Create AI Use Case
-
Go to the Use Cases menu and click the Create Use Case + button:
-
Follow the steps from the Use Case details tab and fill in the requested fields, as follows:
2.1. Choose a title for your AI Use Case and optionally add a description
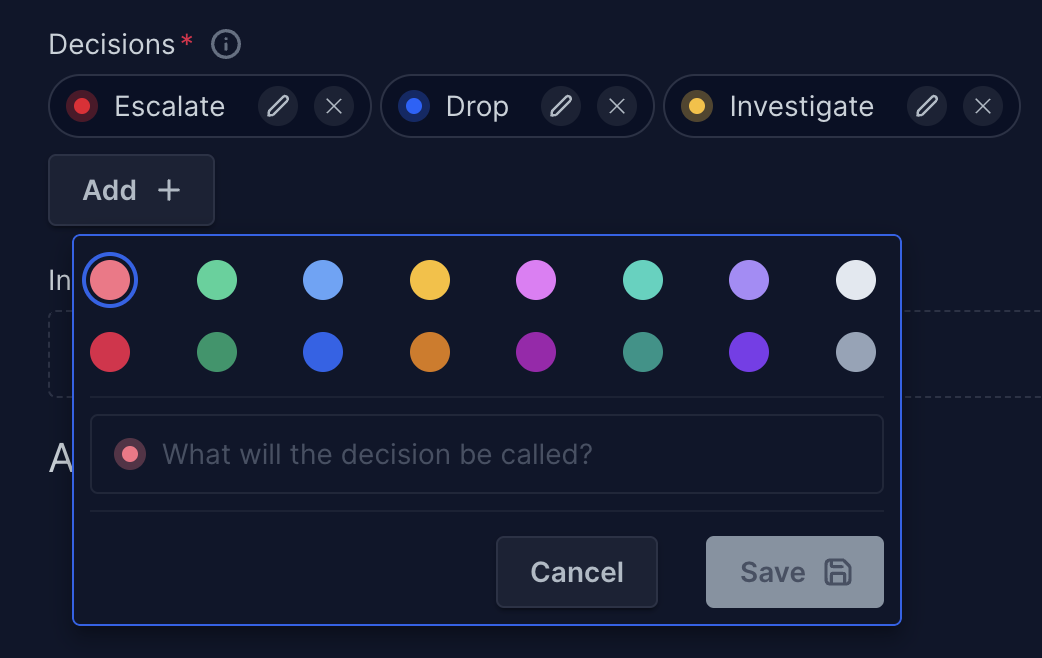
2.2 Decision can be configured and added as per your need
2.2. In the Input section, select the integration you have created with your datasource
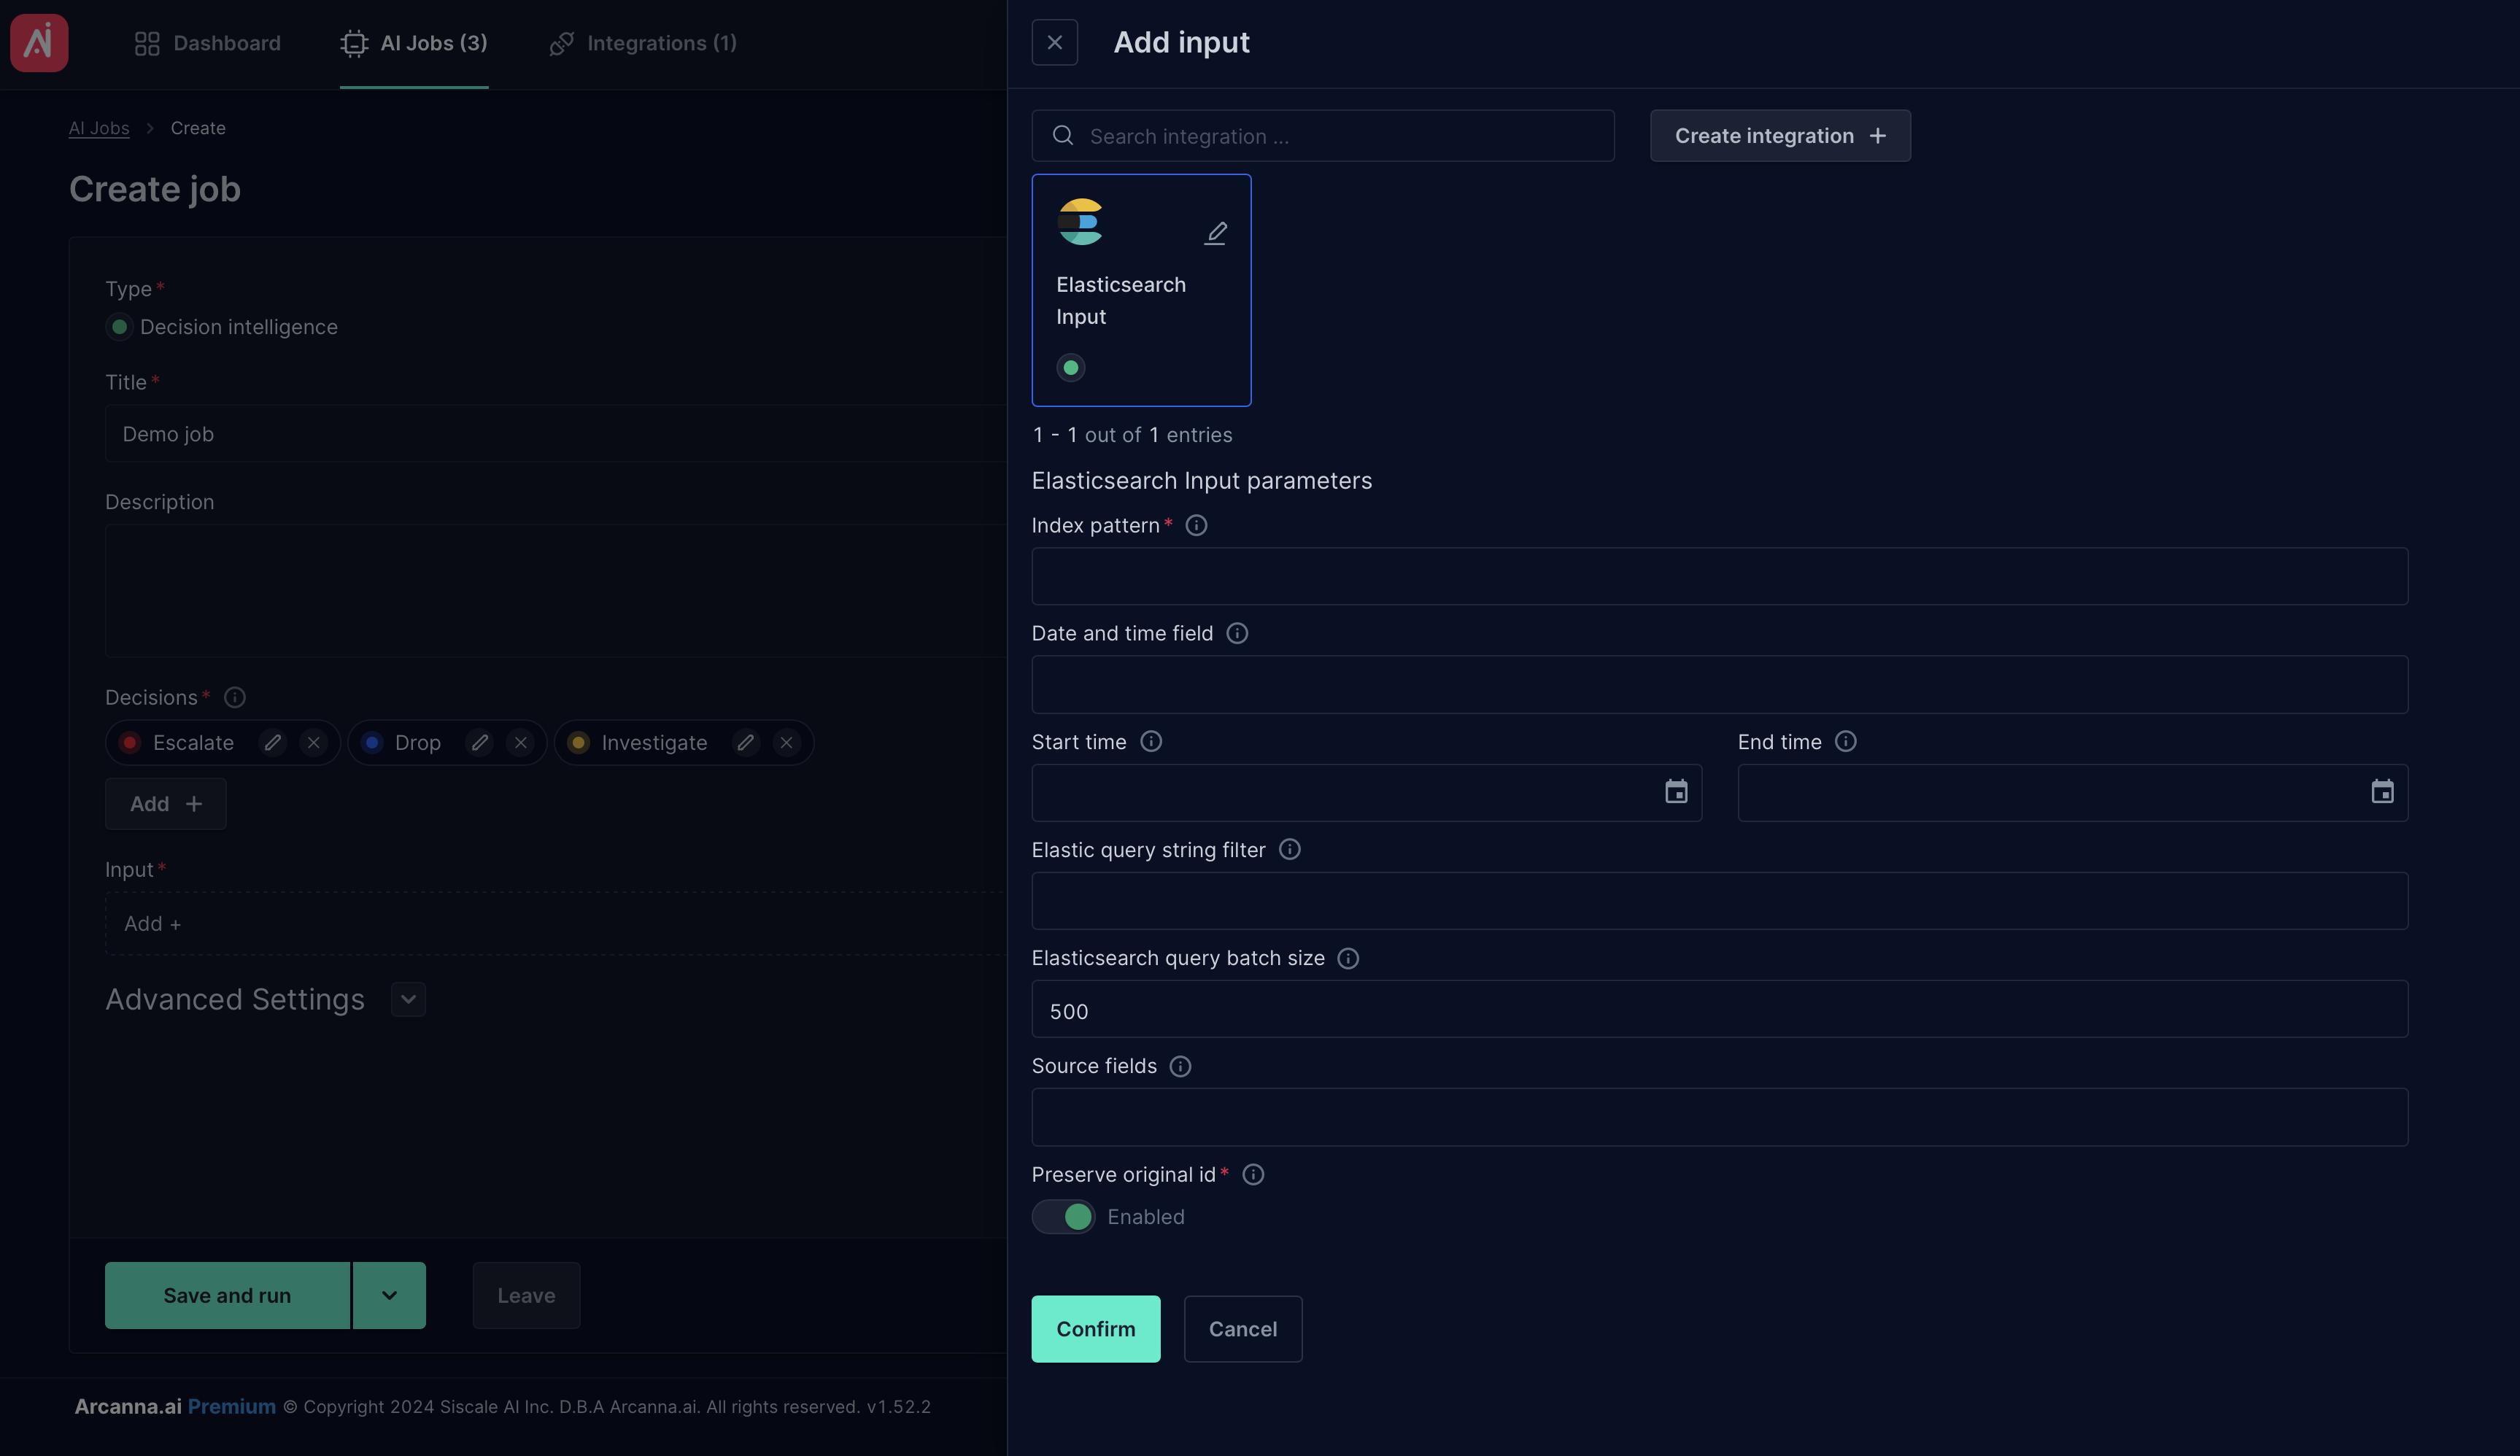
At this step, depending on the type of product which is behind the integration you have selected, additional options will appear in the template which will allow you to customize the data processing.
Following the example above, for integrating with Elasticsearch data warehouse, you will have the following options:
- Index Pattern - this allows you to specify to Arcanna the exact data index you want to be processed (this is very helpful, especially when storing multiple sources of data in a single warehouse)
- Start time - allows you to specify the exact time from which you want Arcanna to start processing the data. This option allows you to process historical data, if available, and refers to the timestamp associated with processed data
- End time - allows you to specify the exact time when you want Arcanna to stop processing data. This refers to the timestamp associated with processed data
- Elastic query string filter- allows you to add additional filters for your data that will be processed by Arcanna.ai
- Source fields- allows you to configure which fields you want to be collected
After saving the input, a check will be perfomed and sample events will be collected, you can review them to make sure that input settings are fine for you.
2.3. In Advanced settings you can configure additional steps for you flow, such as:
- pre-decision enrichments
- post decision case creations or other automations
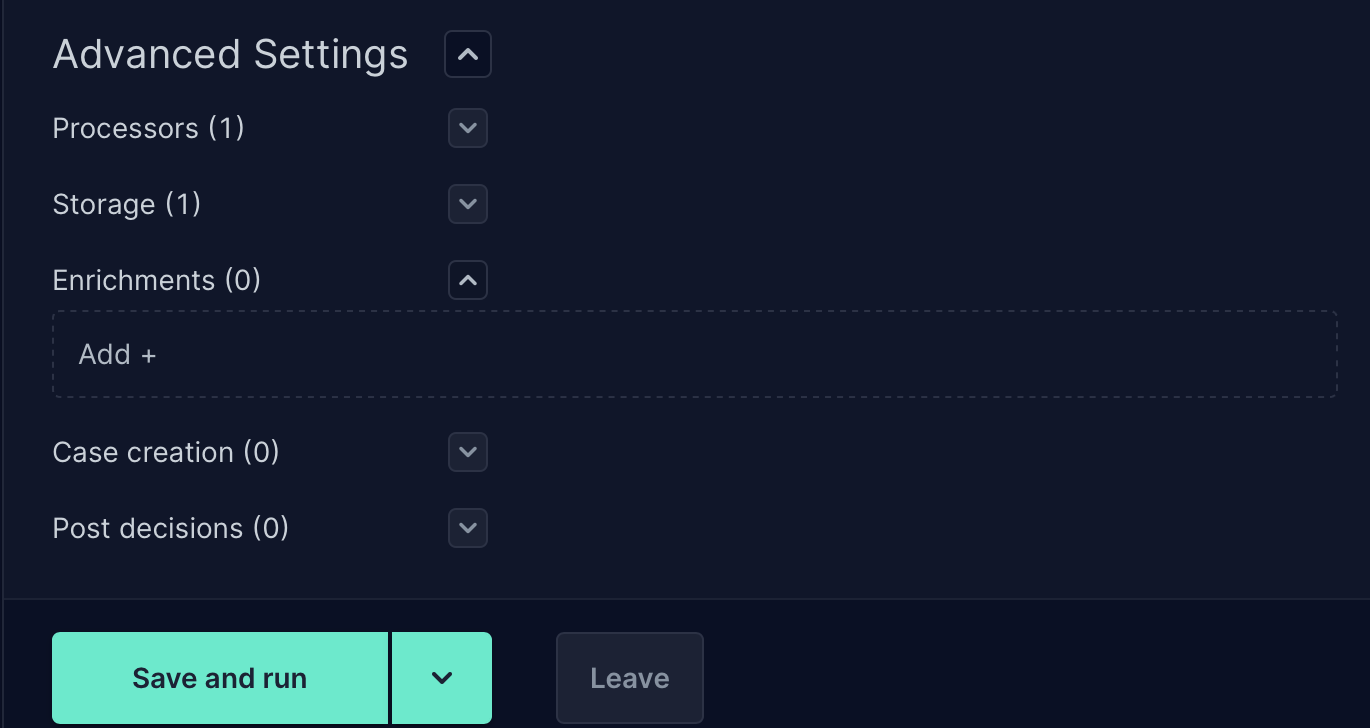
2.4 Click the Save and run button and the AI Use Case will be available for use in the AI Use Cases menu. From this point on, the AI Use Case will start to process the data and the learning process can be started (please refer to the Decision Points section for next steps.
When you first start your AI Use Case, all the processed events will be marked as "Undecided", since the AI models do not have yet any relevant information regarding the environment in order to make educated decisions. This will be the case until the first train session will be performed (please refer to the AI Use Cases, Feedback and Training sections for additional information about it)