Arcanna.ai and Azure Sentinel
Introduction
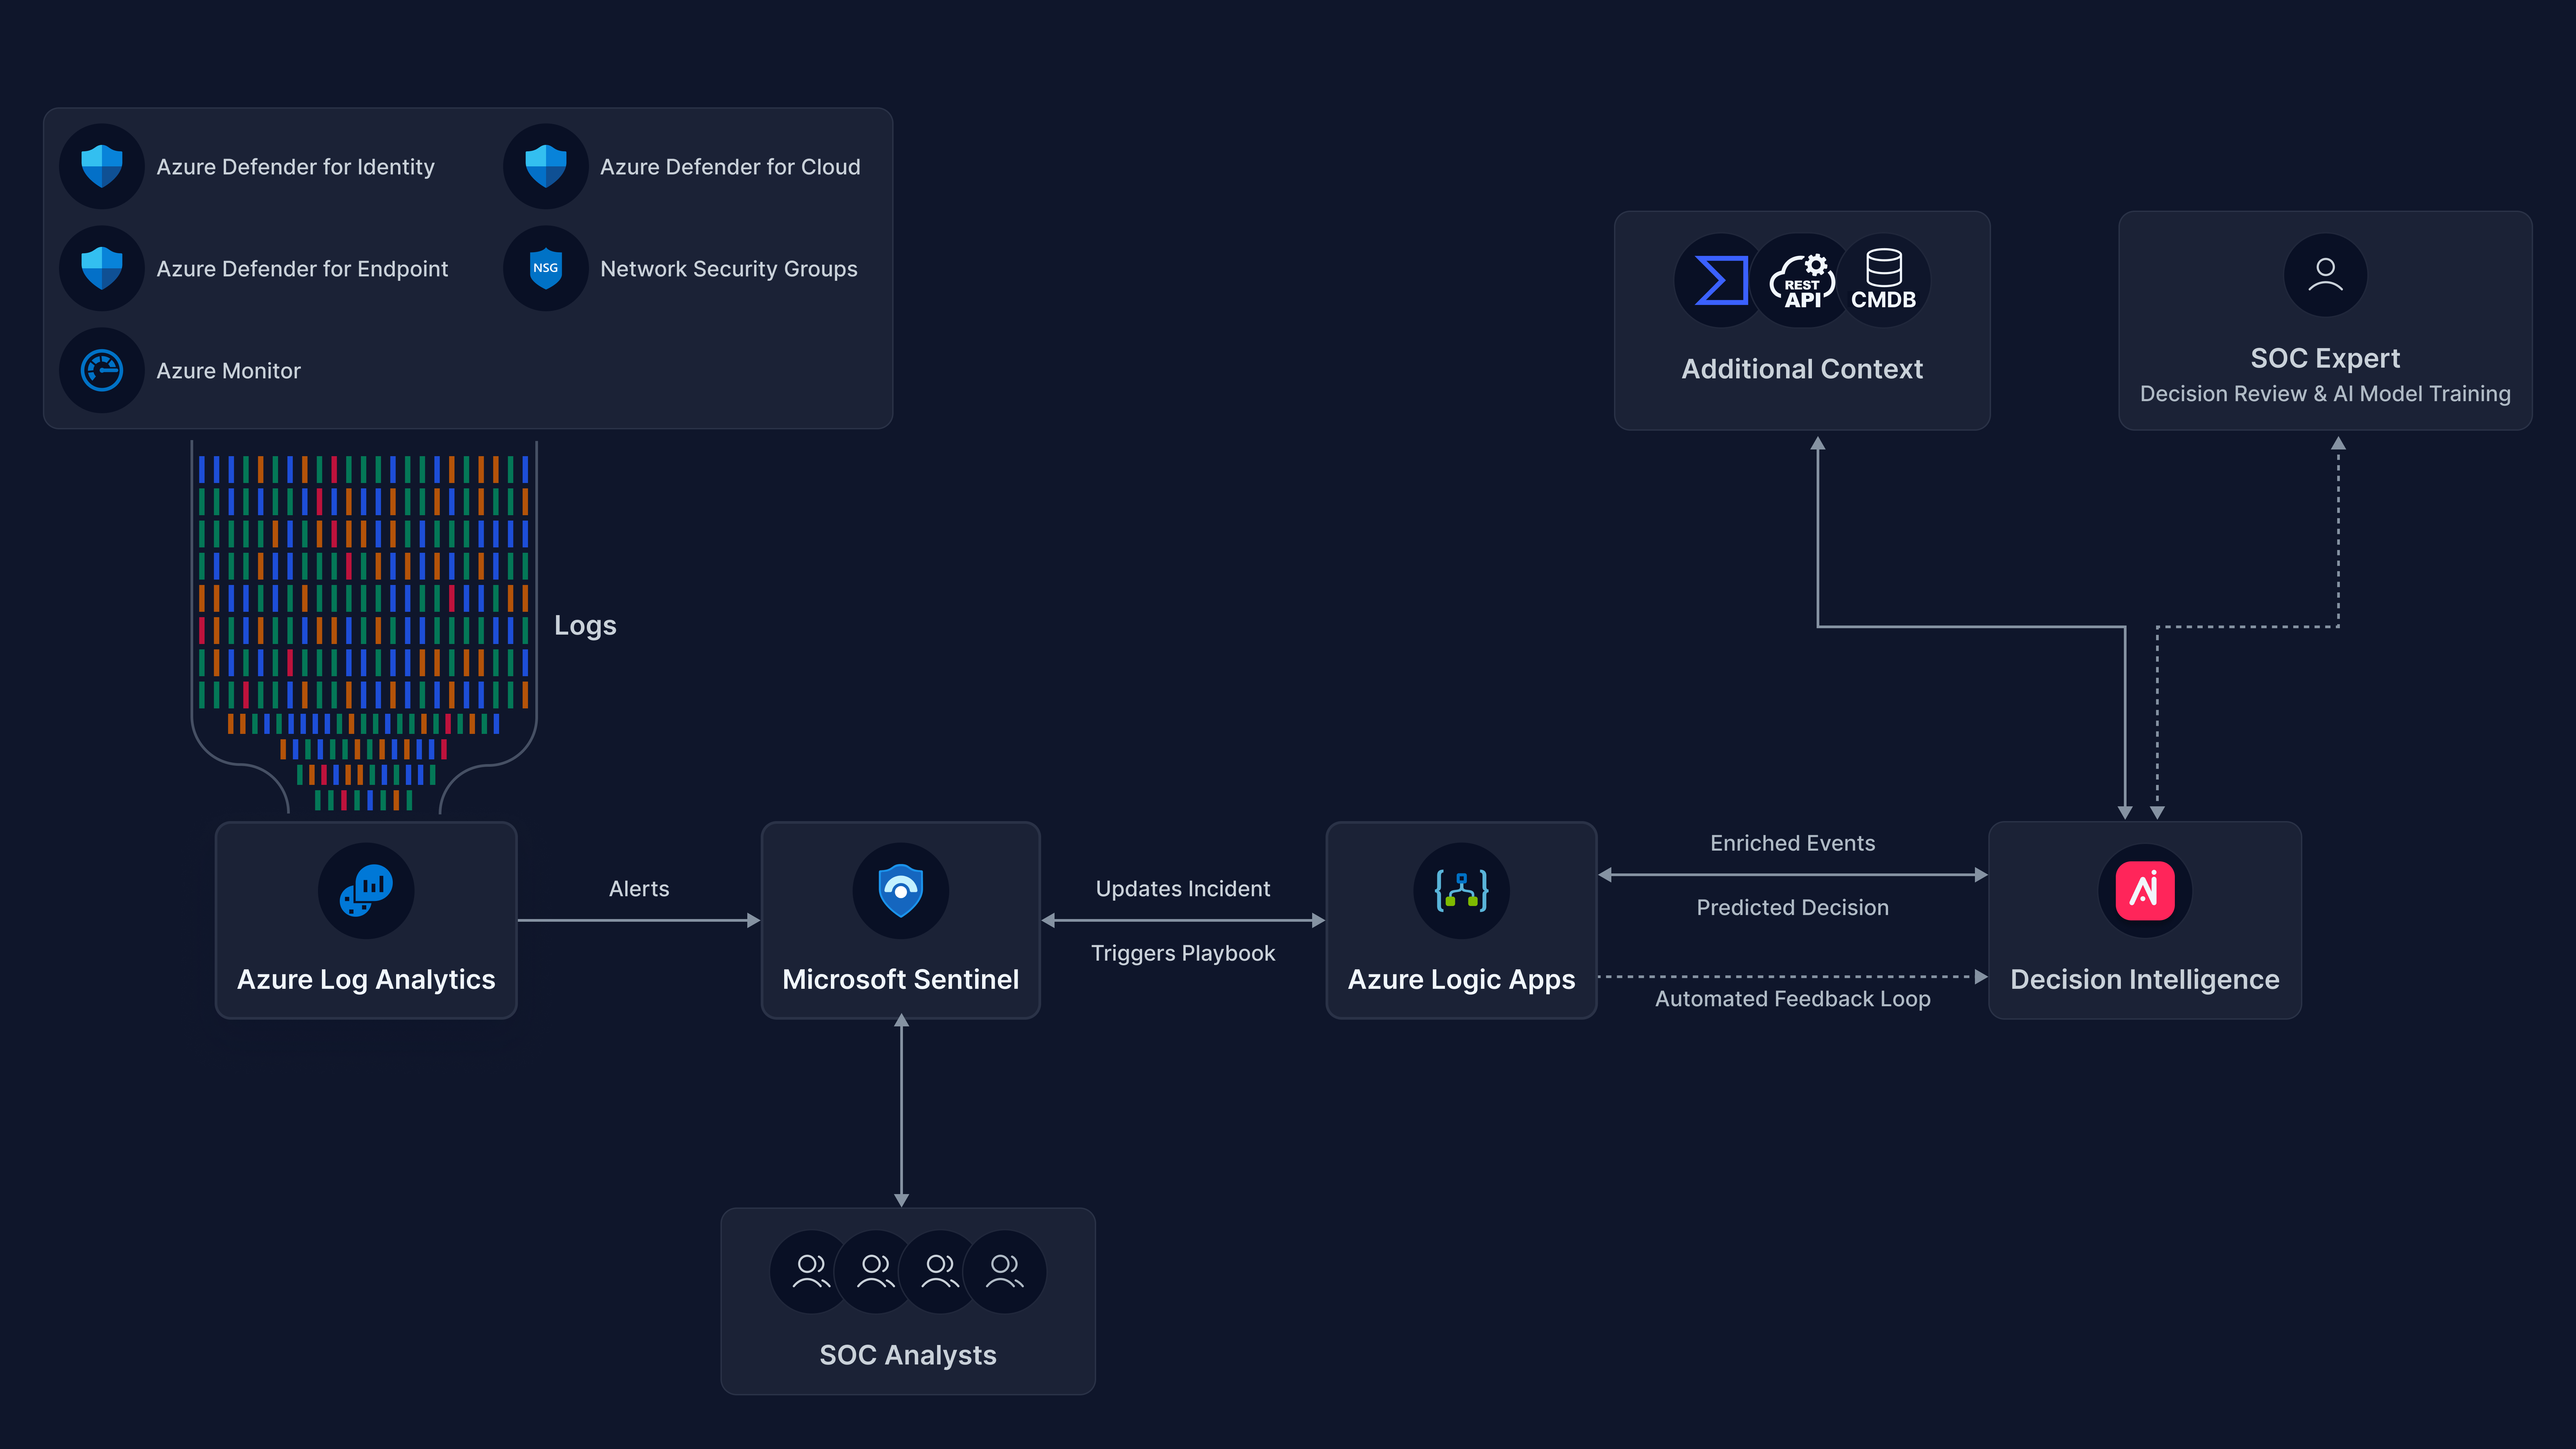
Arcanna.ai is a decision intelligence platform that uses NLP, deep learning and user feedback that can be integrated with Azure Sentinel to assist in decision making, learn from daily incident resolutions and to incorporate knowledge to scale team’s capacity and to lead to a true autonomous SOC.
This is a step-by-step guide on deploying Arcanna.ai on top of Azure Sentinel.
The integration is done via an Azure Logic Apps workflow. It allows Arcanna.ai to provide results of decision intelligence directly into Azure Sentinel incidents as tags.
Prerequisites
-
Arcanna.ai - Arcanna.ai can be deployed in the cloud (AWS), or on-premise. For setup, you can follow this user guide. For flexibility reasons, Arcanna.ai is exporting the AI processed alerts to an internal Elasticsearch/Opensearch data warehouse, that needs be installed at the same time with Arcanna.ai. You can use an Elasticsearch/Opensearch instance you already have, or a new one dedicated just for Arcanna.ai backend.
-
Azure Sentinel (guide).
-
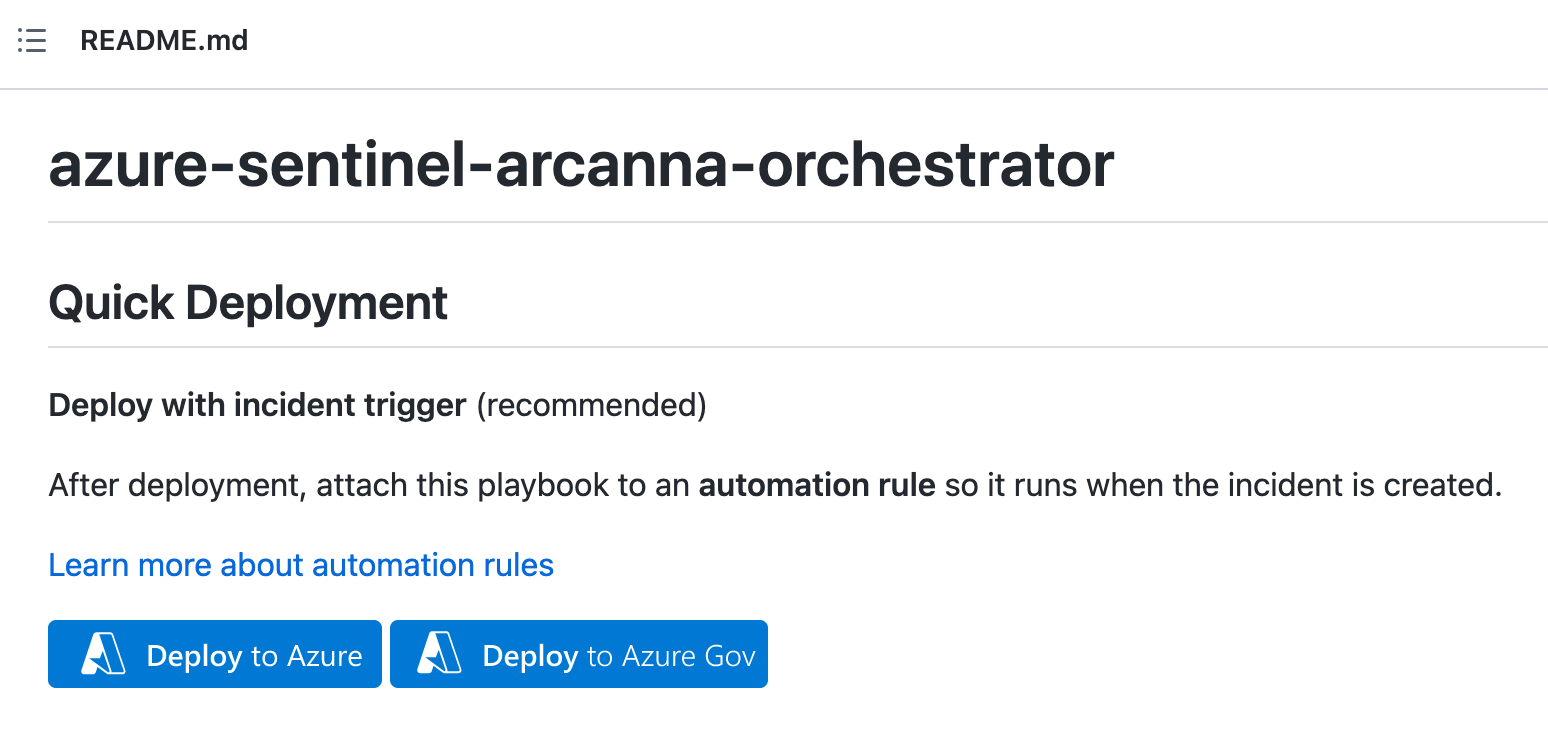
azure-sentinel-arcanna-orchestrator - Azure Logic App created by Arcanna.ai team (github link here).
Configure your Azure Sentinel for working with Arcanna.ai
- Azure Logic Apps deployment
Arcanna.ai will work with your Azure Sentinel instance via an Azure Logic App workflow. There are two different ways of deploying Azure Logic Apps in your environment – Consumption or Standard - depending on the scenario and requirements of your deployment (additional details about Logic app deployments here). Depending on your scenario, you would need access to Azure Virtual Network for your Logic App to be able to communicate with external resources via a REST API.
Details about how to create an Integration Service Environment for your Azure Logic Apps can be found here
If your Arcanna.ai machine is deployed in an AWS EC2 instance, you need to create an allow rule for your Arcanna.ai instance to be able to talk with Azure Logic Apps (for Consumption based deployment).
Depending on the region where your Azure Logic Apps are deployed, there is a subset of IPs predefined for the region that will be dynamically assigned to your Logic app. The list of IPs can be obtained from this link.
Details about how to create an ACL in our AWS EC2 environment can be found here.
- Add azure-sentinel-arcanna-orchestrator Logic App workflow to your Azure instance
azure-sentinel-arcanna-orchestrator is provided by the Arcanna.ai team as an ARM template (github link here). All the steps included in azure-sentinel-arcanna-orchestrator template can be integrated in existing Azure Logic Apps workflows, by incorporating steps at known decision points in the workflow.
- Click on Deploy to Azure button from the readme. This will load the ARM template in Azure Portal:
- Configure the Arcanna.ai connection parameters in azure-sentinel-arcanna-orchestrator Logic App
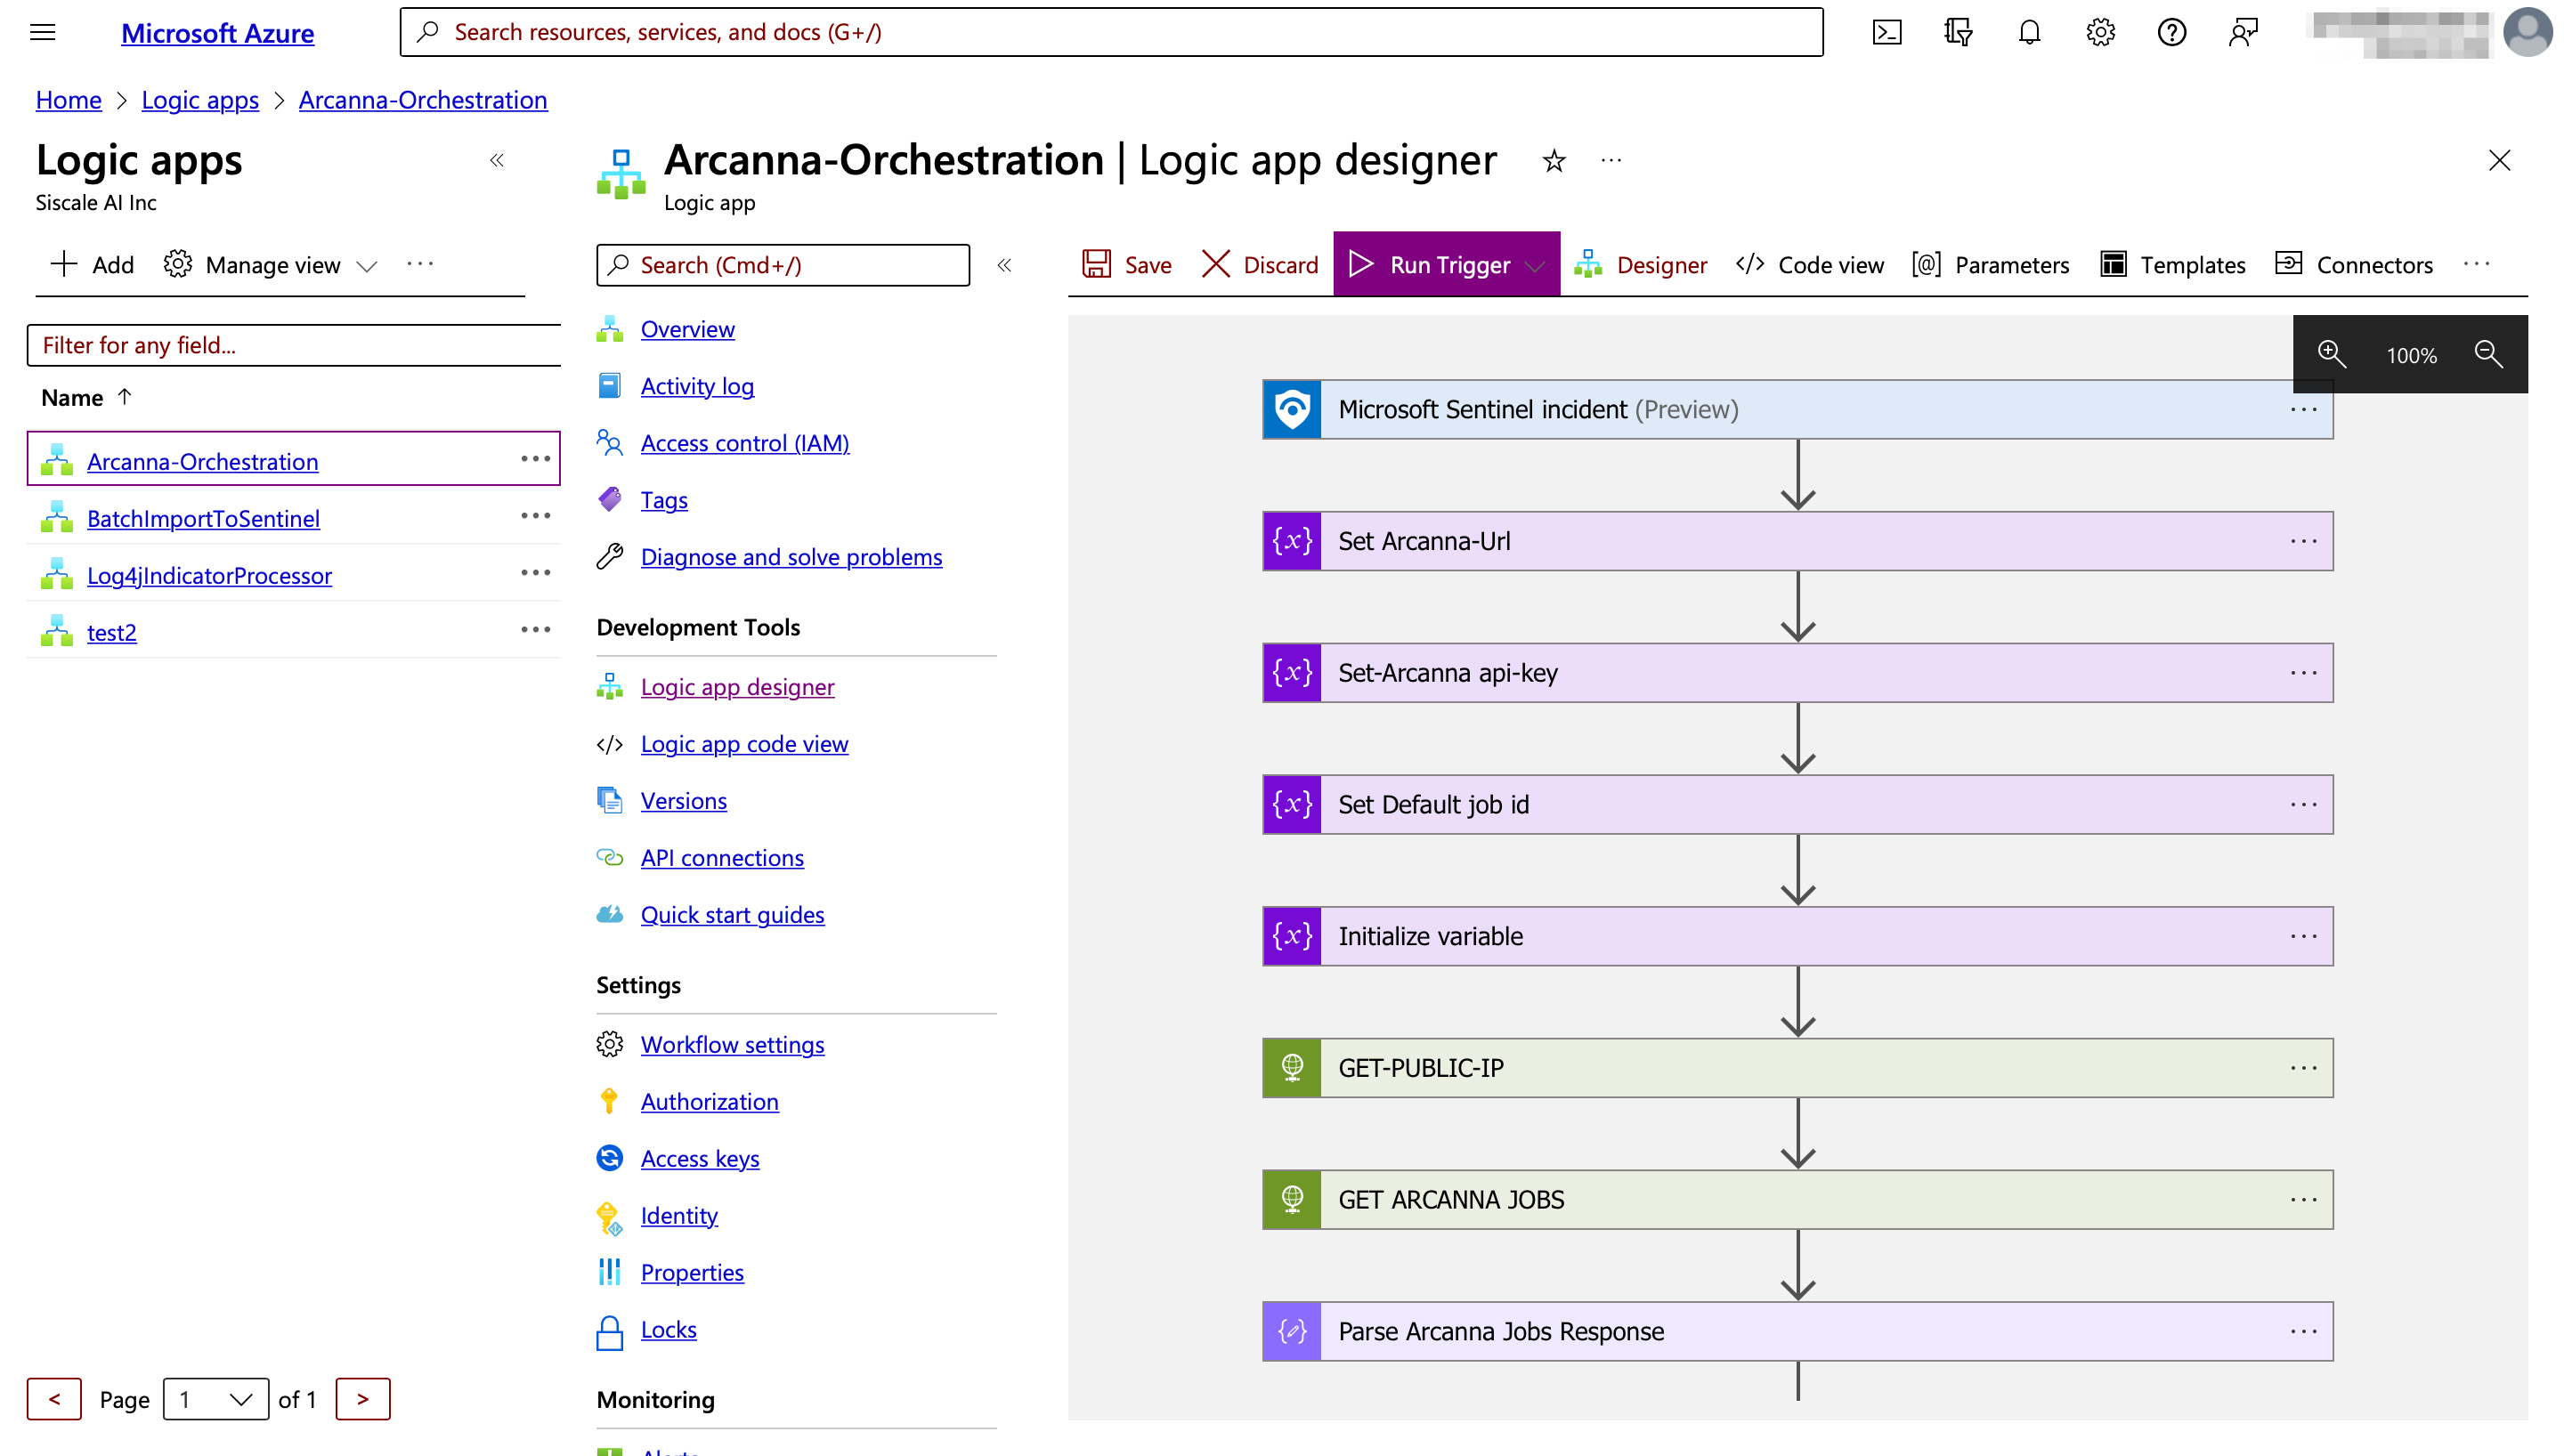
- Go to your Azure Logic Apps, select azure-sentinel-arcanna-orchestrator workflow, and open the Logic app designer:
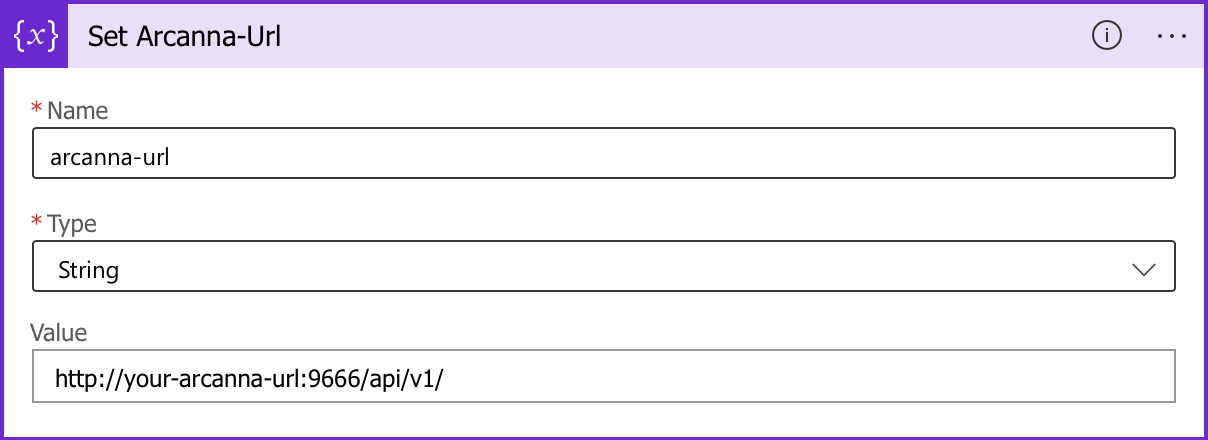
- Open the Set Arcanna-Url step inside your Logic App and replace the IP address in the value field with your Arcanna.ai instance public IP address (the rest of the URL will remain the same). Default port is 443 on which Arcanna.ai accepts external REST API calls.
- Configure Arcanna.ai API key in your Logic App. If you don’t have yet one, generate a new API key in Arcanna.ai, by following these steps:
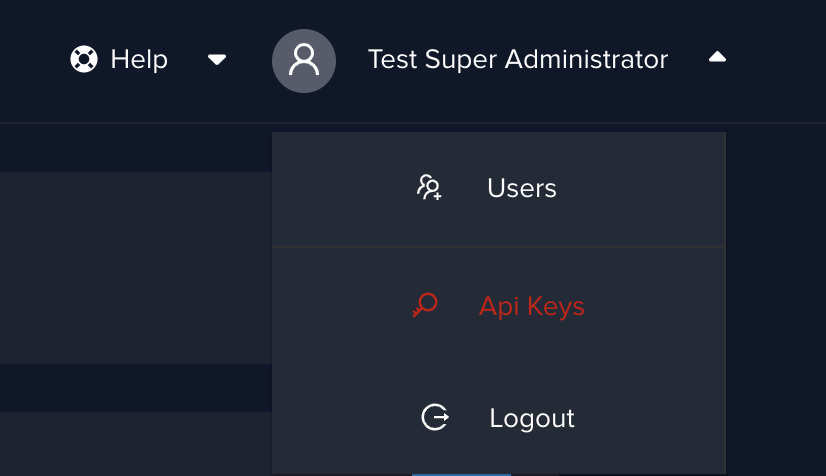
- Open Arcanna.ai, on the top-right corner of the UI, under your username, hit the drop-down menu and select API keys:
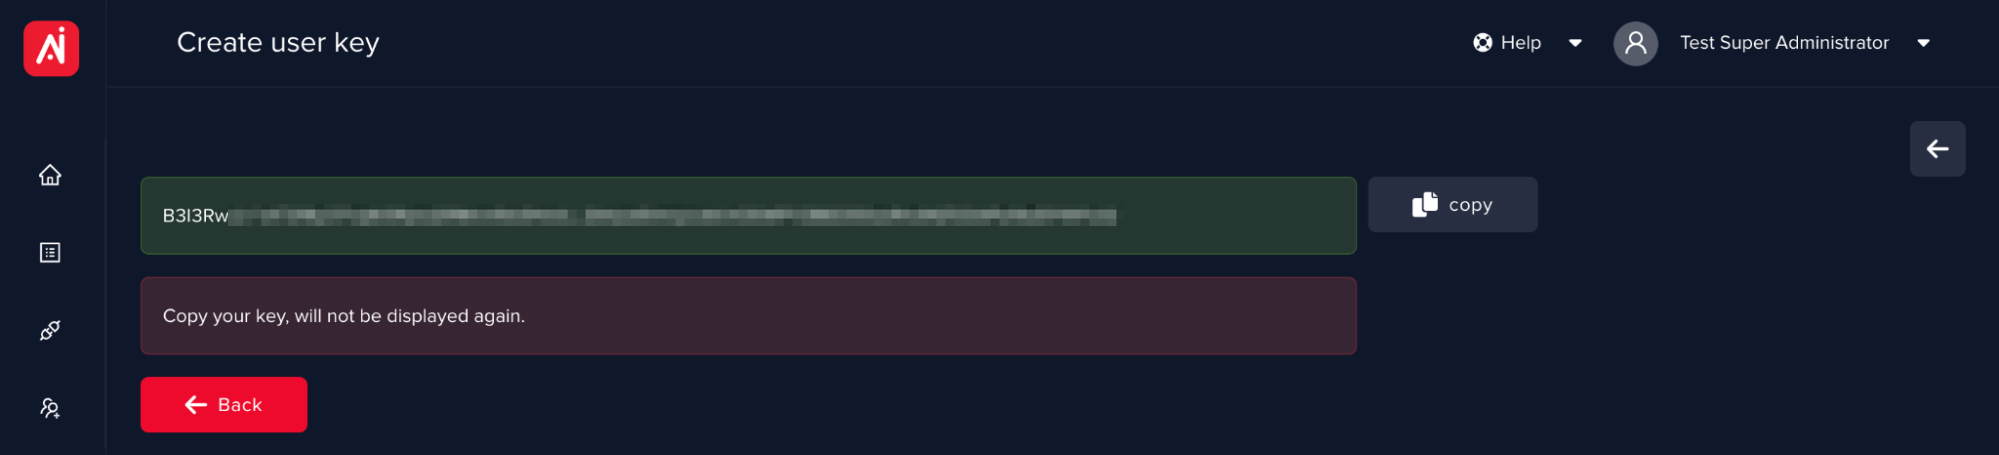
- Give a name to your API key and hit Add new User Key button and copy your API Key value by hitting the Copy button next to the value field
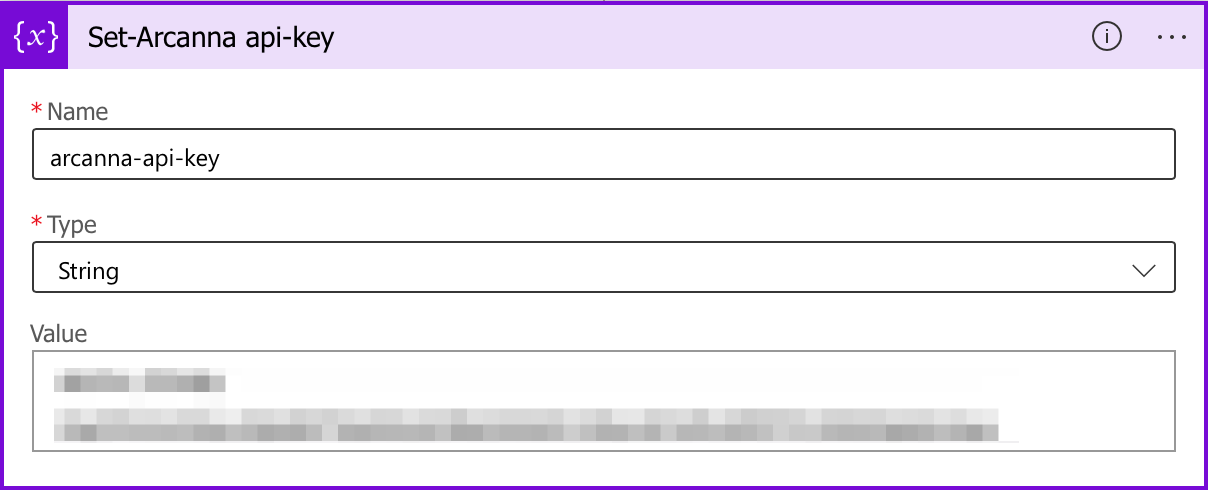
- Go to your azure-sentinel-arcanna-orchestrator Logic App in Azure, open the Logic App designer (as described in previous steps), and paste the API key in the Value field of Set-Arcanna API-key workflow step
Configure Arcanna.ai integration with Azure Sentinel
Go to the Integrations page and click on Add new integration. Fill in all the integration parameters as described below:
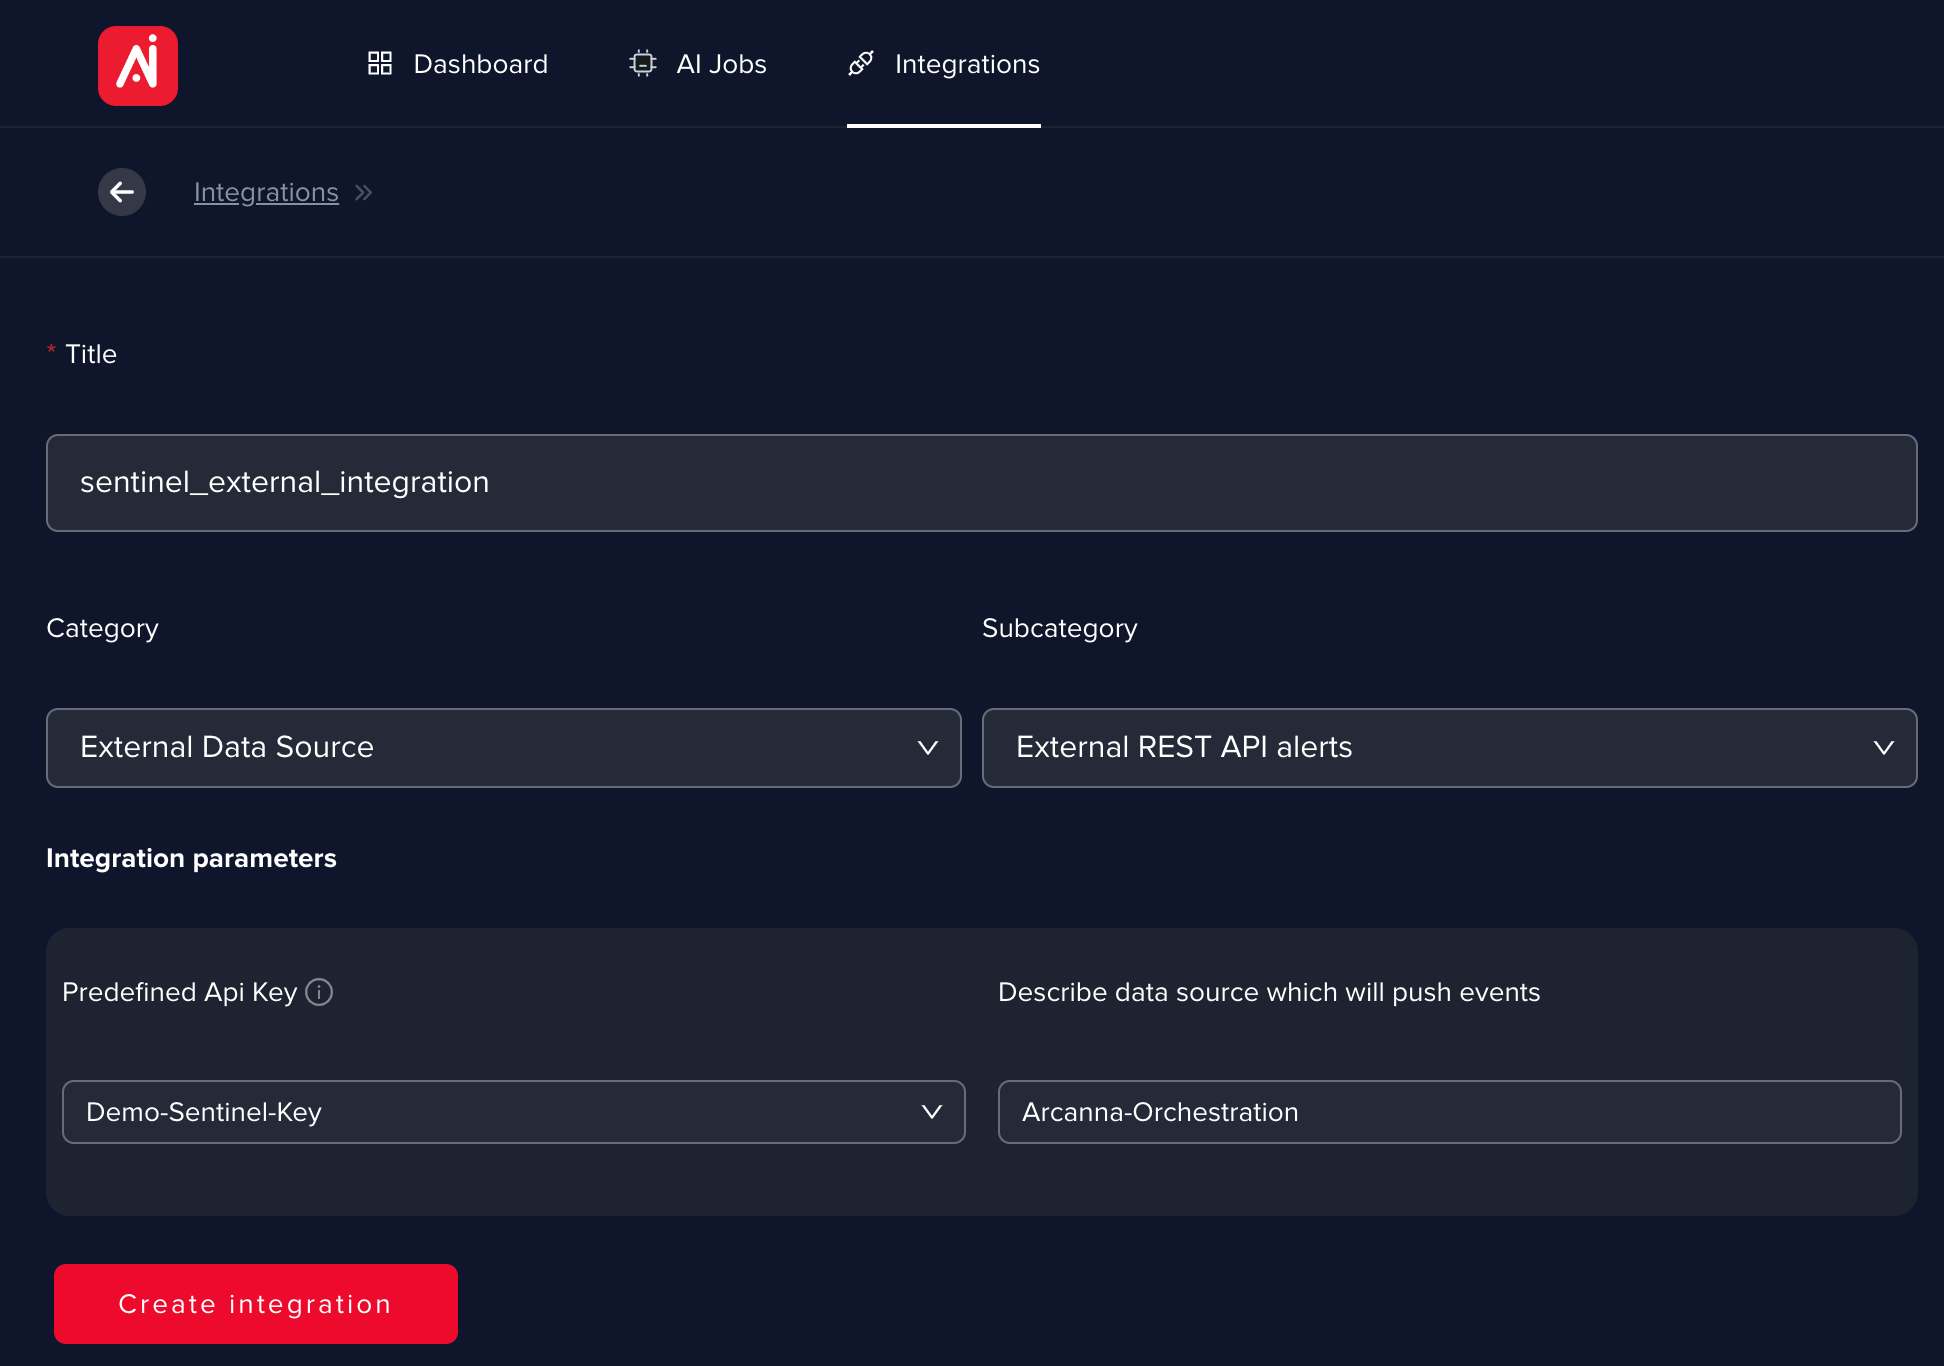
Title: choose a name for your integration (e.g. sentinel_external_integration)
Category: from the drop-down menu, select External Data Source
Subcategory: from the drop-down menu, select External REST API alerts
Predefined API Key: select the API Key you have previously created
Describe data source which will push events: Add a tag for each external REST API pipelines in order to keep track and easily identify pipelines into the external data system who is communicating with Arcanna.ai (in this case the Logic App).
Once all parameters have been filled in, hit the Save Integration button.
Processing alerts using AI
Create an AI Pipeline
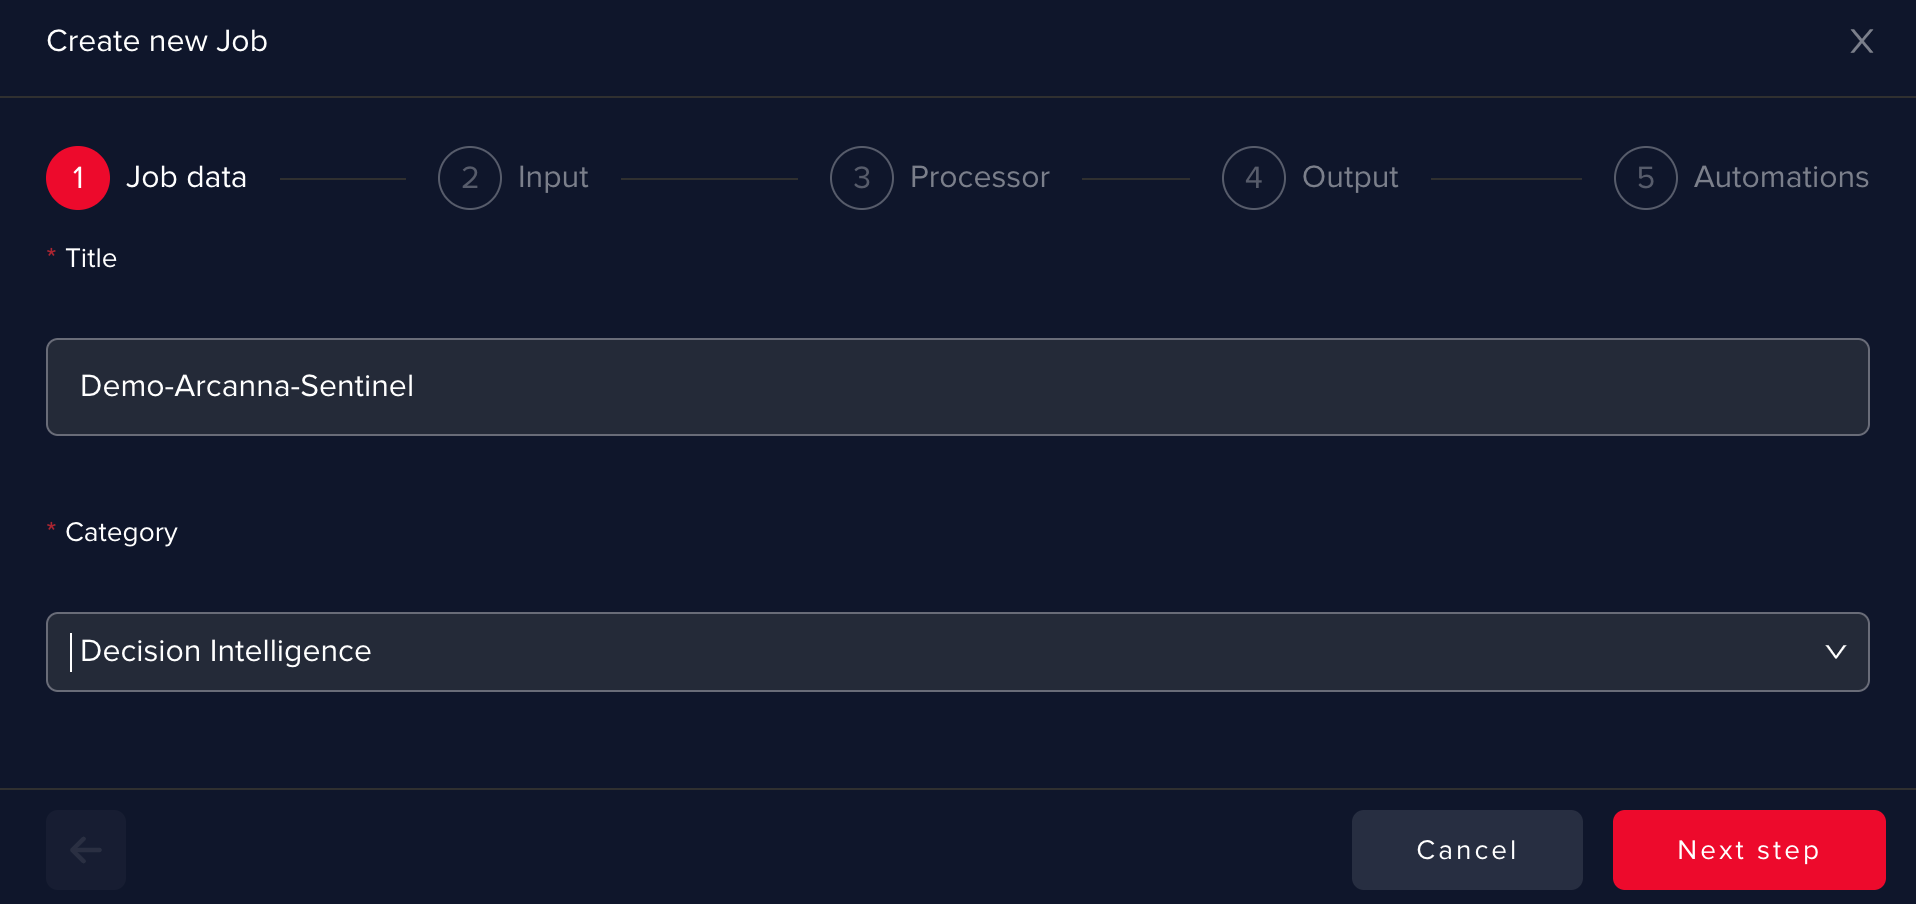
Navigate to AI Pipelines menu and hit the Create Pipeline + button. On the first step of creating the AI Pipeline, you will need to give a name to your AI Pipeline and choose the category Decision Intelligence and proceed to next step.
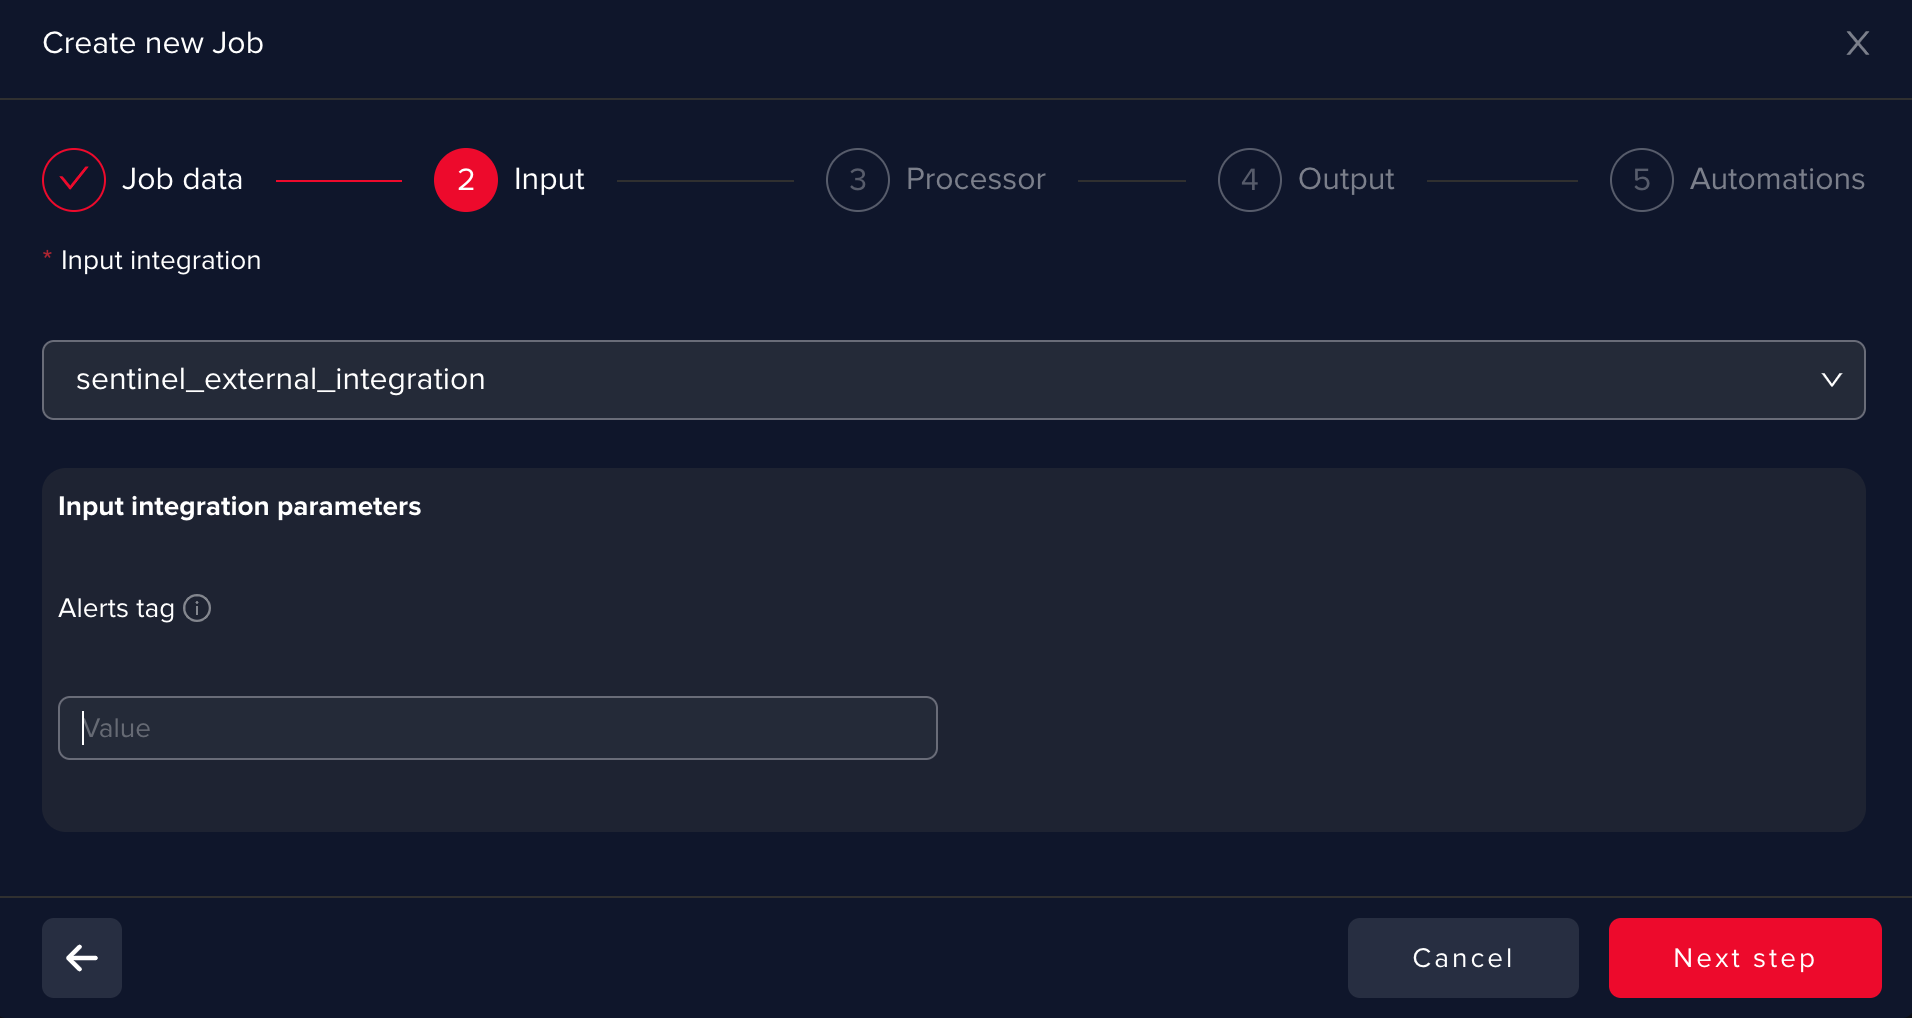
From the drop-down menu, select the integration you have previously created that allows your Arcanna.ai instance to connect to your Azure Sentinel instance, fill in a tag for the incidents that will be augmented by decision intelligence, and proceed to next step:
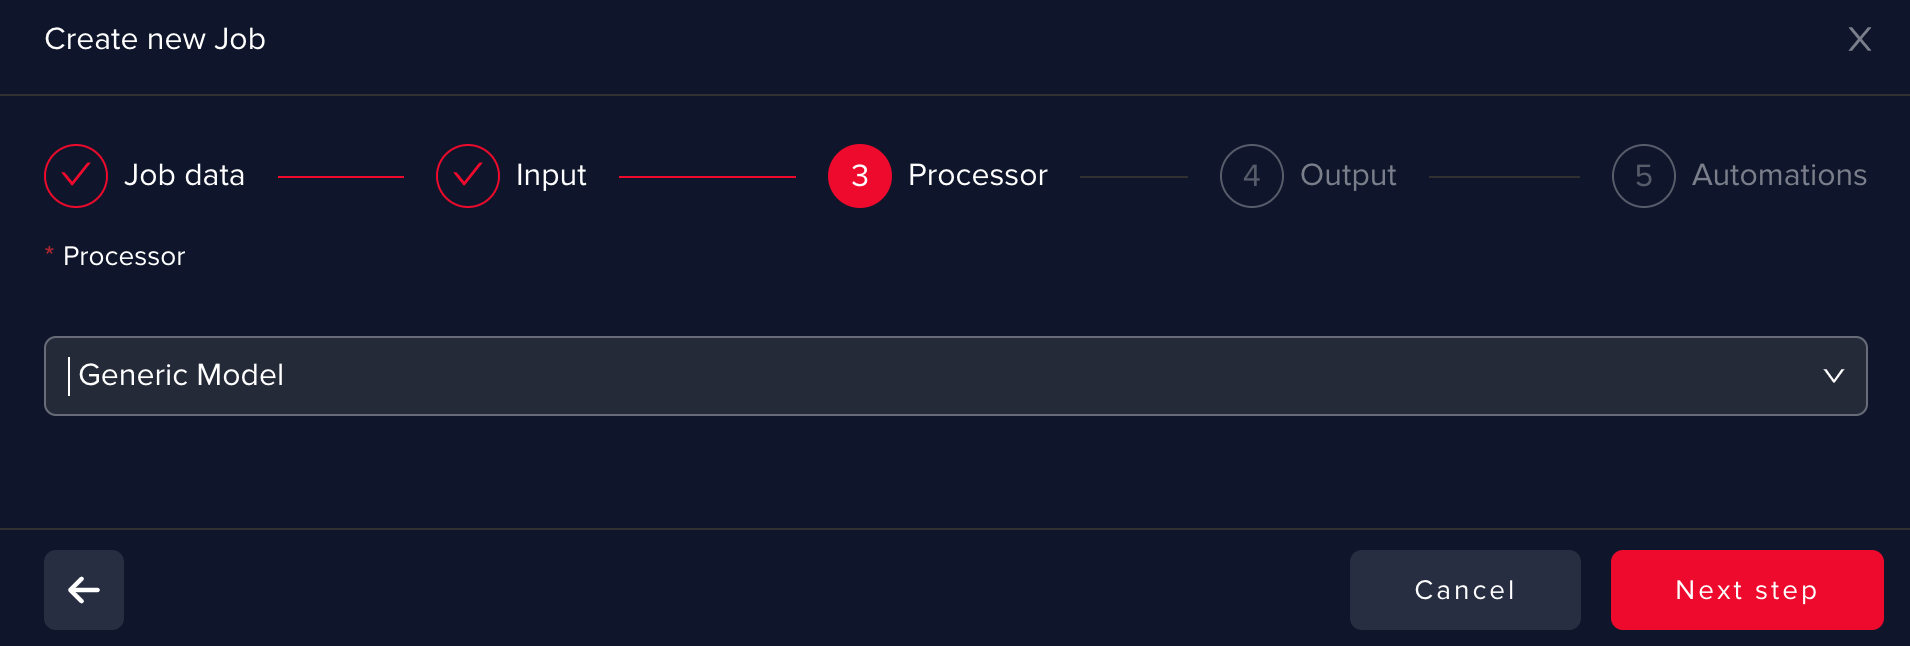
In the Processor stage, select Generic Model as your template for building the AI model, and proceed to next step
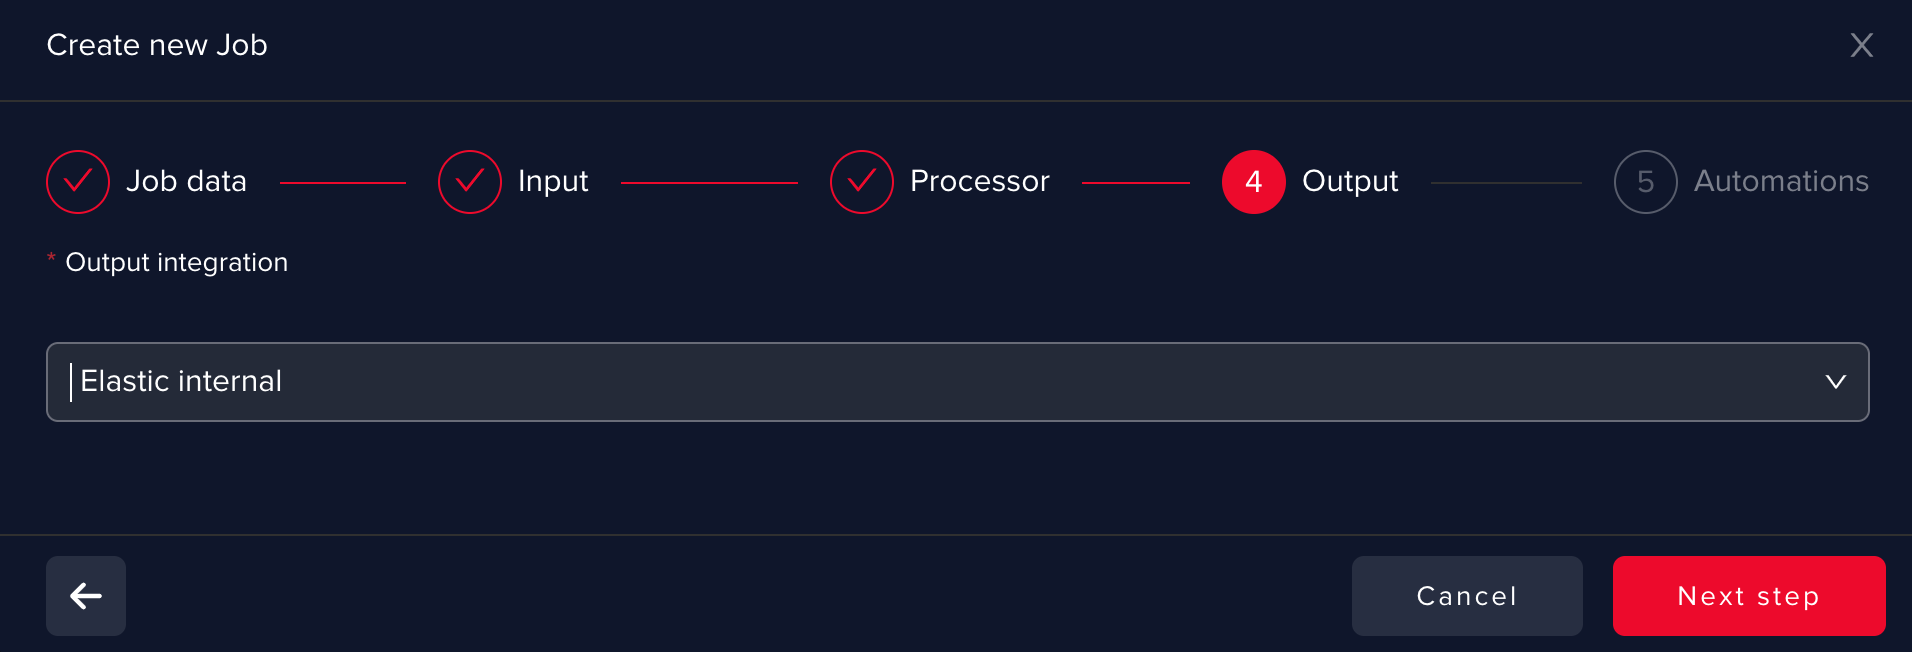
From the drop-down menu, select the Elasticsearch/Opensearch integration you configured as prerequisite at Arcanna install and proceed to the next step:
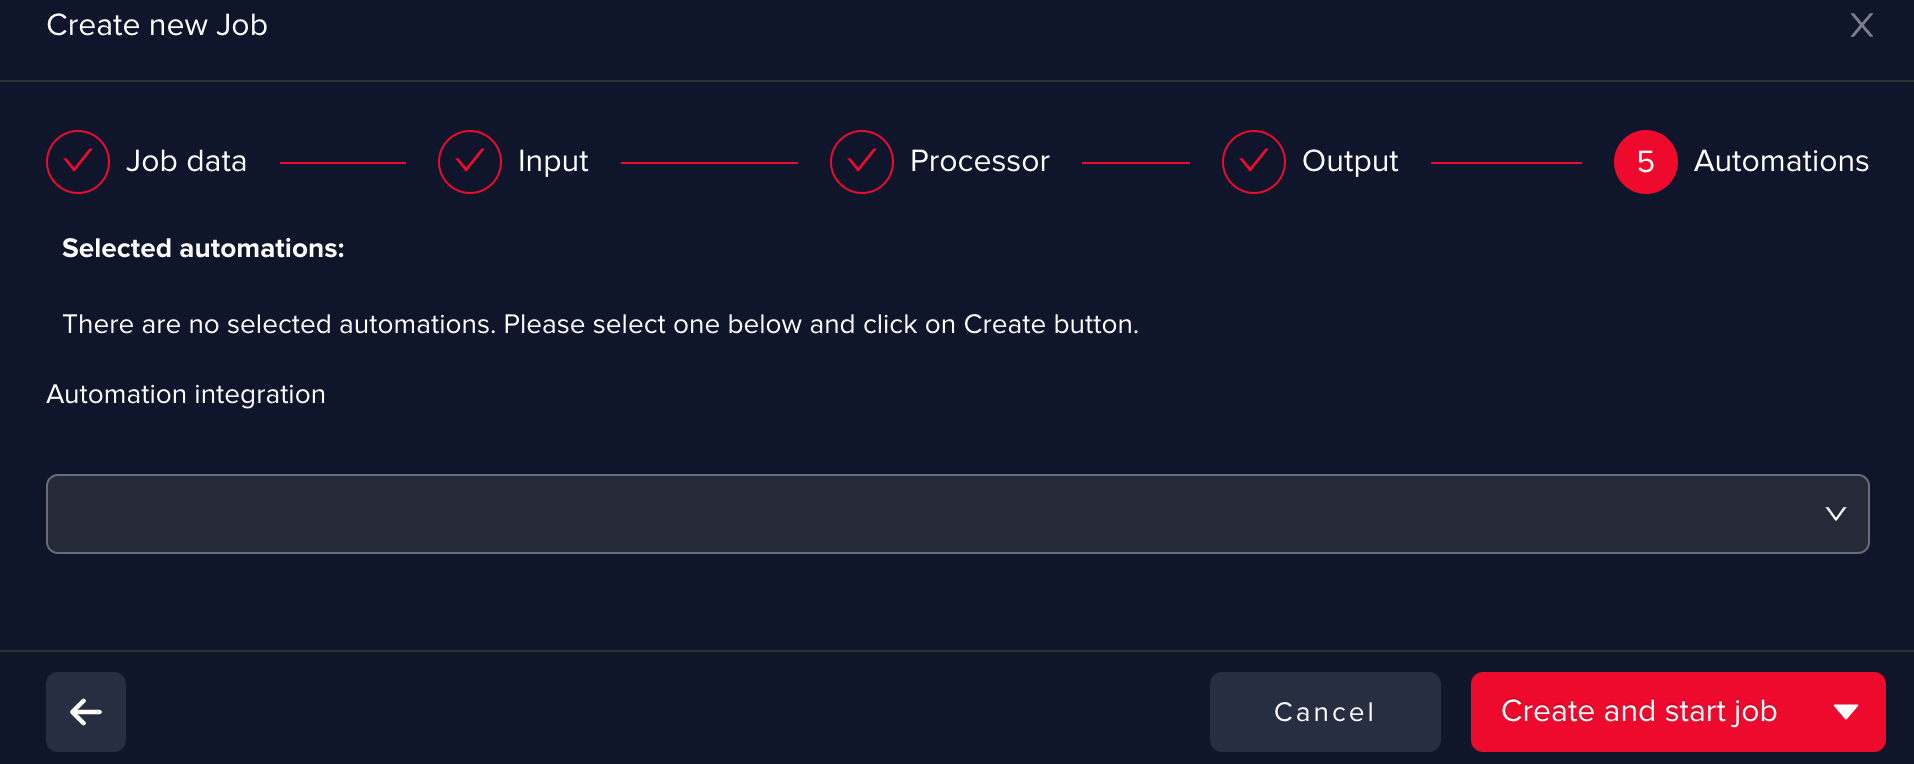
You can skip the Automations step at this stage and hit the Create and Start Pipeline button:
The AI pipeline is created is now ready to receive alerts sent by the Logic App.
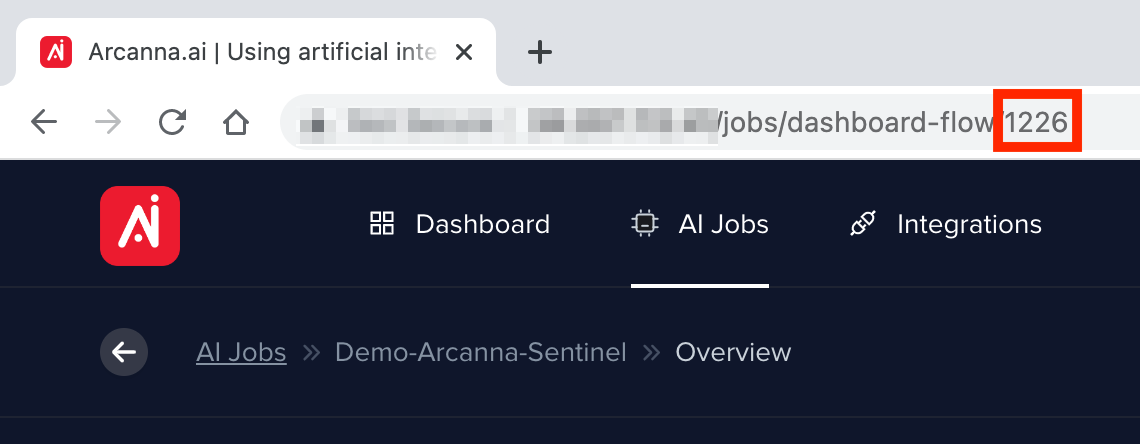
At this point you can retrieve the AI Pipeline ID that you need to configure inside your Logic app playbook in Azure (see instructions above): in the AI Pipelines menu, click on your AI Pipeline’s name The AI Pipeline ID is represented by the last number in your URL (e.g.: 1226)
Train your AI model
- Feature Selection
The first step in the AI model training process is Features Selection. Features are represented by those pieces of information extracted by the AI from the data set and used to build the AI decisional model. In our case, Features will be represented by specific data fields and their values extracted from Azure Sentinel incidents
From Arcanna.ai UI, select the AI pipeline you want to select features for and navigate to Feedback Page

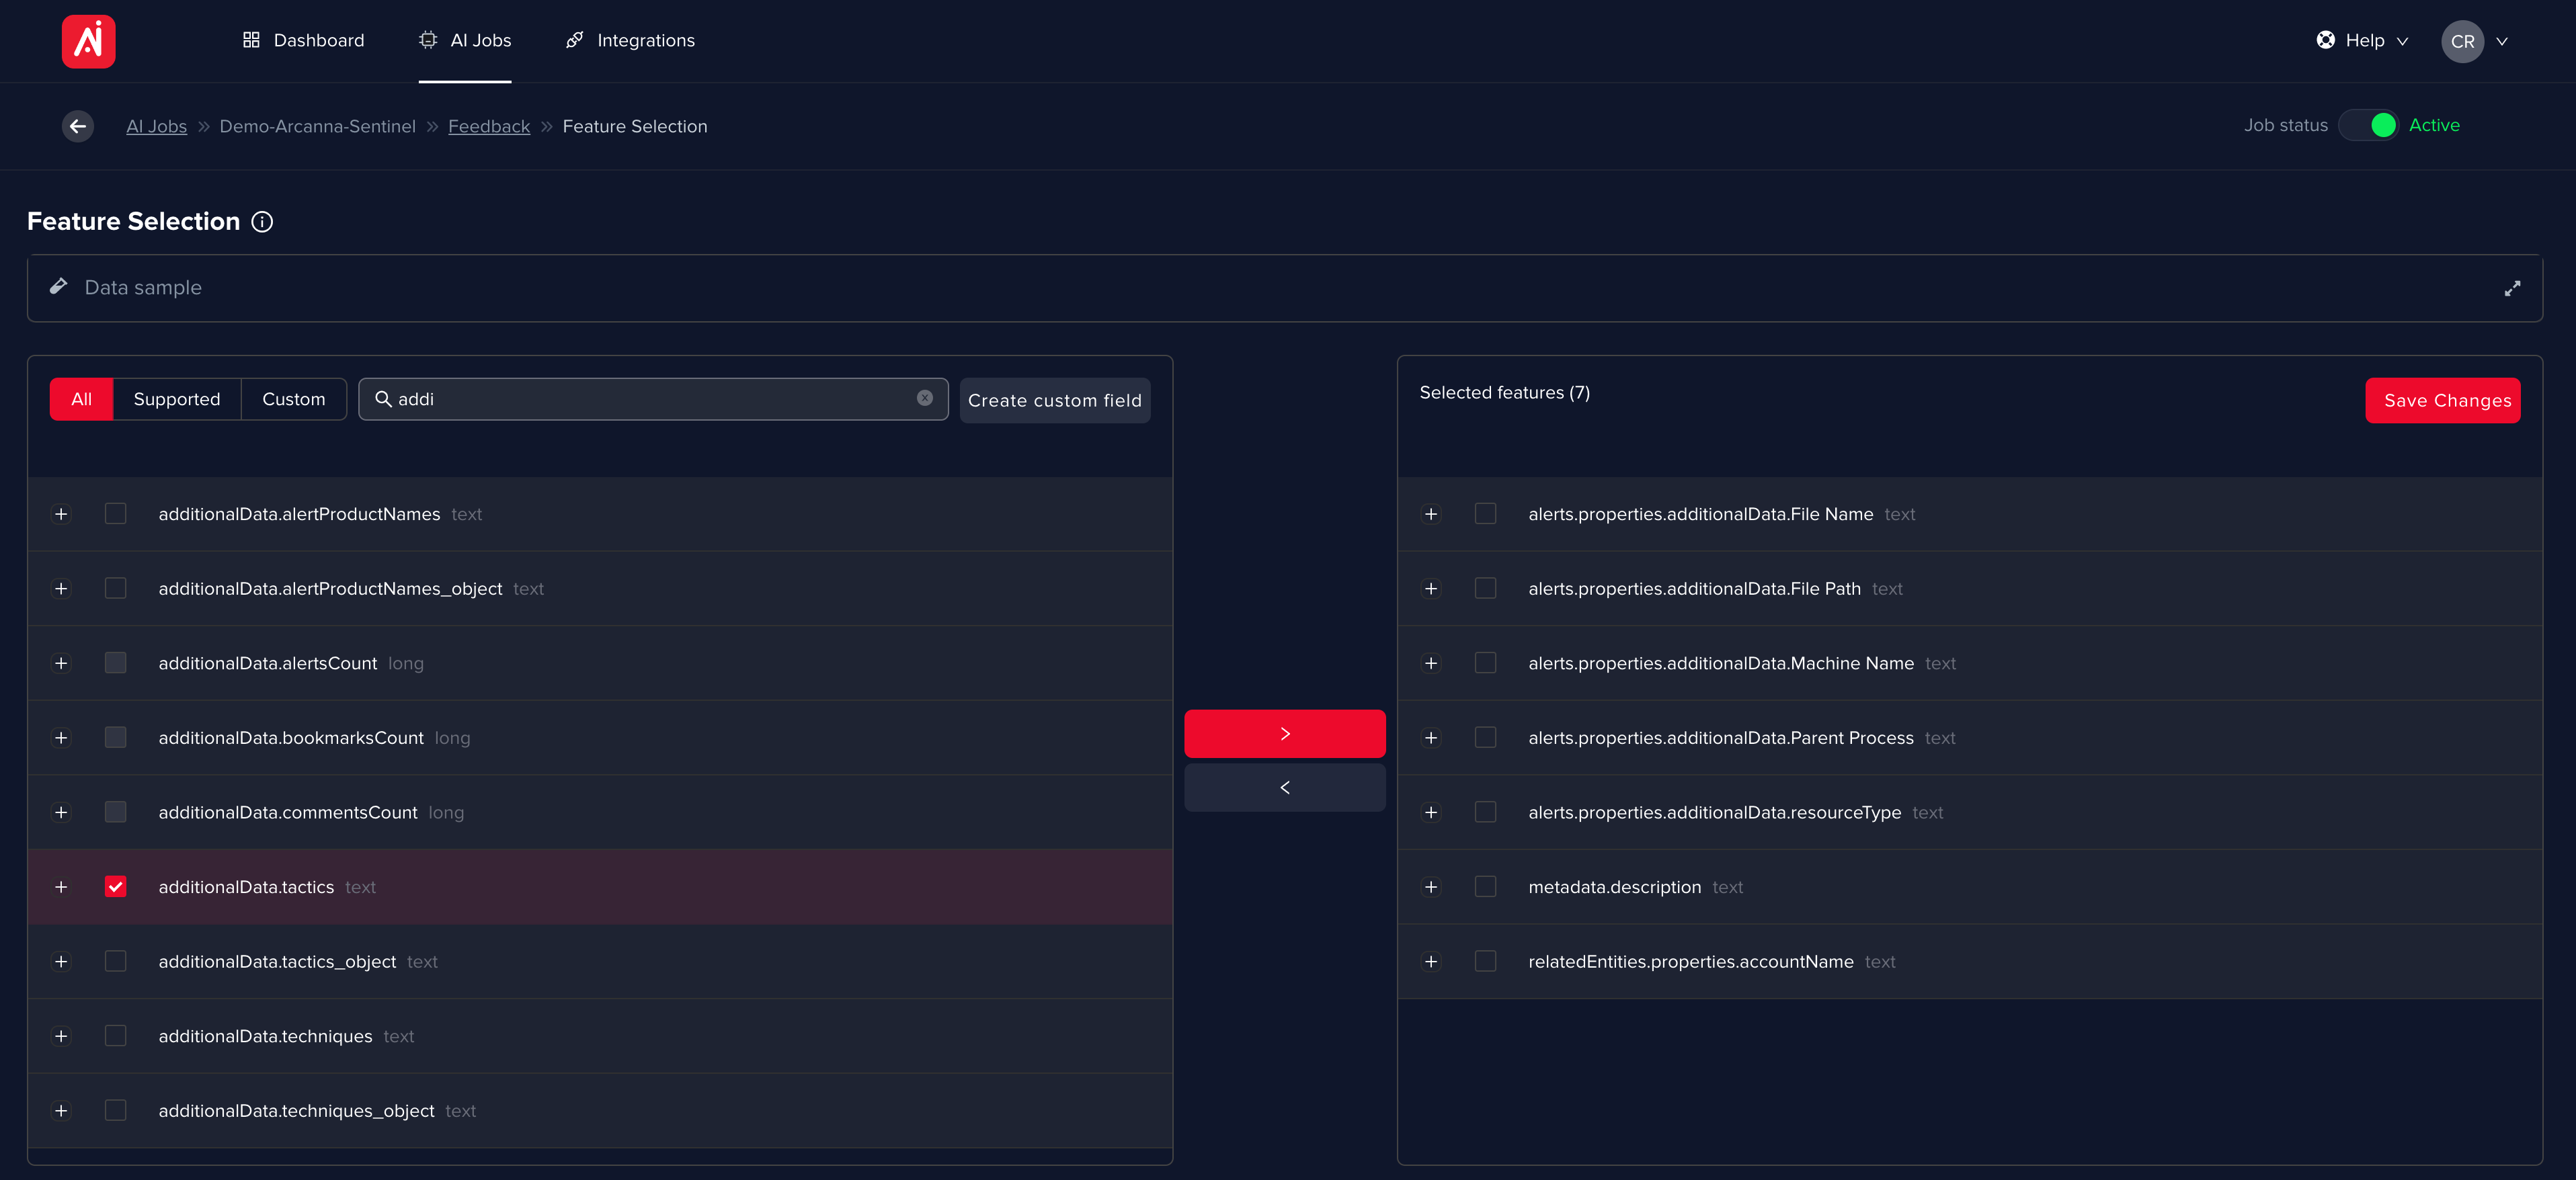
Inside the Feedback by Bucket view, click on Features selection button and navigate to the features selection screen

From the list of available incidents fields, select those fields you wish Arcanna.ai to use as features.
Note: you should select those fields that you usually use in your process for deciding if an incident could represent a potential threat and needs to be escalated for further investigation, or you can want to drop it.
Arcanna.ai is working only text information. You can still work with numerical values, by creating a trasformation from numerical values to text values, using the Create Custom field functionallty.
e.g.: severity it’s an important information frequently used by security analysts to prioritise and make decisions, but this information is in many cases produced by the detection system as a number (severity=1). But we know, for example, that 1 means critical, 2 means medium and 3 low, so we can create this mapping for Arcanna.ai to use this information in the AI model - let’s use this example to create a custom field
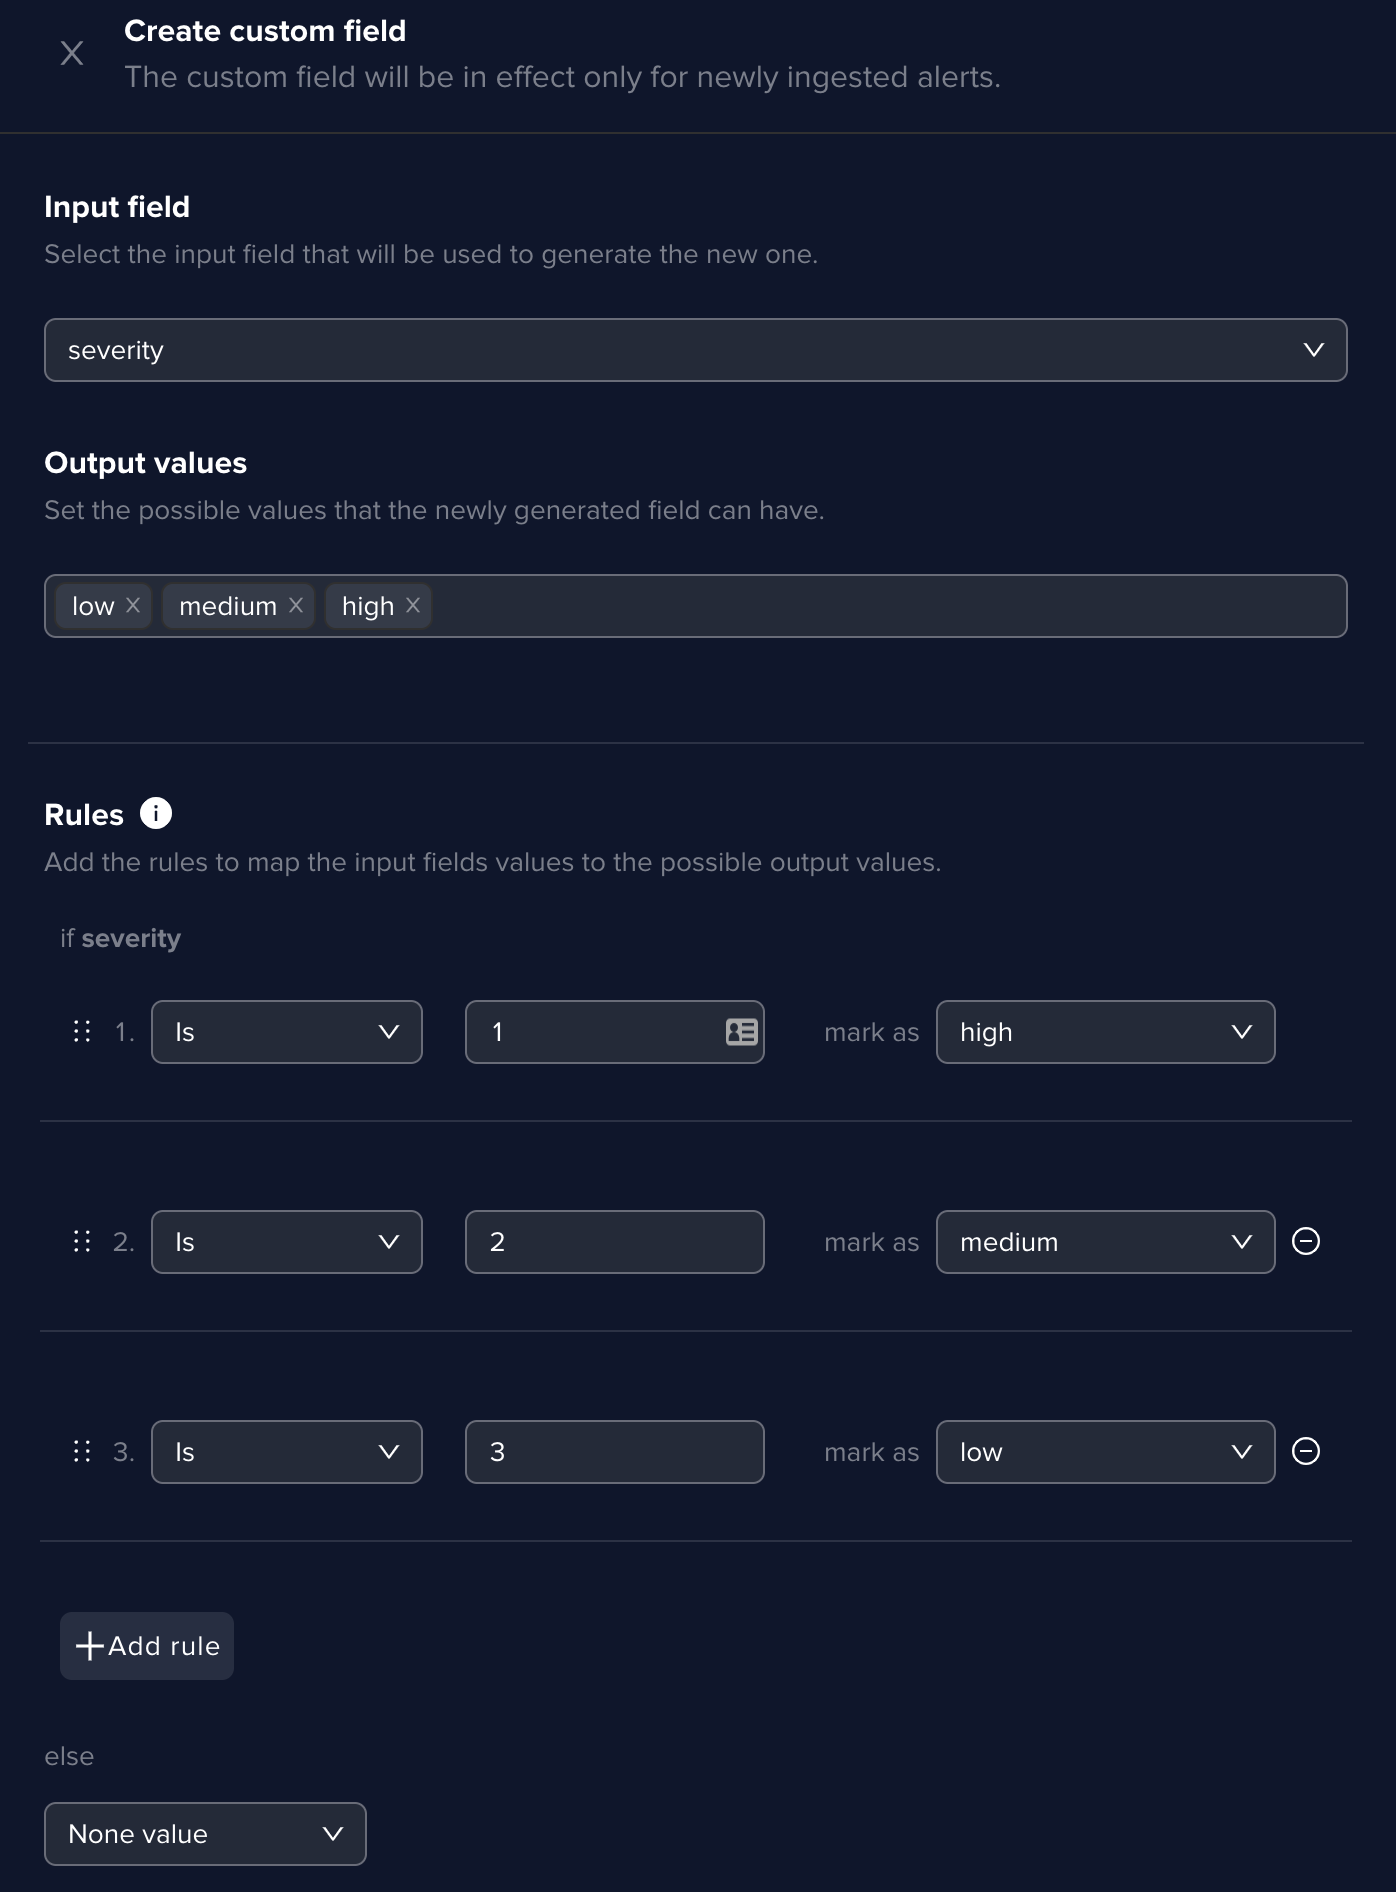
**Input field ** - select the field for which you wish to create custom mapping
**Output values ** - define our own custom values that you wish to map the original field values against
** Rules ** - create mapping rules using conditions from the drop-down menu, depending on the type of field for which you create the mapping
** Add rule ** - allows you to add as many mapping rules as you want
** Create custom field ** - saves the mapping created
The rules are sequentially checked. If no rule is matched, then there are several options ou can choose:
- use a default value
- keep the field's original value
- or leave the empty
Once created, the field will appear in the list of available features with its original name, followed by generated and can be selected as a feature. Once all features have been selected, hit the Save Features Selection button.
- Feedback and Retrain
The continuous learning process for the AI model to grow in knowledge and be able to provide a more accurate decision intelligence it’s split in two phases:
- Feedback = is the process of providing examples of decisions to the model
- Retrain = is the actual process of learning, when the model extracts meaningful information from the examples provided through feedback - based on selected features - and adjust dynamically it’s decisions
From Arcanna.ai UI, select your AI pipeline and navigate to the pipeline feedback by bucket view note: alerts are presented in this view grouped by the values of selected features (meaning that all alerts having the same values for the entire set of features are grouped together in a single bucket) all learning process will be executed on buckets
Select buckets you want to provide feedback for and using the buttons below specify what was your decision for the selected buckets
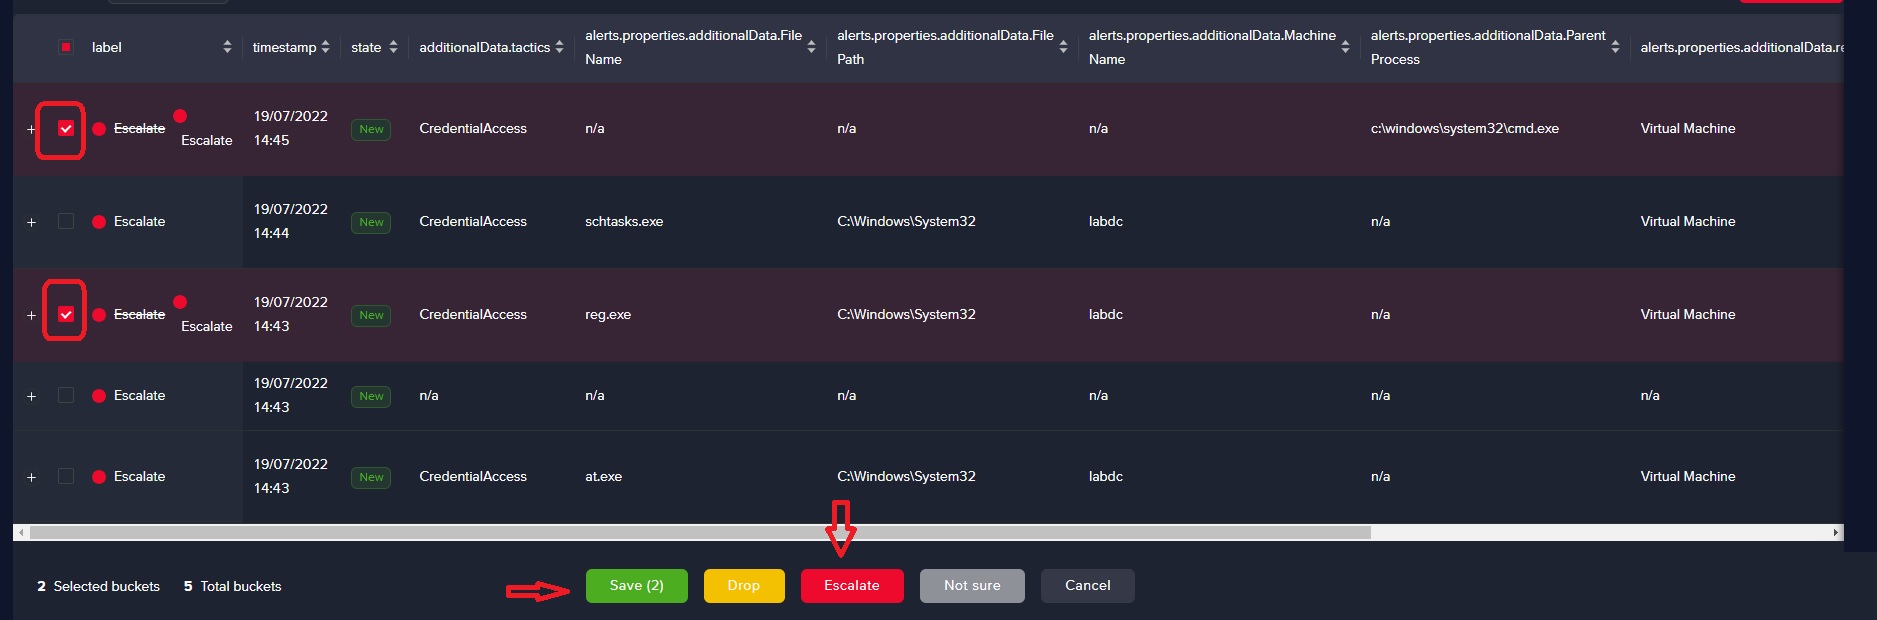
Repeat the process for all the buckets you want to provide feedback for. Once you finish, hit the Save button and navigate to the Retrain dashboard
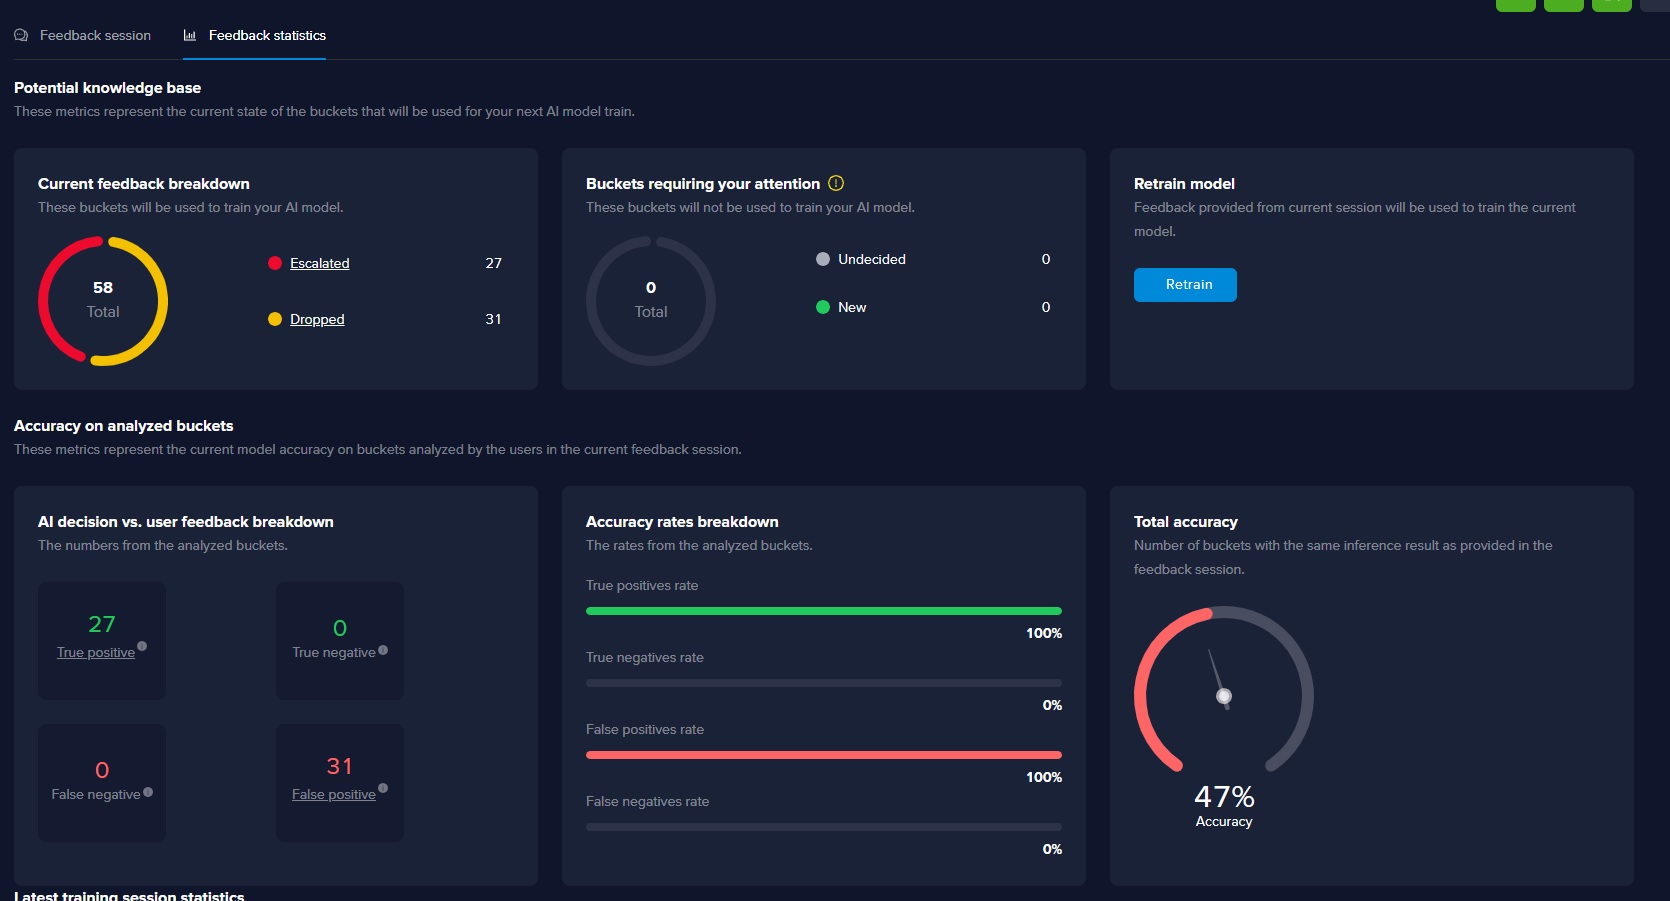
You can consult your AI model performance and improvement over time, by analysing the data inside the Feedback statistics page (each widget has included information and explanations regarding data displayed):
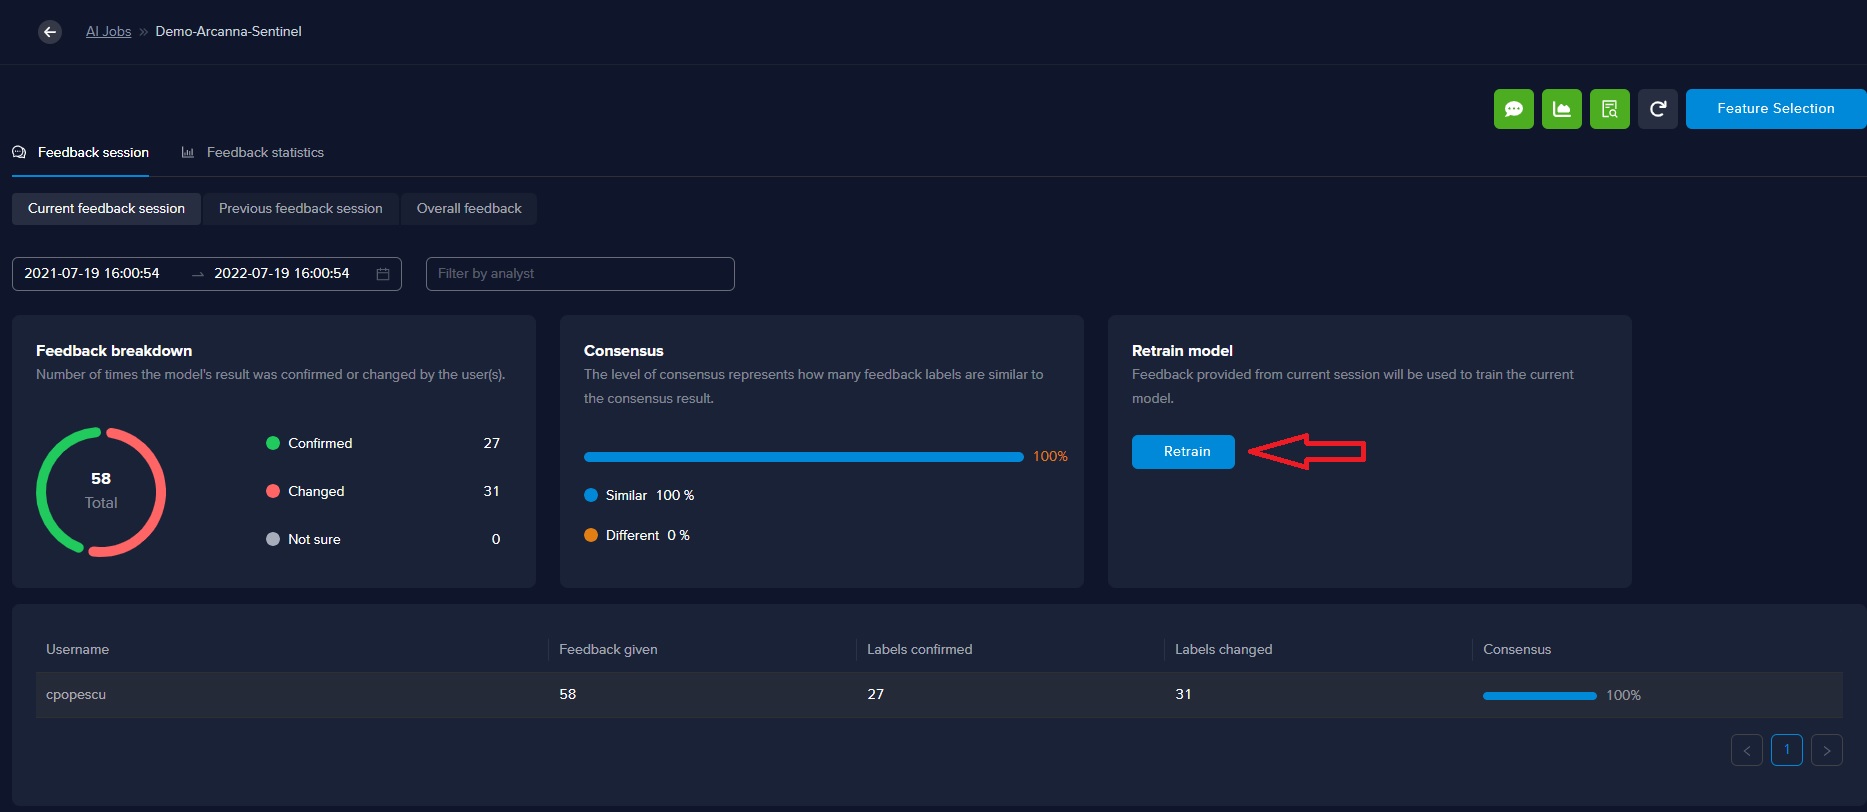
For starting the Retrain process, navigate to the Feedback Session > Current feedback session tab and hit the Retrain button
Once the first retrain session has been completed, your AI model incorporates the knowledge provided through the Feedback session and will adapt its decision intelligence process based on the information provided.
Results of Arcanna.ai decision intelligence process will be provided via the Logic app playbook directly into Azure Sentinel UI as a tag attached to the incident
