Arcanna.ai and Elastic SIEM
Last updated: 21.01.2024
Introduction
This is a step-by-step guide that will explain how to integrate Arcanna.ai with your Elastic SIEM to automate your team's decisions with an AI Decision Intelligence platform.
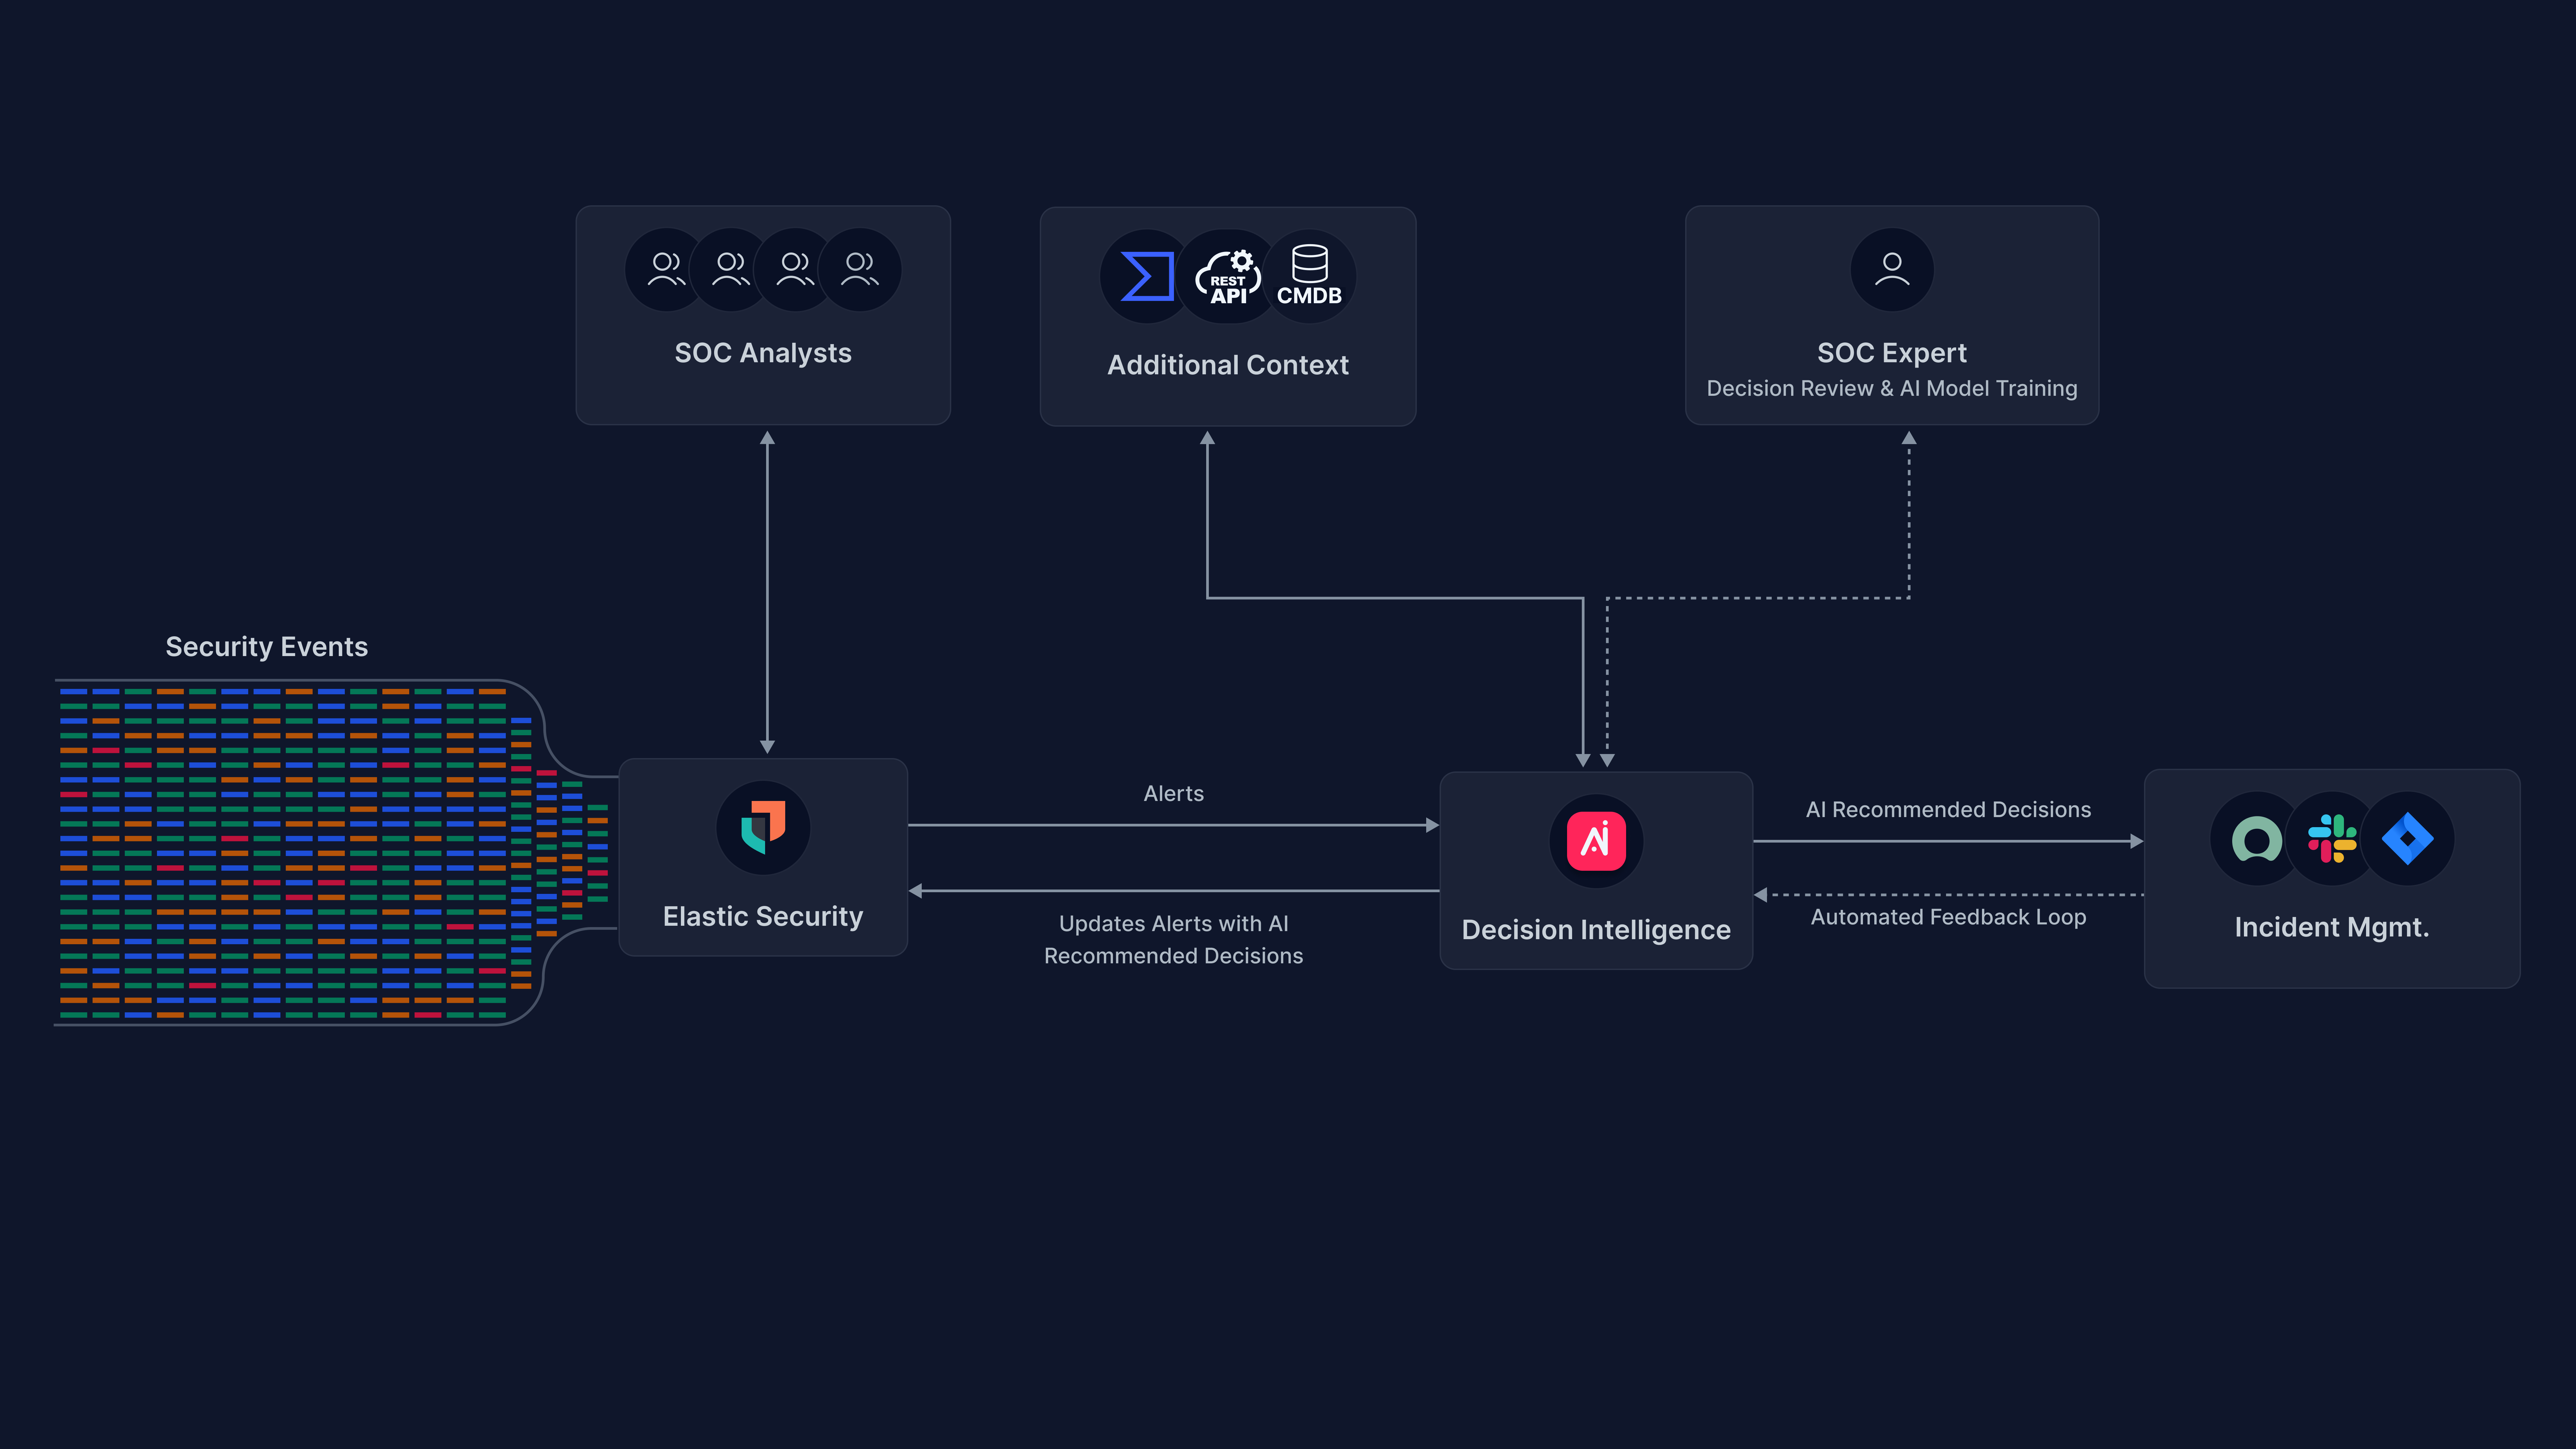
Arcanna.ai can read data from Elasticsearch, serve it to AI Models you trained and output decisions and actions based on those decisions.
Our Post-Decision Automation Capabilities can leverage:
-
Elasticsearch:
- Returning the decision on the original alert
- Add a new field for additional comments (which can be customized to use variable from the original alert)
- Updating the alert status to acknowledged or closed
-
3rd Party Solutions (Case Management, Email, Messaging apps, etc..)
- Create a ticket/case in existing and upcoming case management tools like TheHive, DFIR-IRIS, ThreatConnect
- Setup alerting via Slack or Email
Prerequisites
-
Arcanna.ai (this user guide)
- It can be deployed on premise or in the cloud (AWS). For flexibility reasons, Arcanna.ai is exporting the AI processed alerts to an internal Elasticsearch data warehouse, that will be installed at the same time with Arcanna.ai. This can be the same Elasticsearch instance you already have, or a new one dedicated just for Arcanna.ai backend.
-
Elastic SIEM
- Part of Kibana, free under basic license (guide).
- The SIEM detection engine will populate the
.alerts-security.alerts-default*index with resulted detections. Arcanna will also update this index to change alert status and add context.
Create the integrations in Arcanna.ai
Once Arcanna is installed and you have logged in, we can start to configure our integrations and AI Pipelines.
-
Go to the Integrations page and click on Add integration
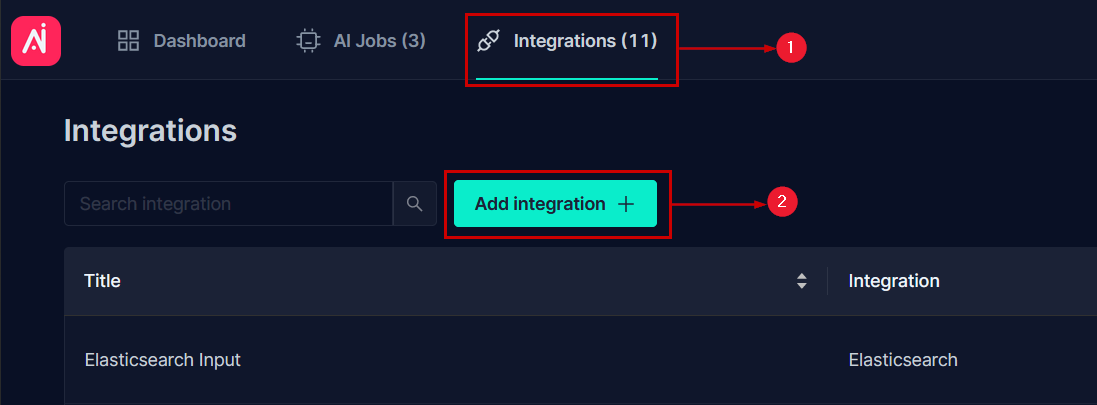
-
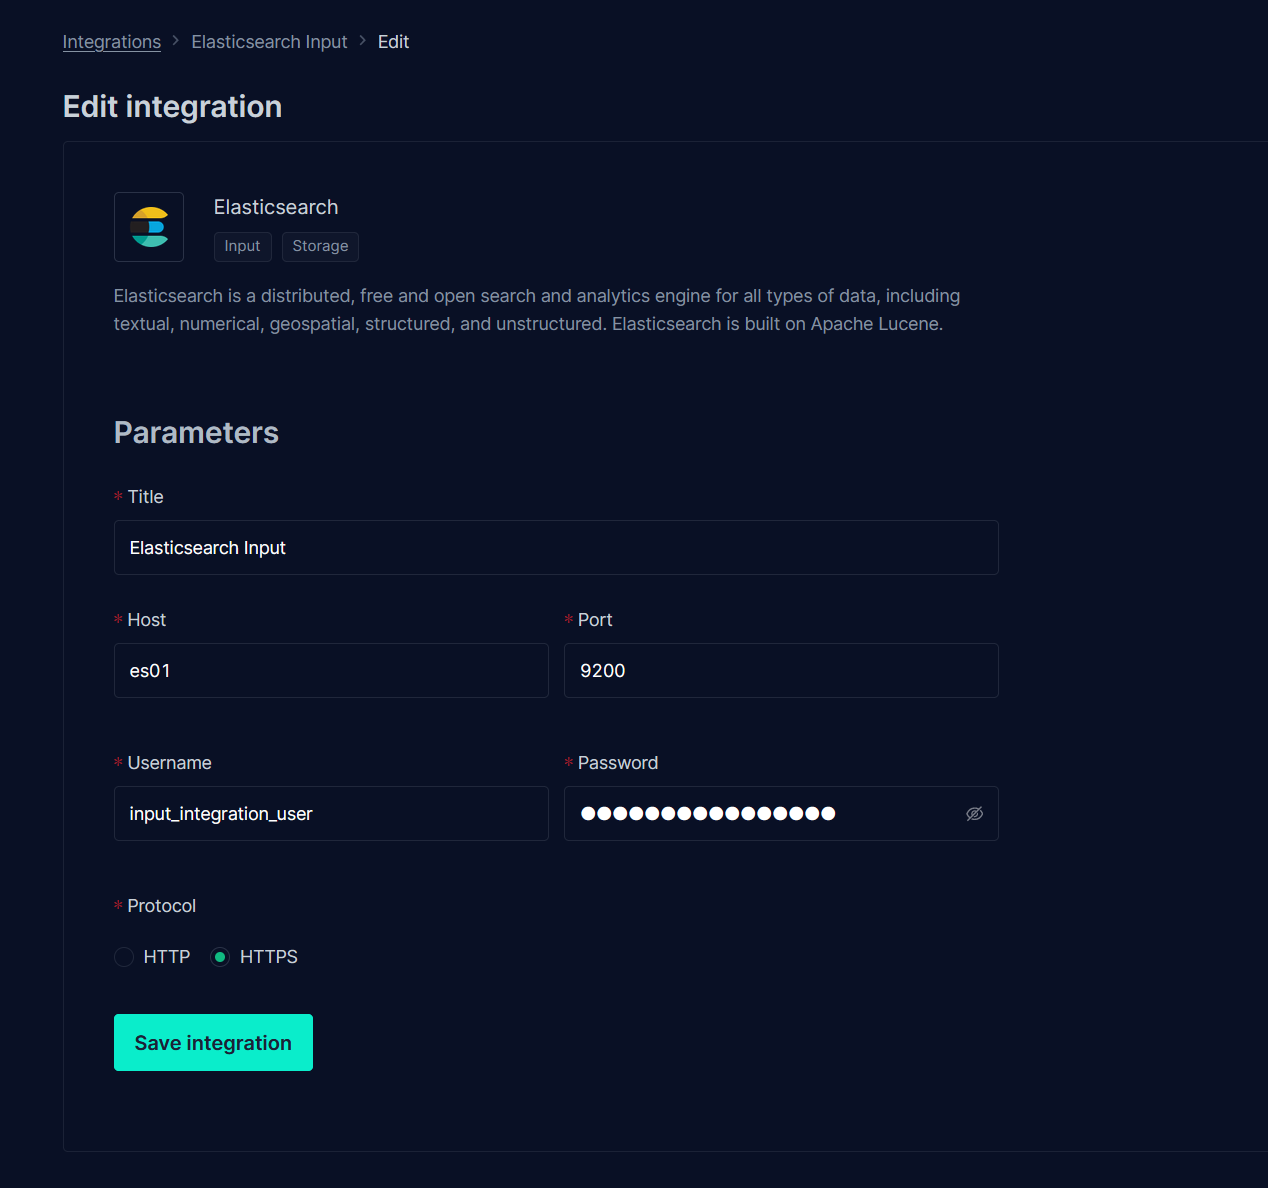
First, we'll select the Elasticsearch input integration:
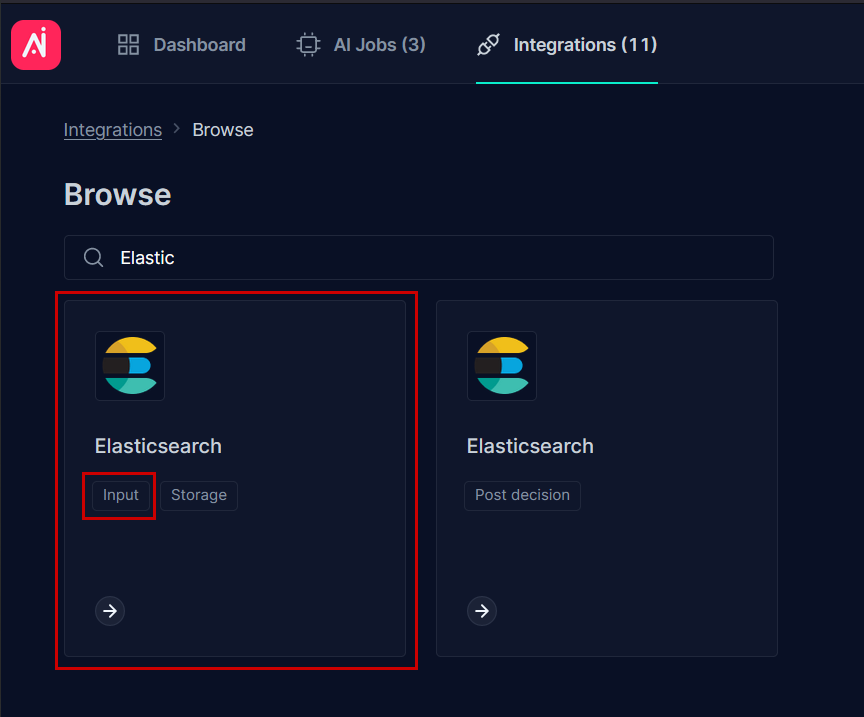
-
Fill in all the fields with the appropriate information. Make sure you use the URL of an Elasticsearch node (not Kibana or other type) and use the corect port (the default one is port 9200). Once finished, click Save Integration
-
OptionalIn case you want to use the post-decision automation, you'll need to add an integration for that as well. For this step, go back to integrations and add the Post Decision version of the Elastic Integration.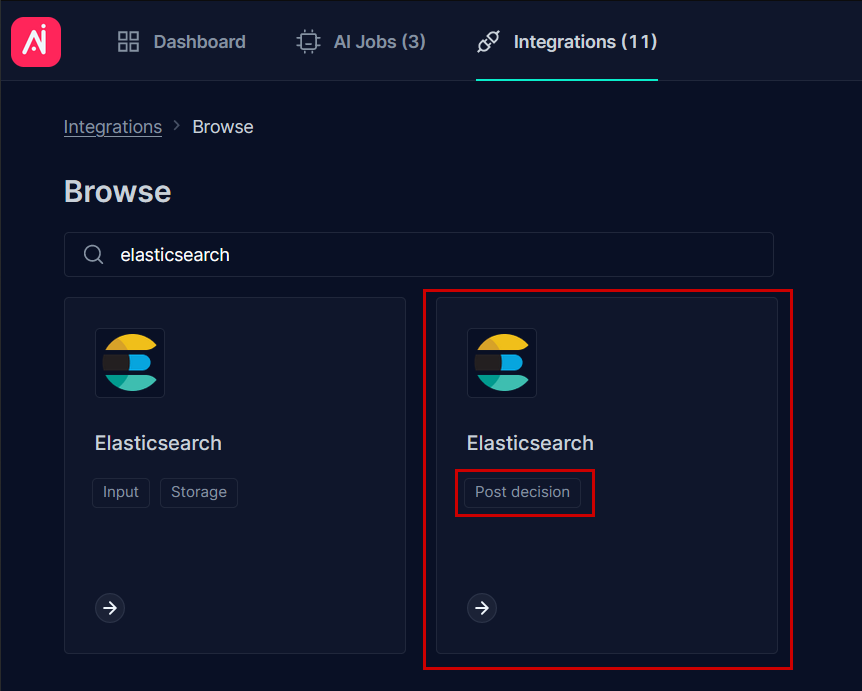
- Fill the parameters in similarly to the one before.
Processing alerts using AI
What the AI pipeline does
- Reads the alerts using the (Input) ;
- Processes the alerts with an AI model, outputing decisions for each of them ;
- Saves the results in the data warehouse (Storage) ;
- Updates the original alerts or creates a case in an external system (Automation) .
Creating a Pipeline
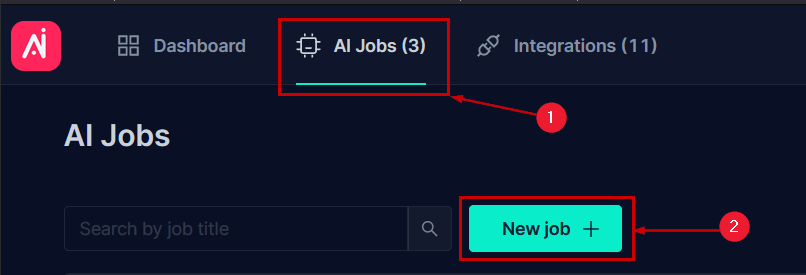
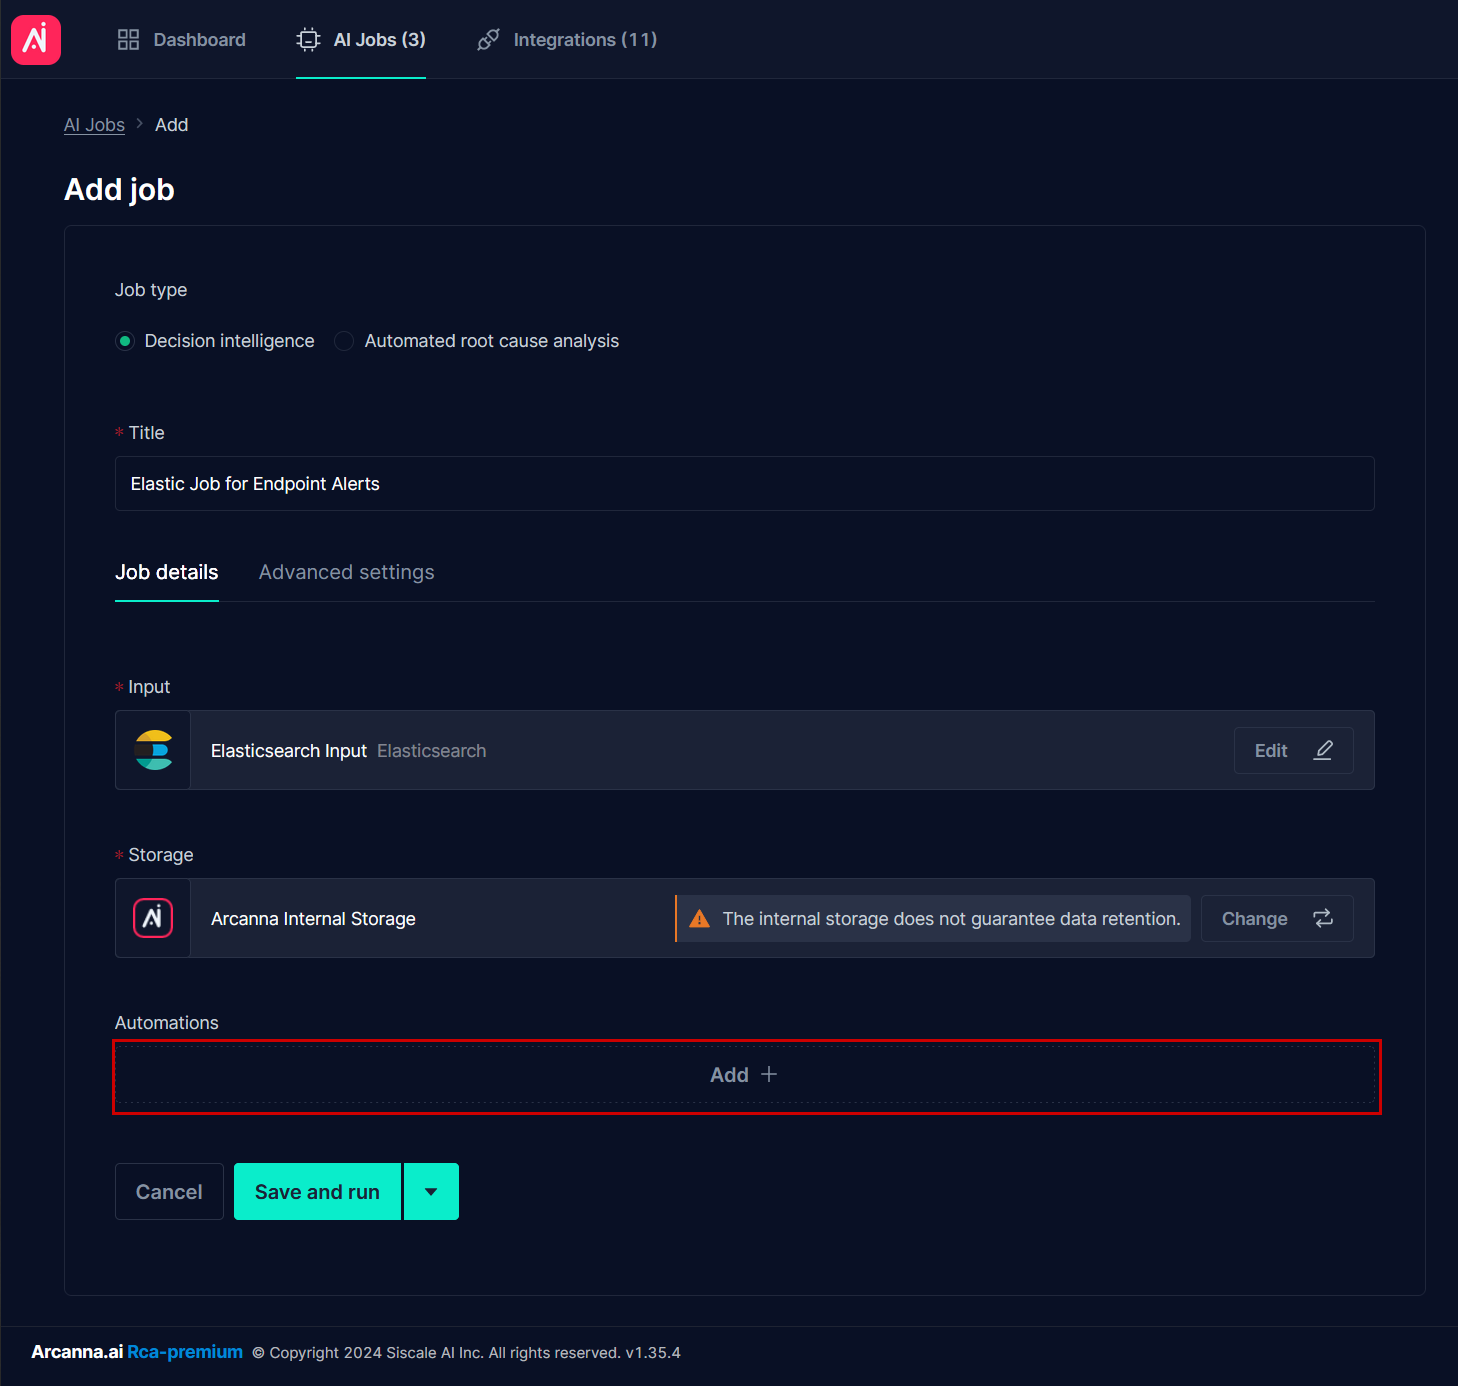
To create an AI pipeline, go the AI Pipelines screen and click "Create Pipeline +"
-
Go on the Pipeline page and click on Create Pipeline +
-
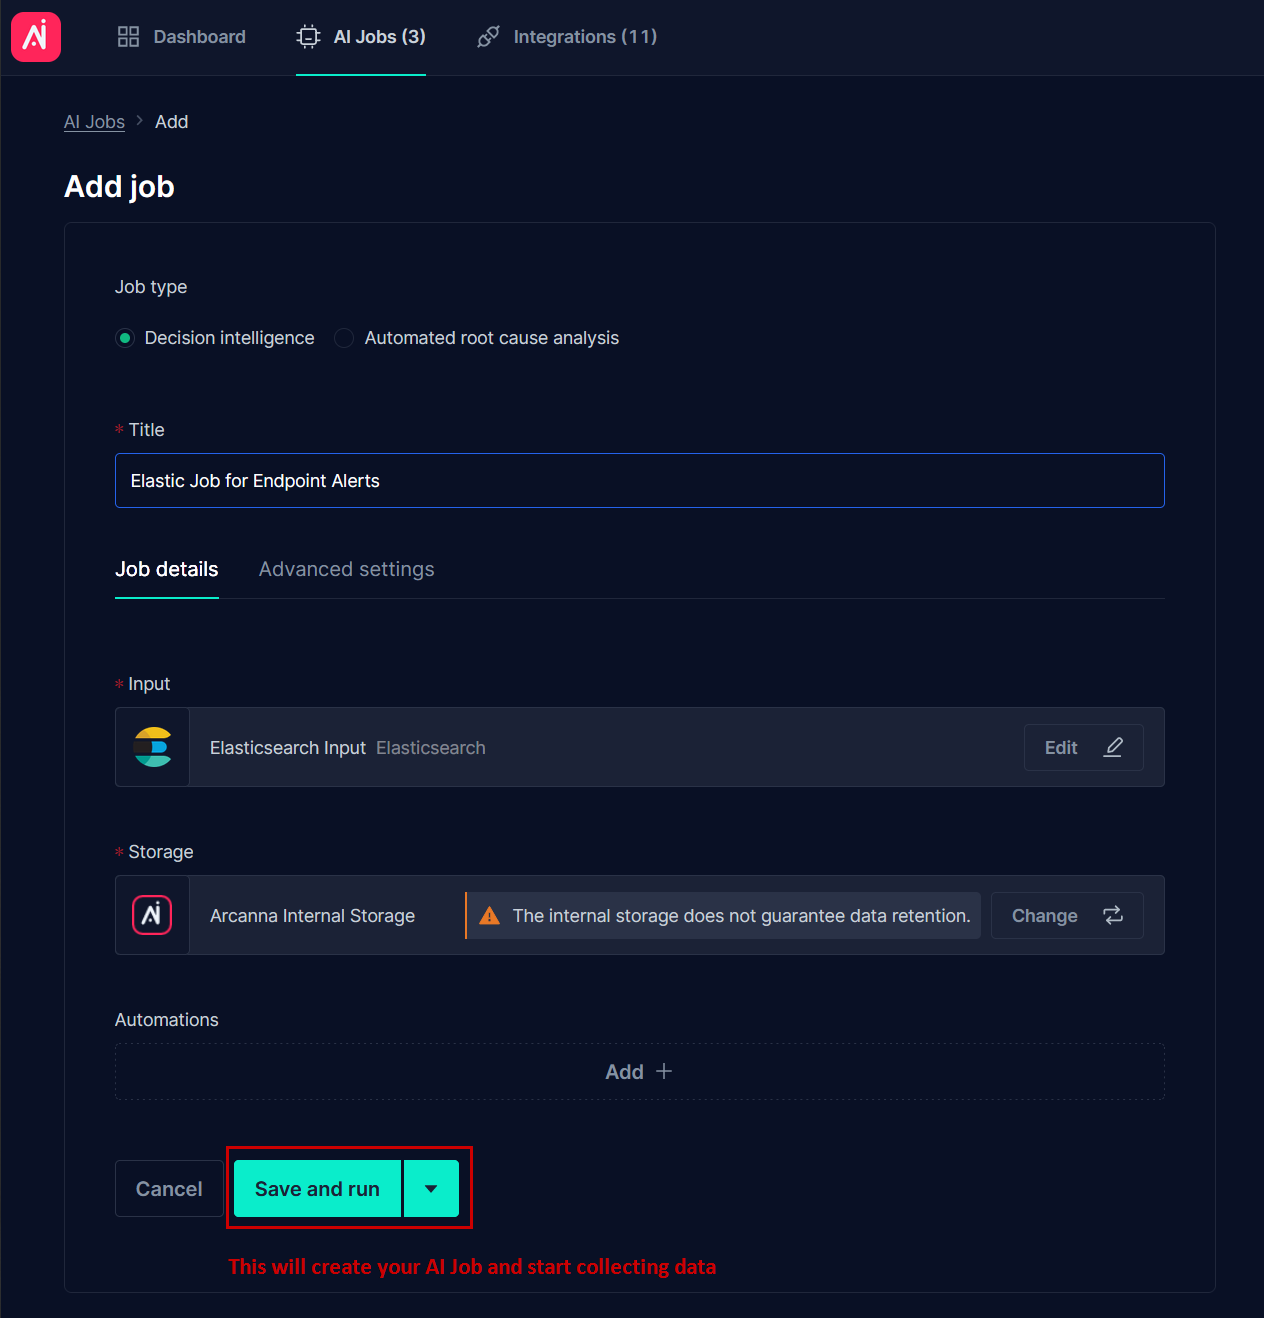
Give your AI Pipeline a title and select an Input
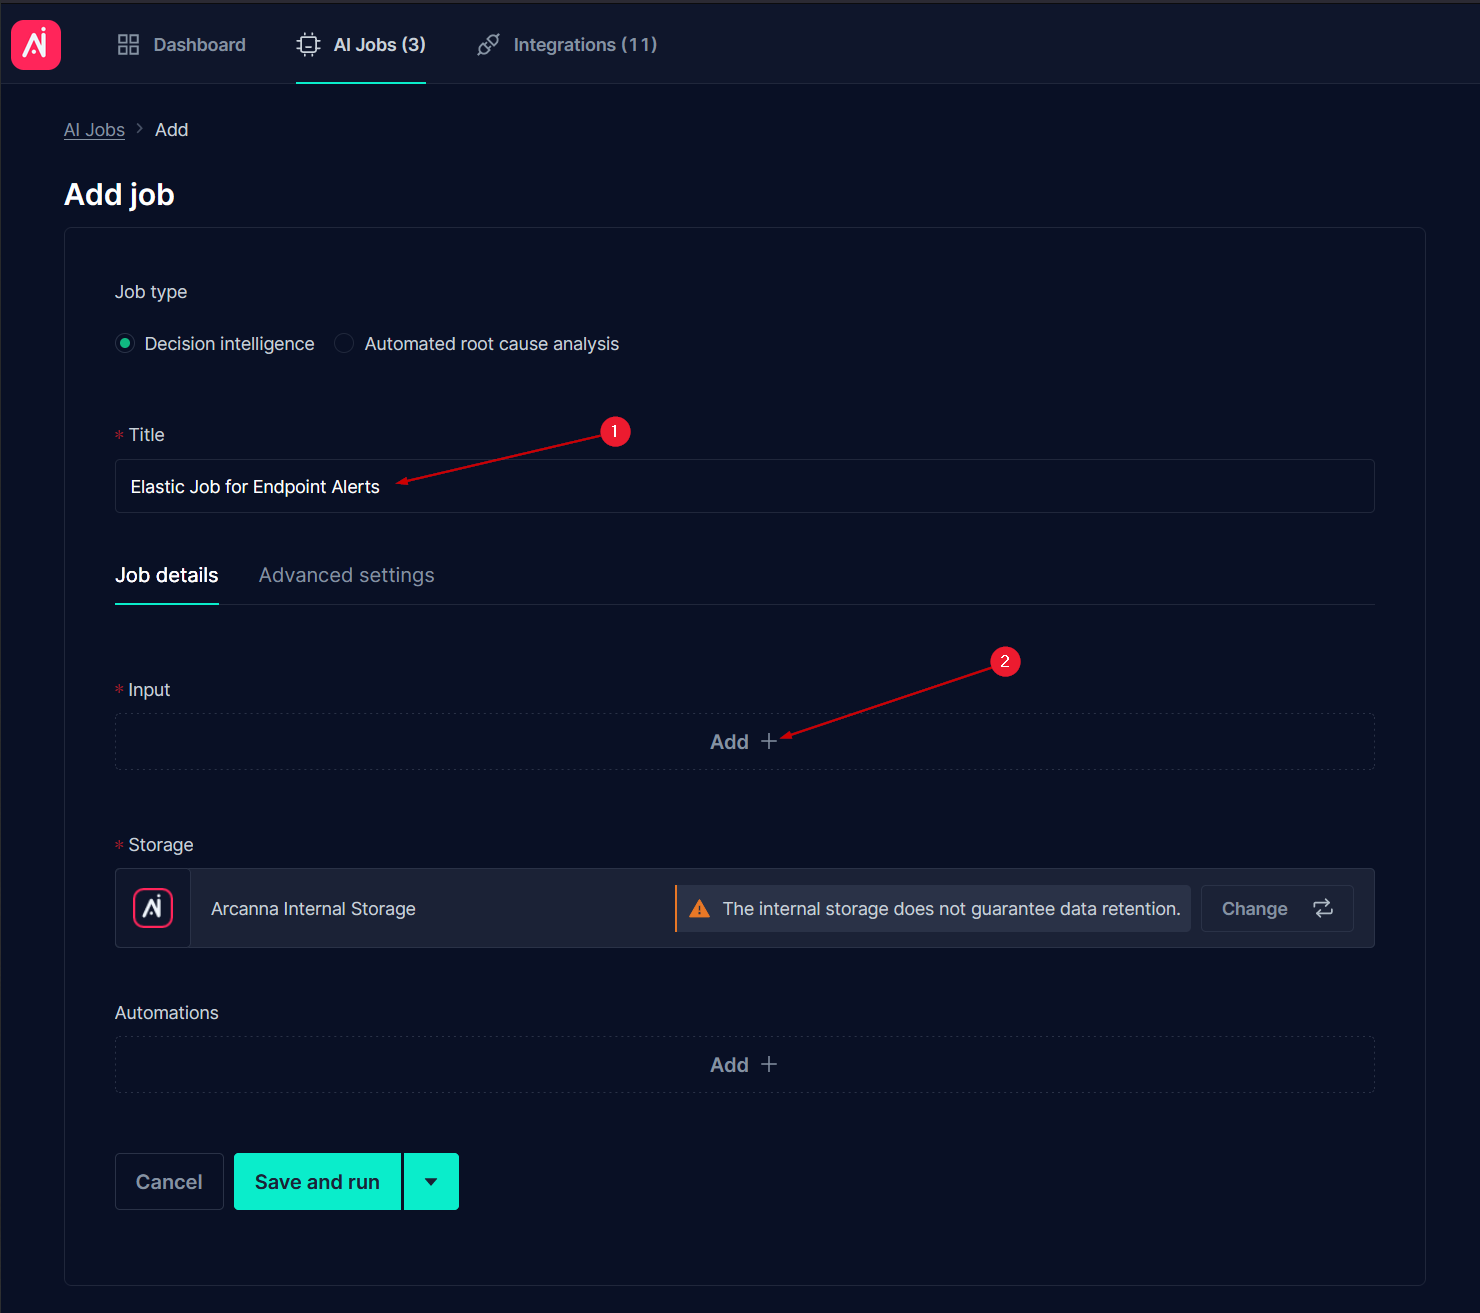
After selecting the integration previously defined, you will have to provide the Input integration parameters:
-
Index Pattern is the index in which your alert logs are stored, such as
.alerts-security.alerts-default*or.siem-signals-*in ES Versions 7.x -
The start and end time allow you to select the timeframe of the data which the pipeline will use.
Only set an End Time if you wish to use a limited set of data, otherwise leave it blank, so that the AI pipeline gets the latest data.
- Elastic query string filter allows you to place a query or a filter on the data before it reaches the model so that the AI model only ingests alerts that match the specified query.
- The syntax is DSL, specifically, what you would put in the query field in your DSL request:
- If you want all the alerts from that index, leave the query filter blank.
- Examples of query filter:
event.kind:alert AND event.module:suricataor something more complex like(host.os.name:/Windows Server.*/ OR host.os.full:/Windows Server.*/) AND NOT (kibana.alert.severity:low OR kibana.alert.severity:medium)
More details about creating queries in Elastic and additional examples can be found here.
- Elasticsearch query batch size allows you to set the size of every batch of events ingested by Arcanna.
- The smaller the value the faster the results; this also increases the number of queries, making it more intesive for the external systems.
- Best practic for Elasticsearch is between 300-500
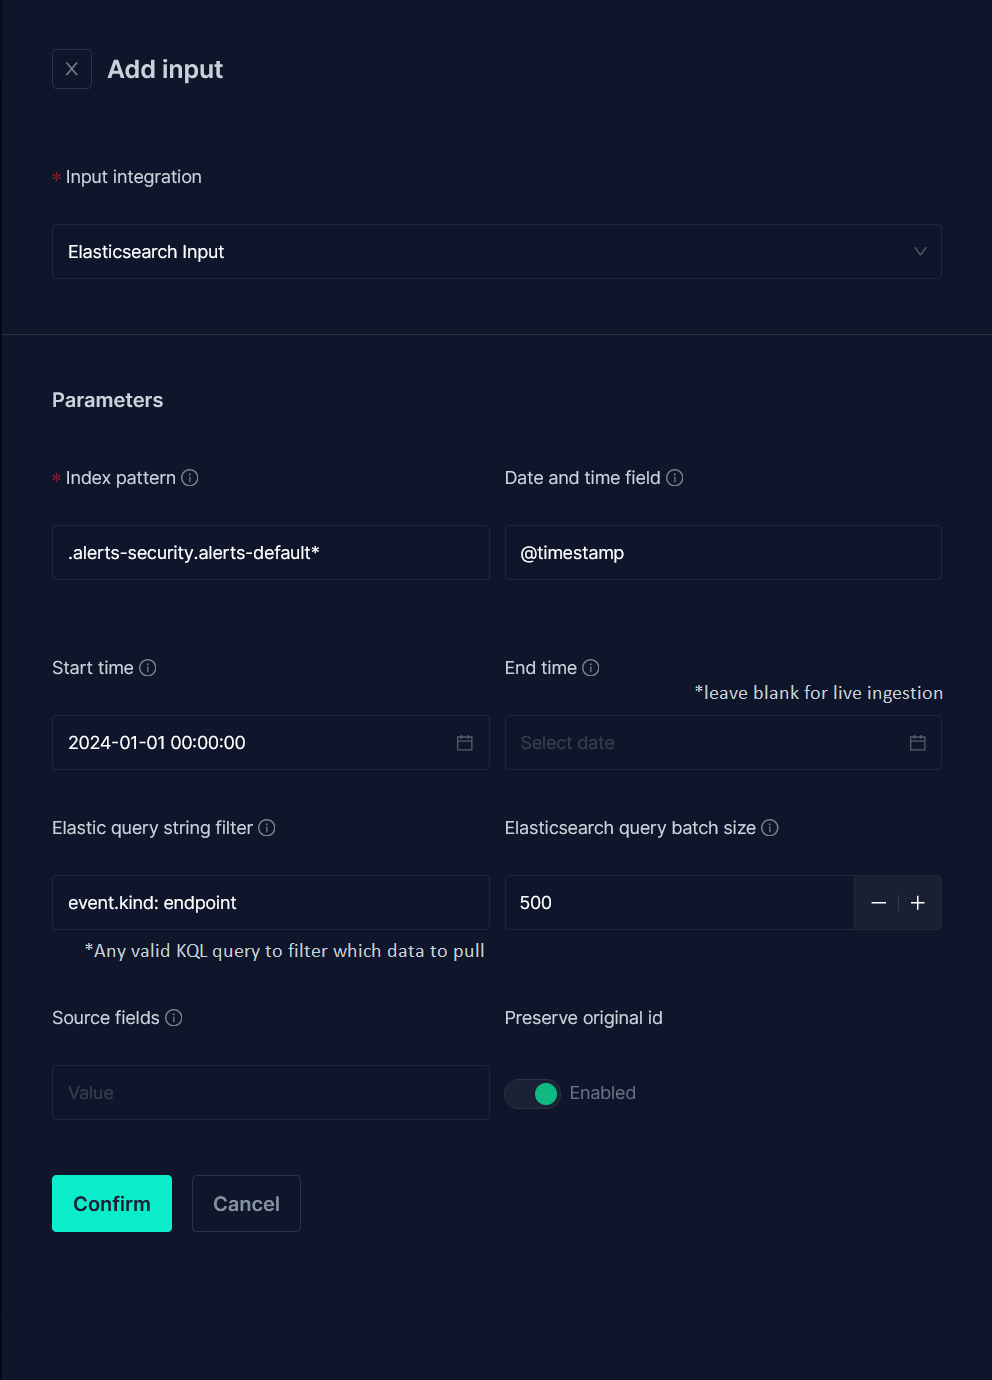
- Once Finished, hit confirm, then follow up with Save and Run. Your AI Pipeline will now start collecting data.
Configuring the AI Pipeline
-
Once data is coming in, your pipeline will have the blue tag Ready to Select Features. Click the AI Pipeline name - this will take you to the feedback view
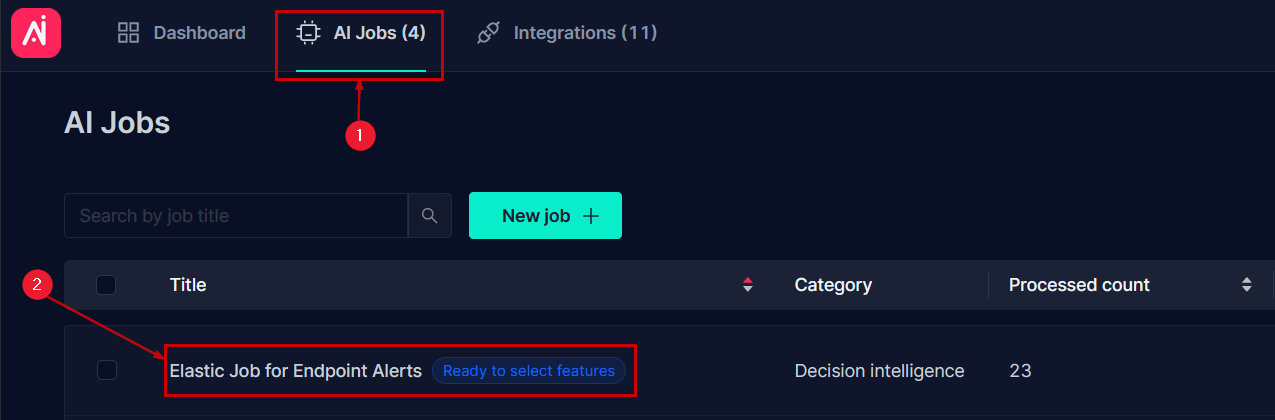
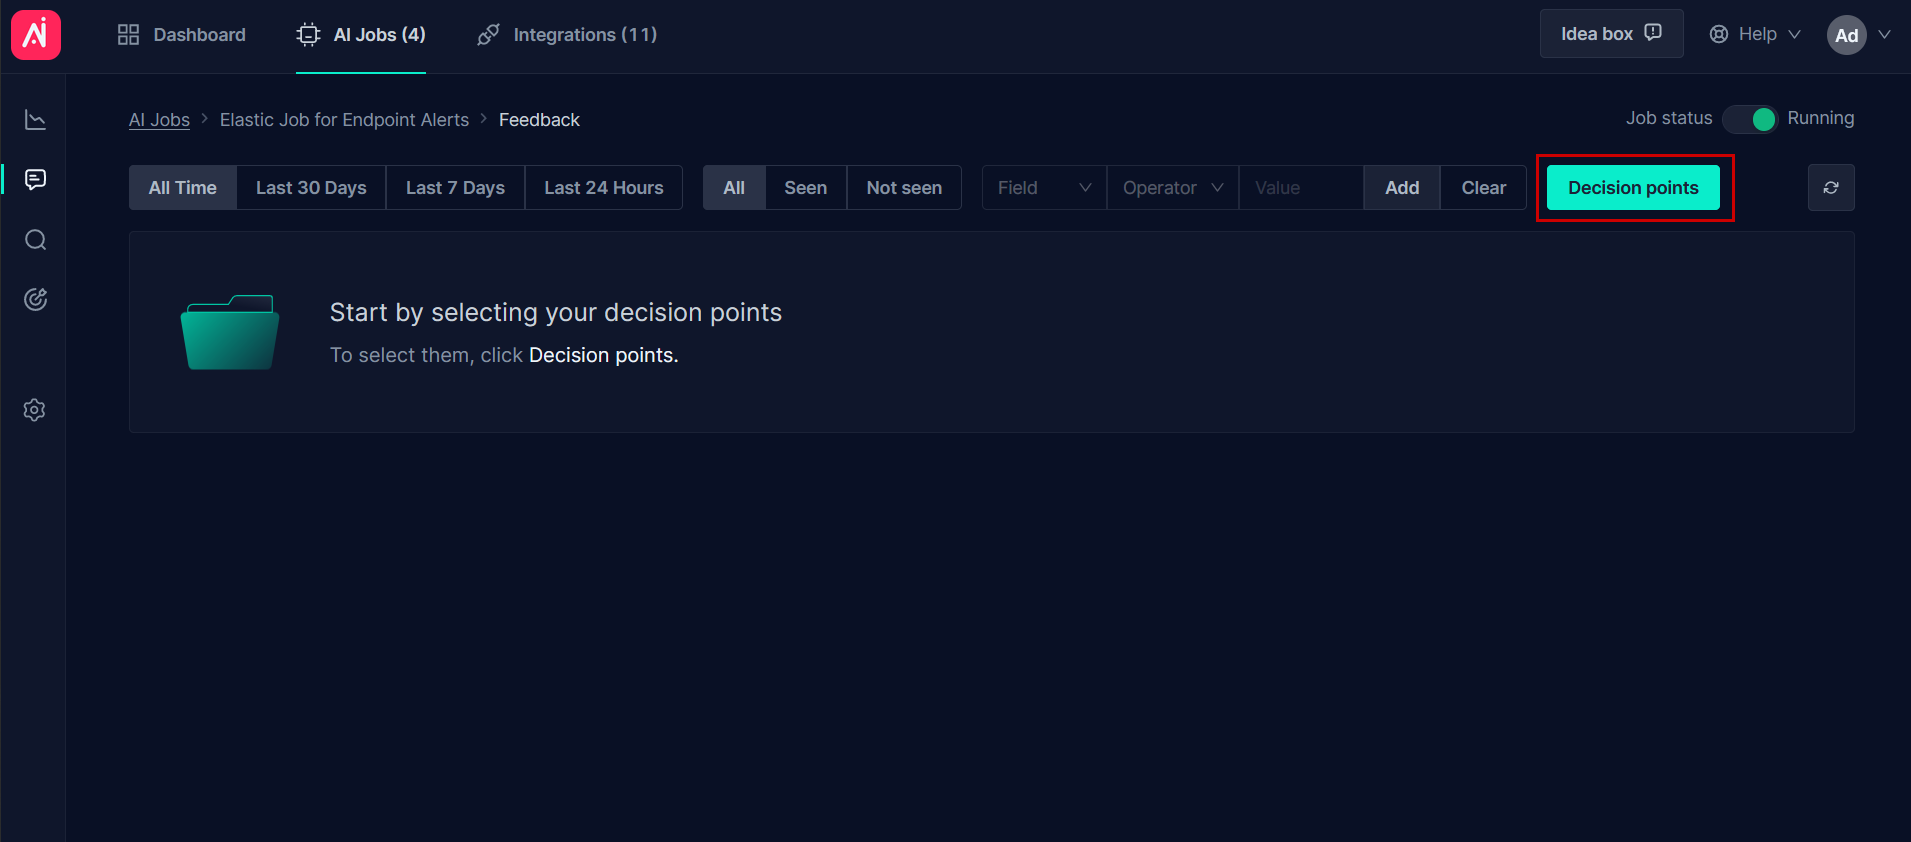
-
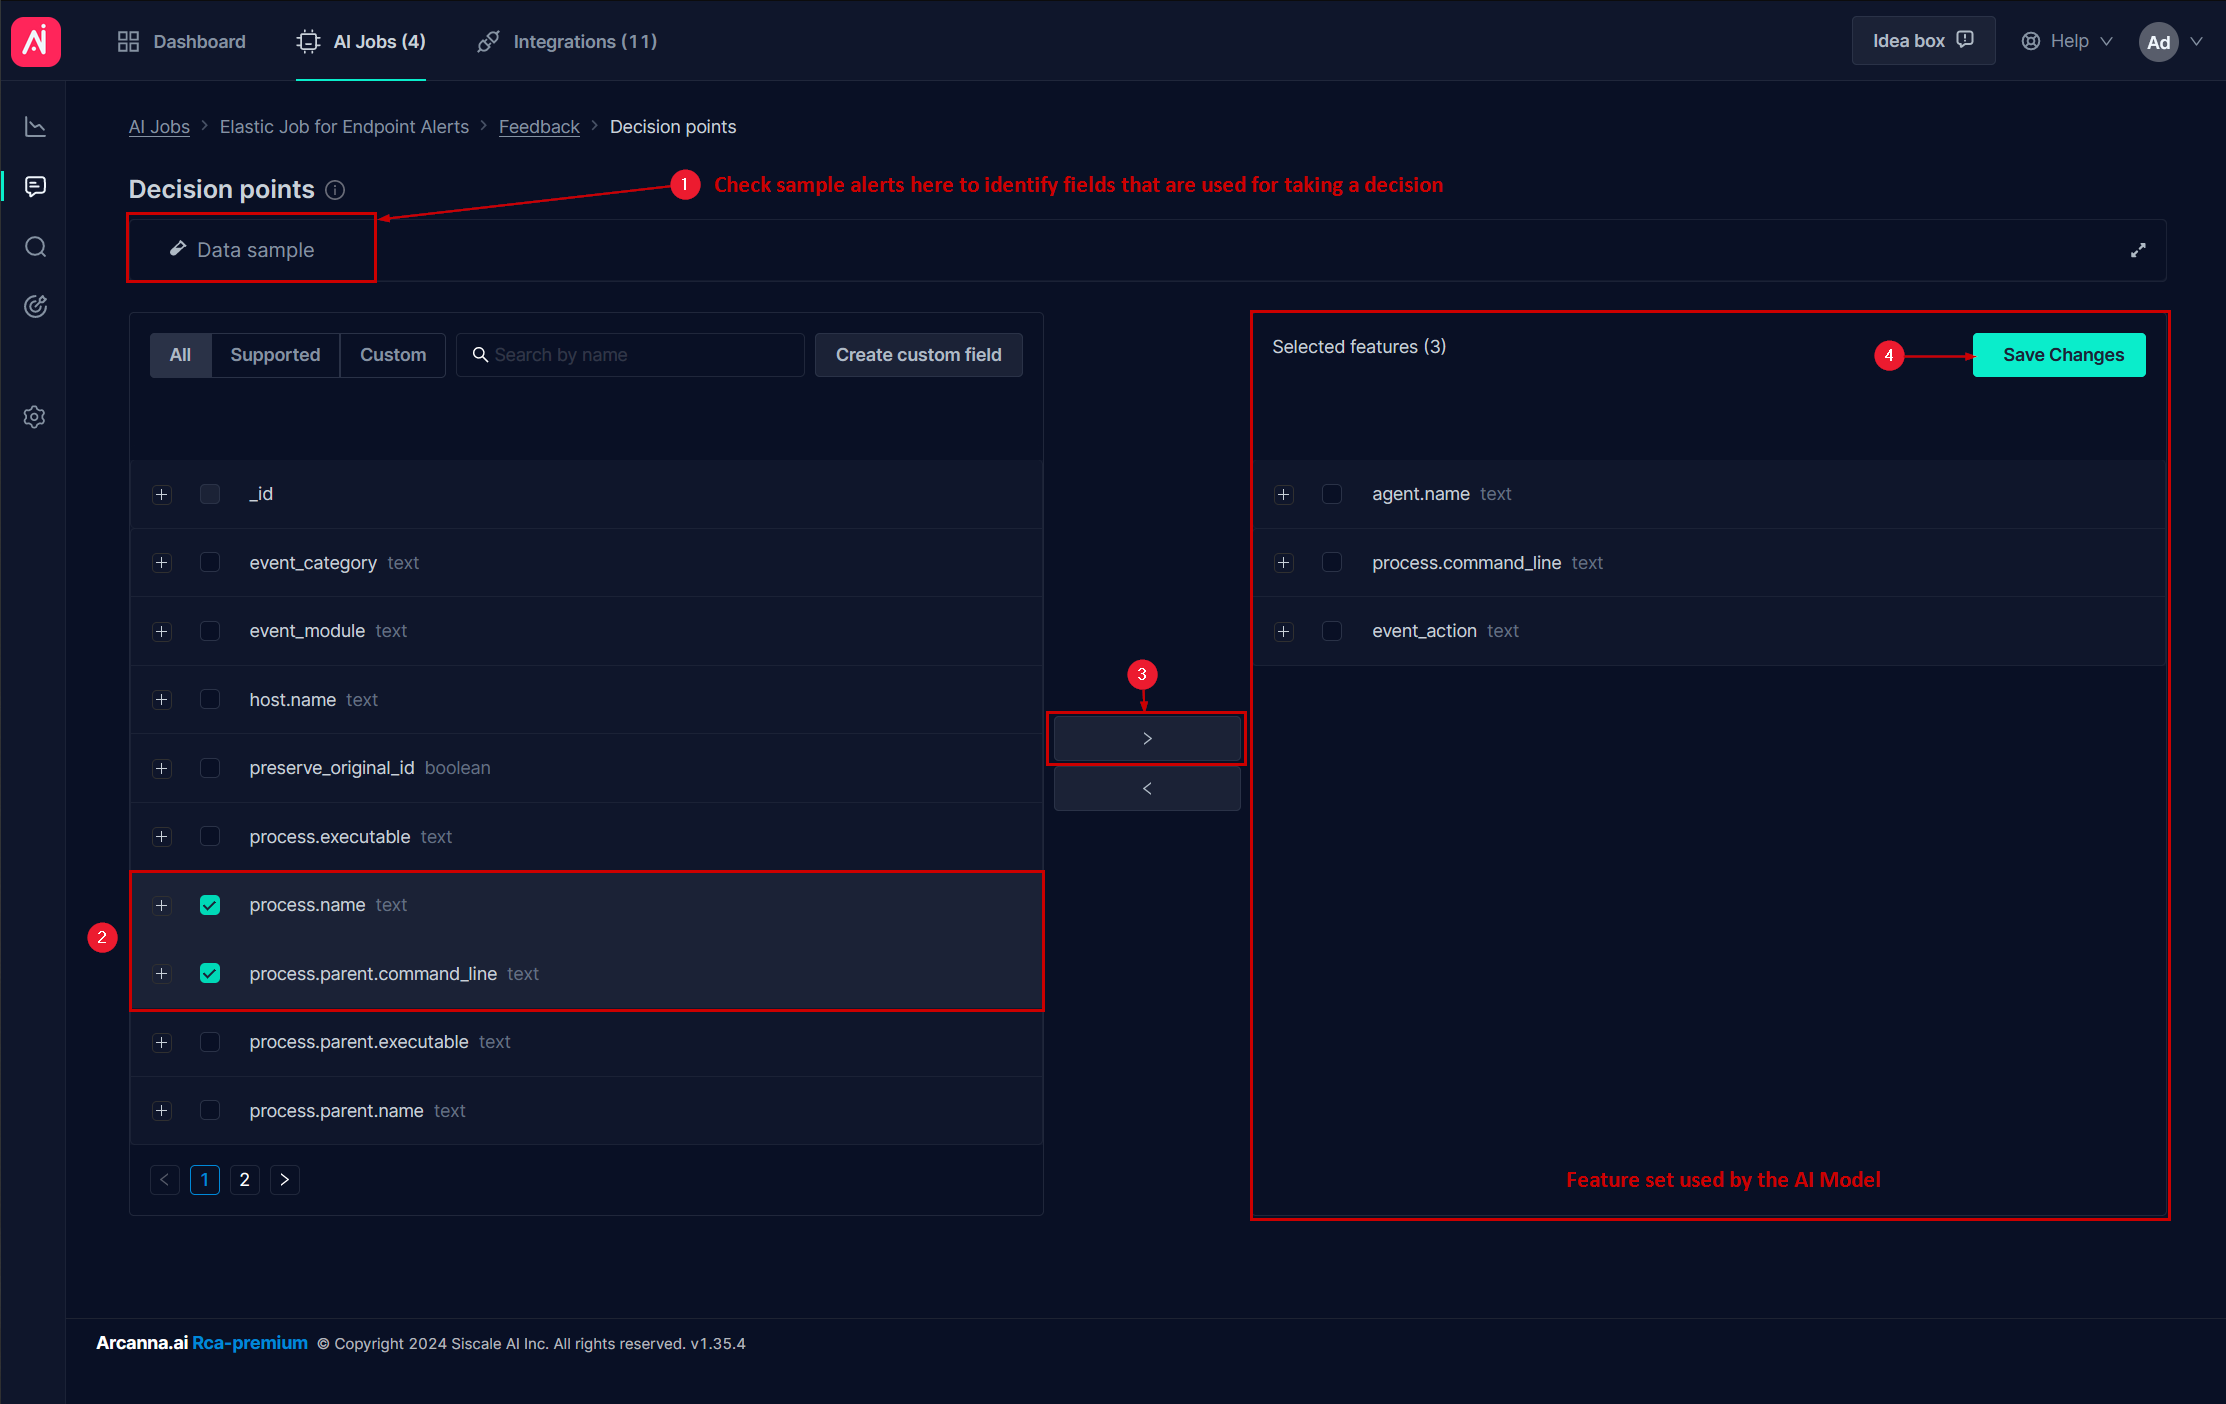
The first step is to select our Decision Points (features)
- These are essentialy fields from your alert that you consider relevant when making a decision.
-
Here you will find a list of all the fields found within the ingested dataset.
- Expand the Data Sample to see actual alerts and explore what fields you may be interested in.
- You can then search them by name or go page by page.
- Expanding the fields will provide statistical information on the values these fields hold.
-
Once decided what fields you are going to use in your decision making, select them as feature by moving them to the right panel.
-
Hit Save Changes and go Back to your feedback view from the bread-crumbs menu.
Providing feedback on the alerts
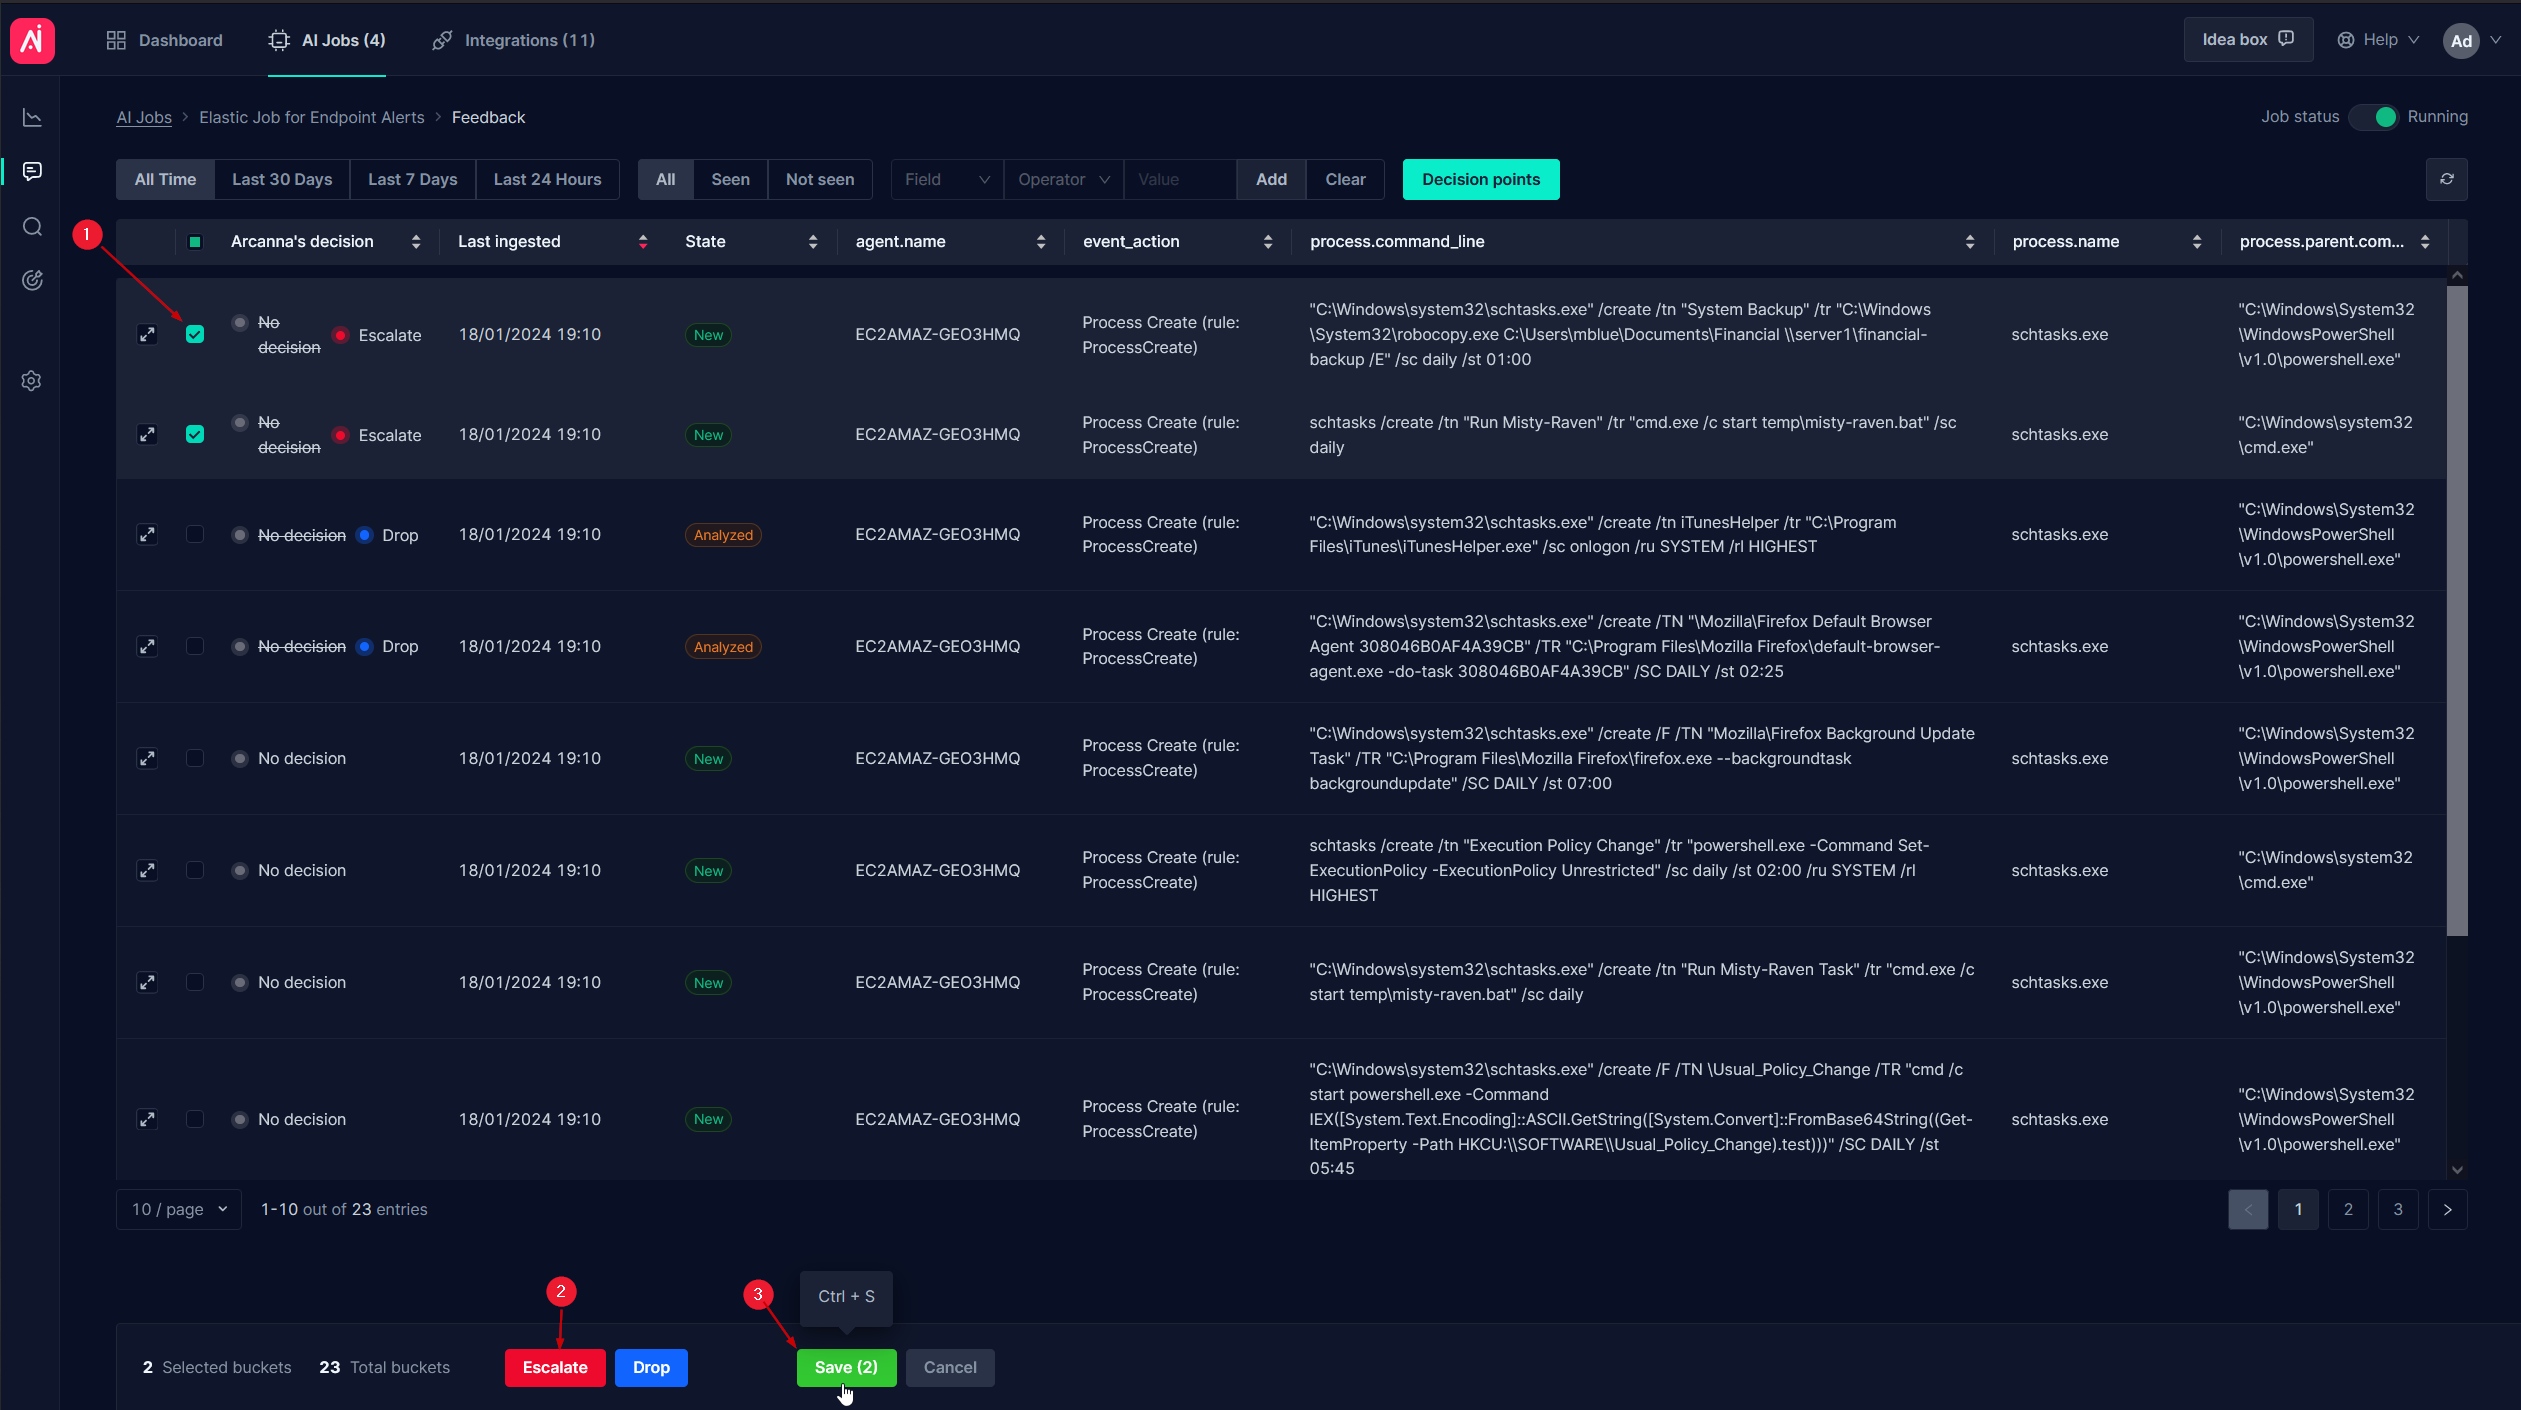
Now that the features have been selected, you will see buckets being generated.
- Buckets are groups of alerts that share the same values for the selected features. Buckets help your provide feedback to your alerts in an easier manner.
There are 2 main ways of providing feedback:
-
The first one is selecting the buckets, marking them as Escalate, Drop, or whatever label you configured and hitting save.
-
This method is helpful when dealing with large numbers of alerts/buckets as you can use the filters to your advantage and provide bulk feedback.
-
-
The second method is by expanding any bucket, analyze the information, and take a decision by clicking one of the configured labels.
-
This method allow for a more focused feedback experience, going one bucket at a time.
-
In the same panel you can also check the AI Explainability tab to get more insights as you train the model.
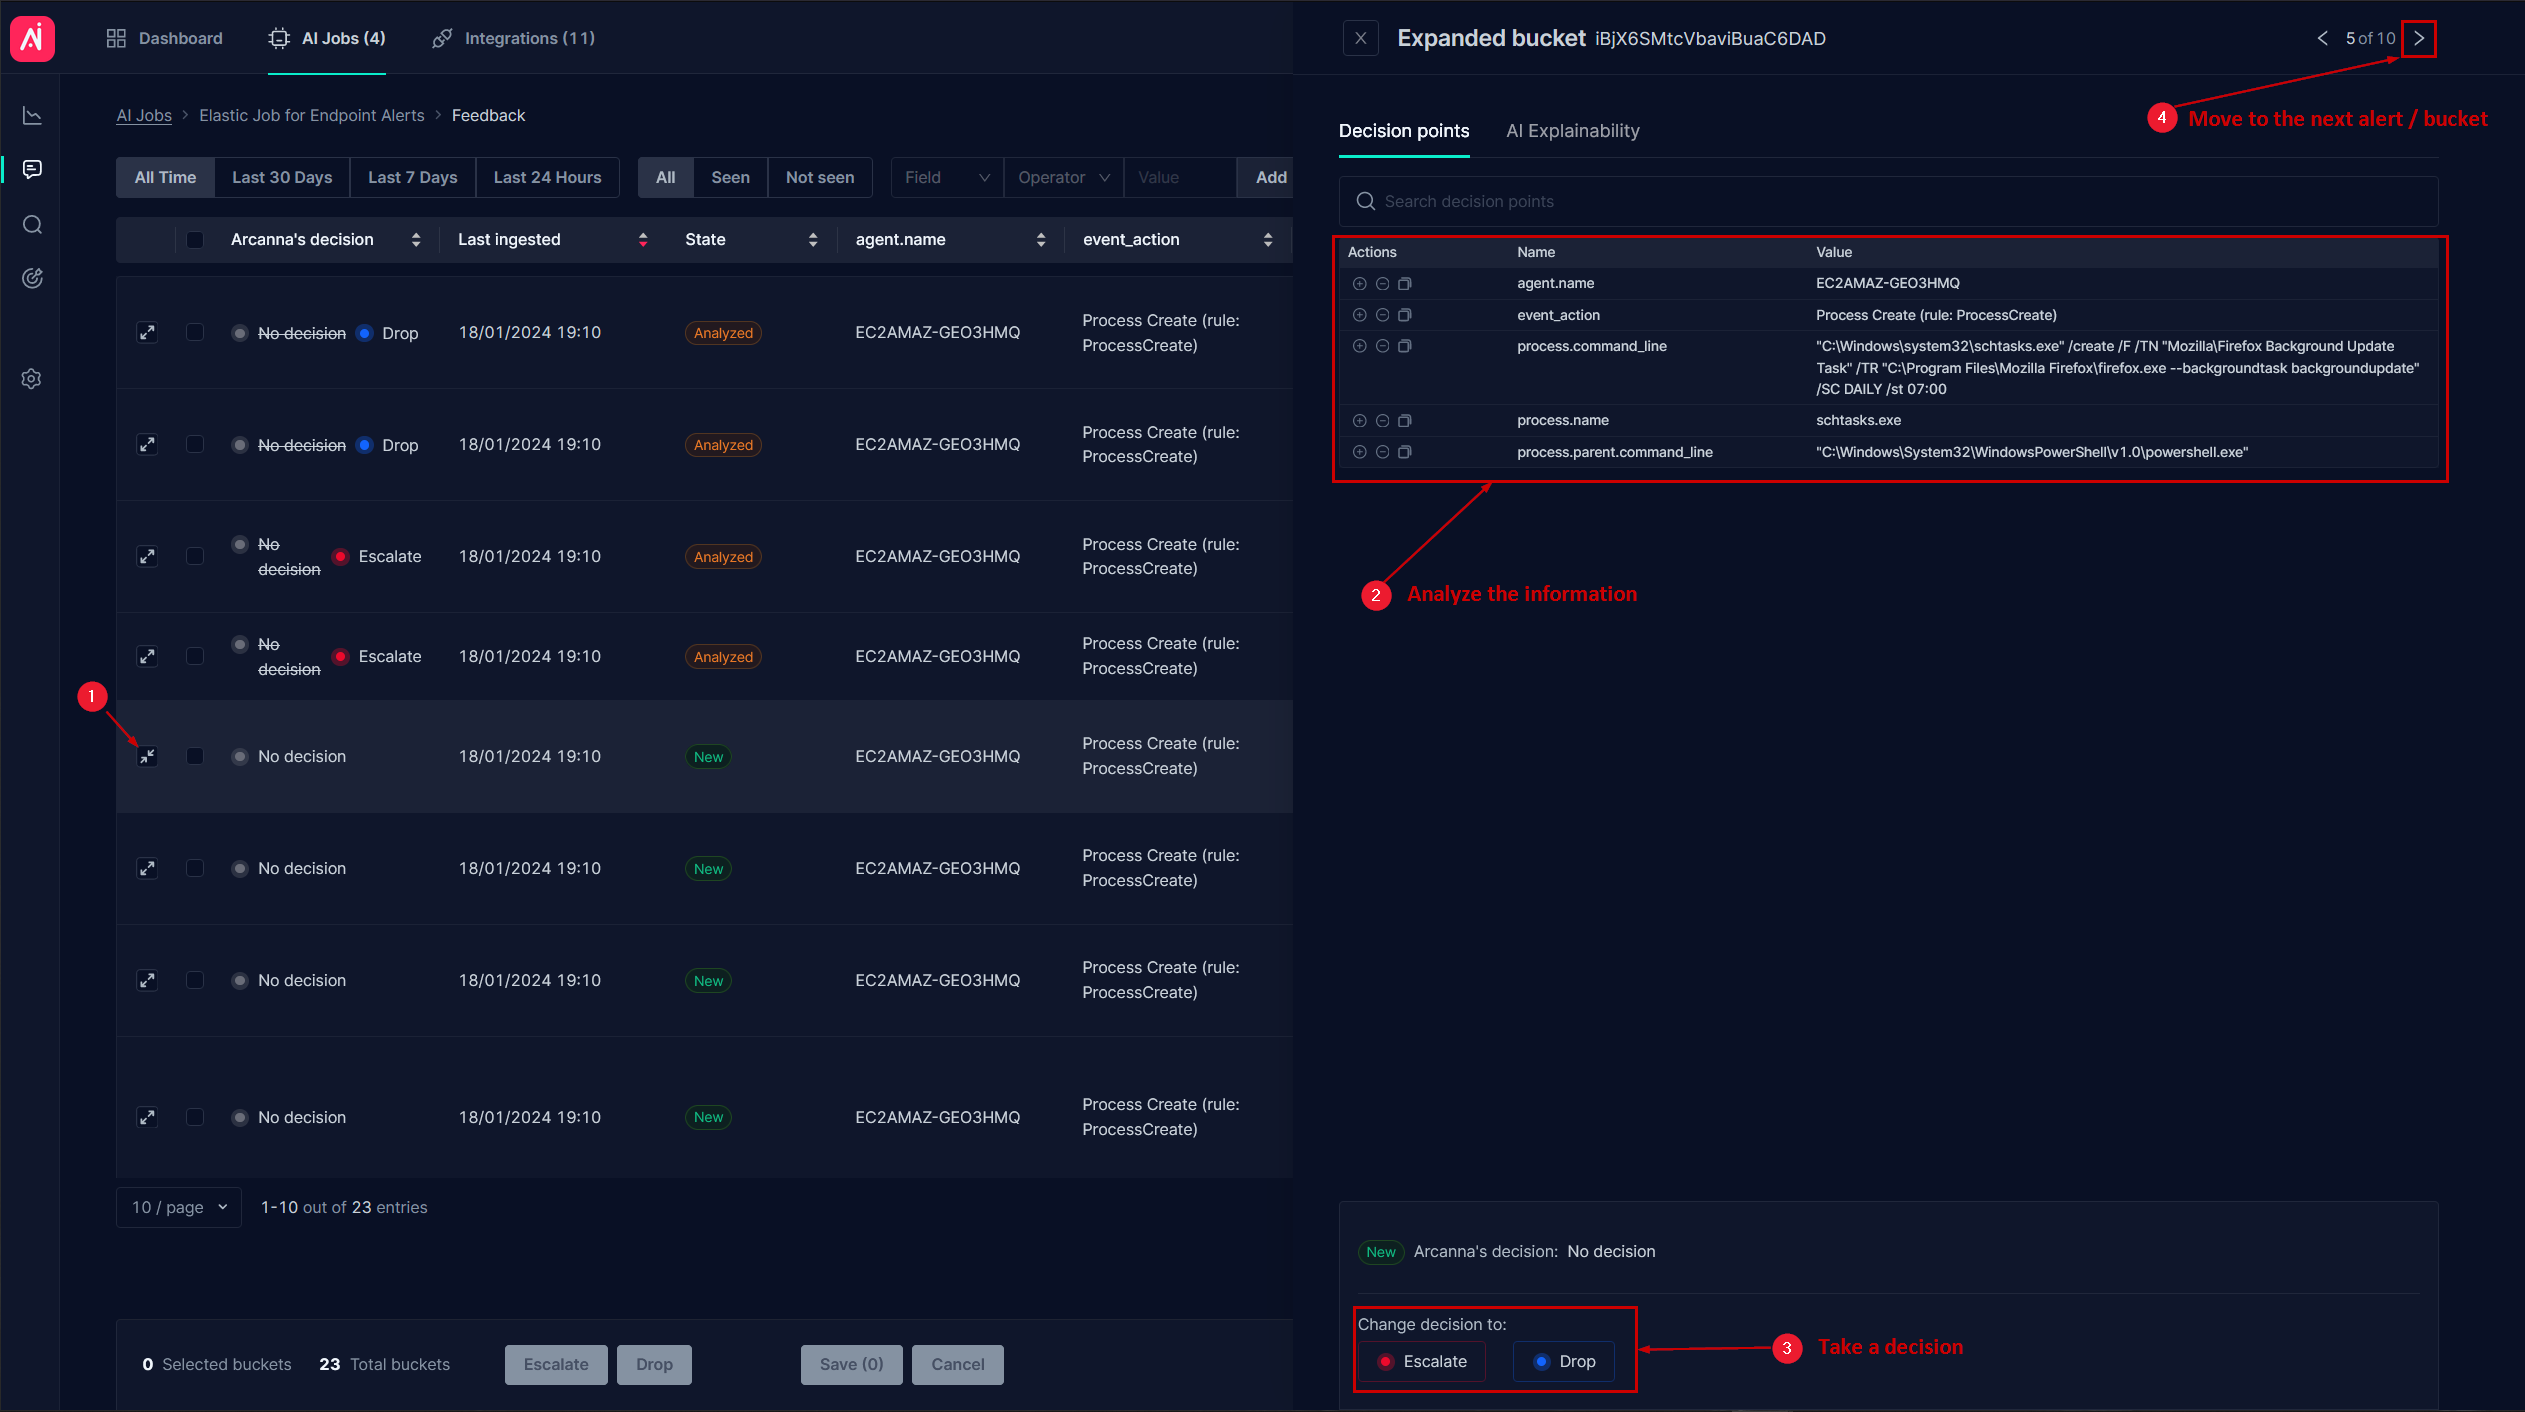
-
Training the AI Model
-
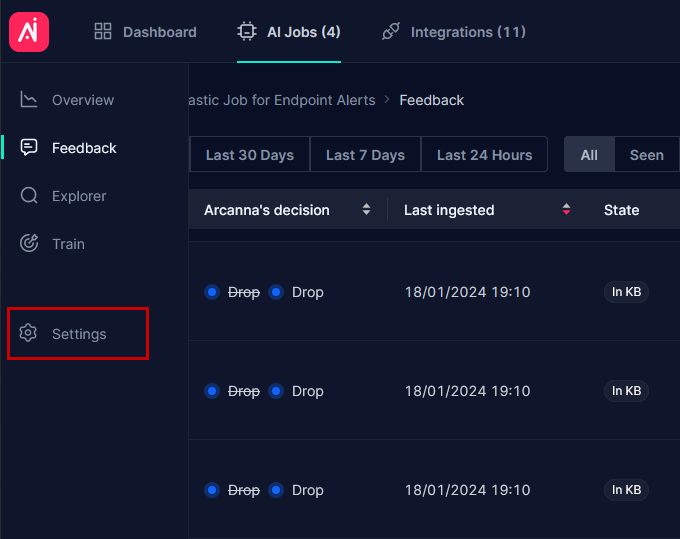
Once feedback was provided, by selecting the "Seen" or "All" option, you can see the state of those buckets turn to "Analyzed". This means feedback was provided for those buckets.
-
To incorporate the feedback into the AI Model, proceed to the training dashboard on the left side.
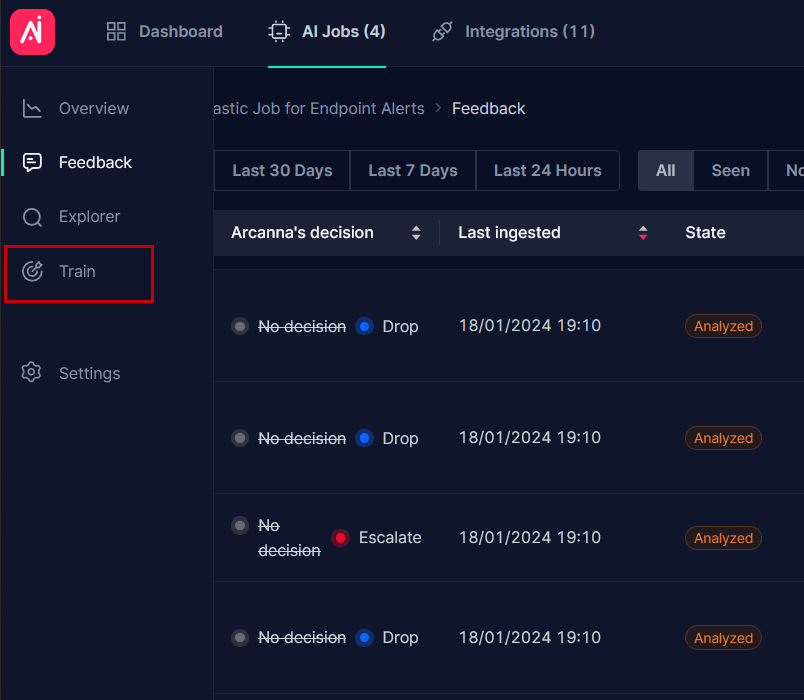
-
Here you can get an overview over the current feedback session and the option to "*Retrain". Hitting retrain will start the training process for this model.

-
Once the training has finished, you will see the following:
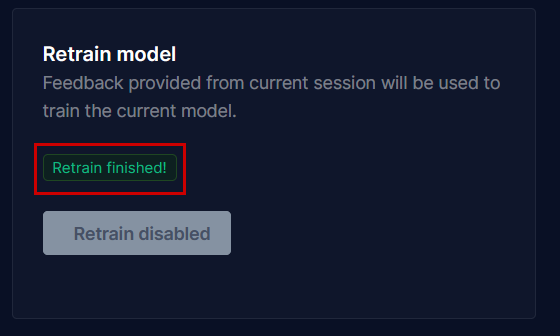
-
This means you have now succesfully trained your first generation AI model. Whenever a new alert will come in, it will receive a prediction, confirm or change it and retrain the model further to increase performance.
Optional Adding Automations
This is usually done once the model is sufficiently accurate
-
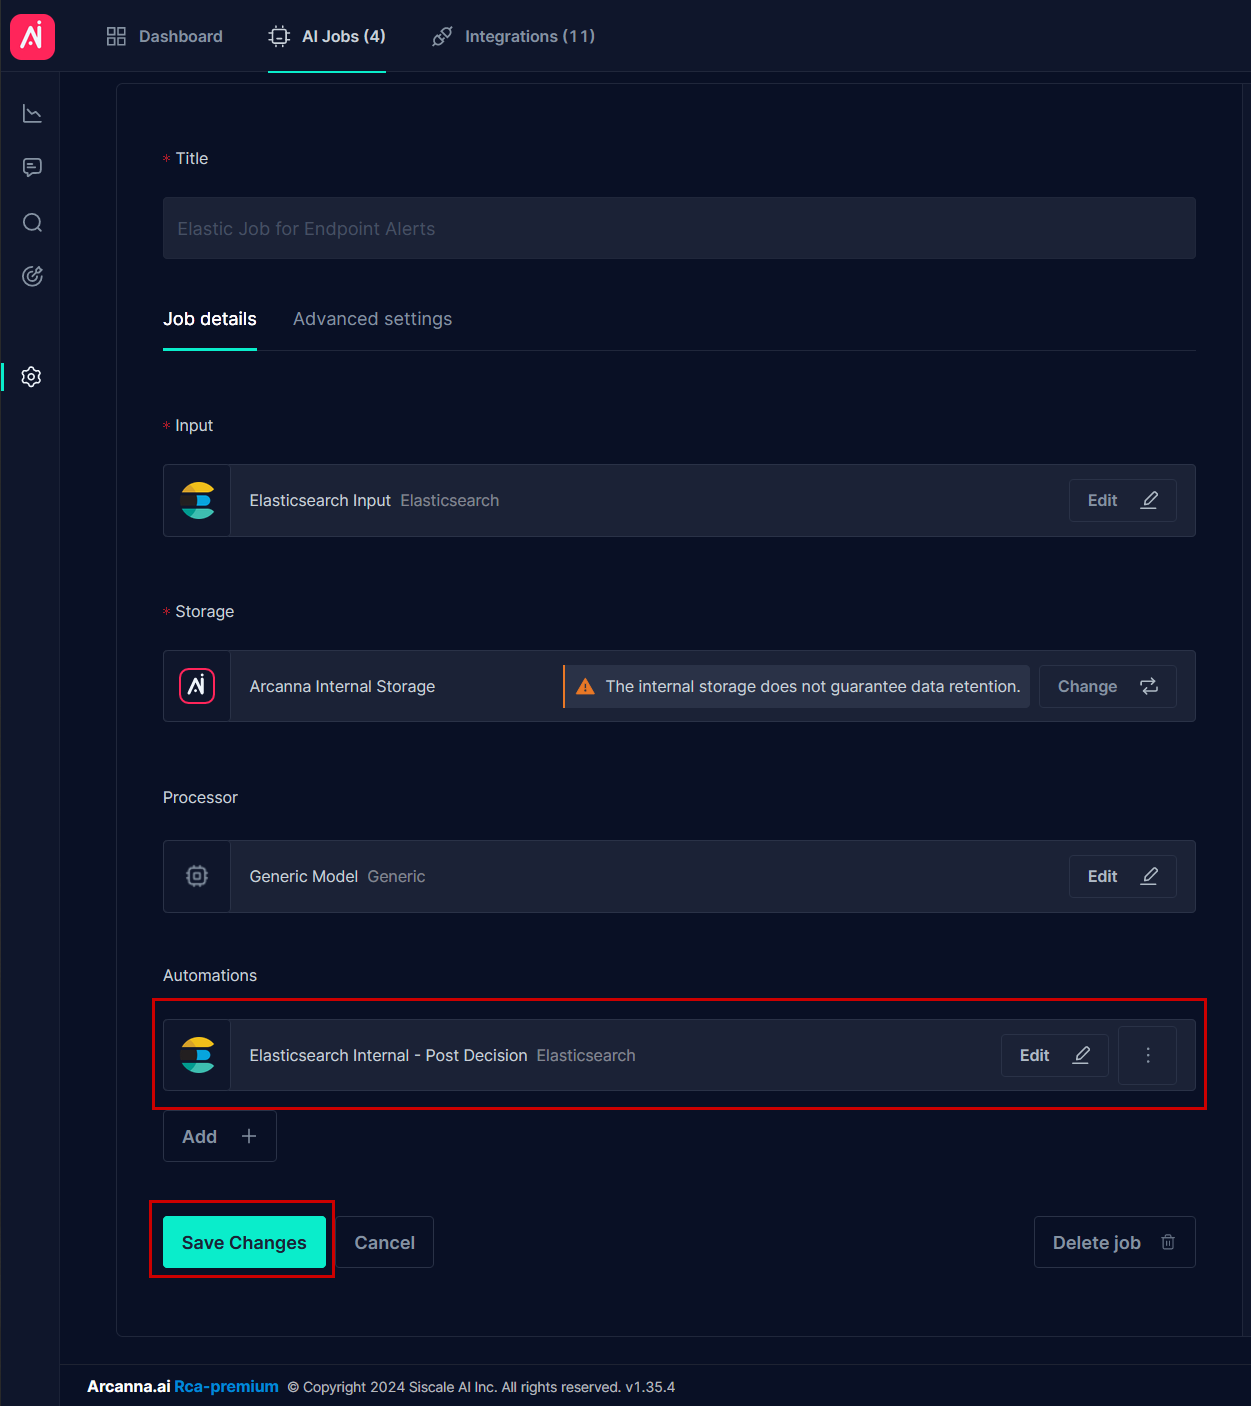
Go to Pipeline Settings
-
Click "Add +"
-
Select your previously configured Elastic Post Decision Integration
-
This wil present you with the classes (labels) configured in the "Advanced Settings" section of the AI Pipeline.
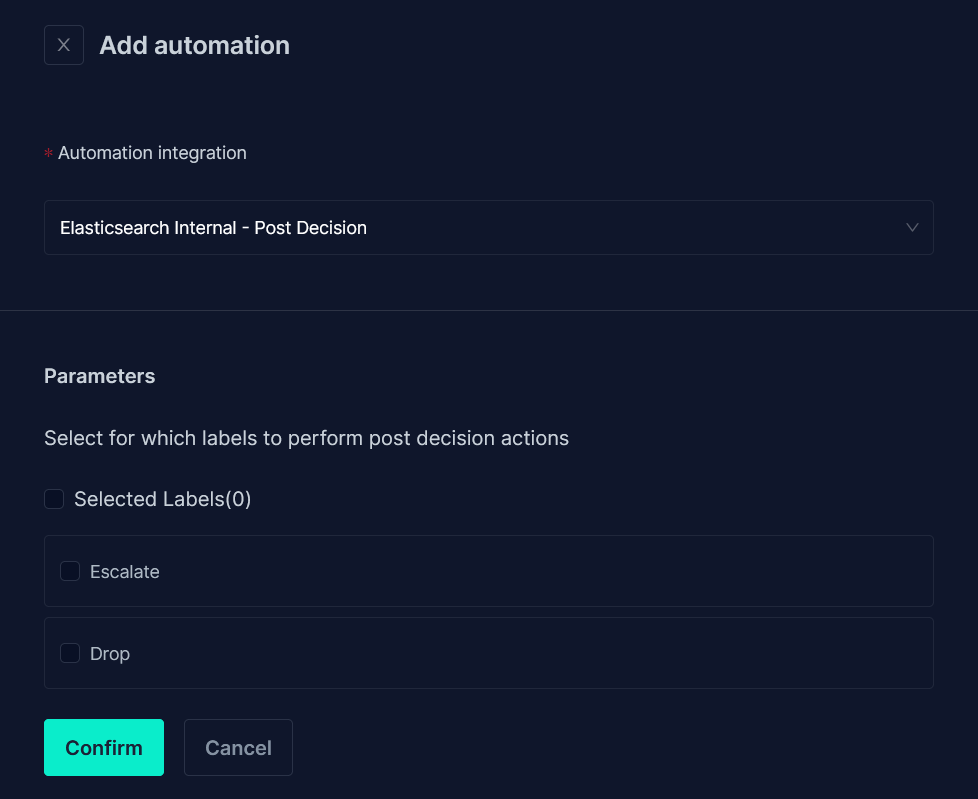
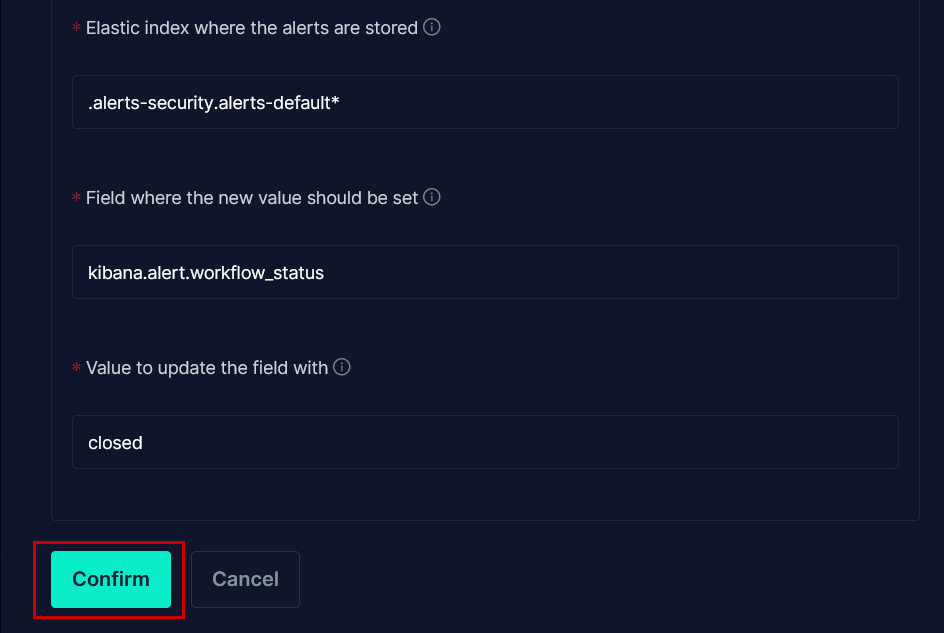
- Select for which class you would like to configure an automation action and customize the parameters. The available parameters are as follows:
-
By default, when selecting a class/label, the decision will be written on the original alert;
-
The other actions have to be enabled and configured, an example is provided in the screenshot.
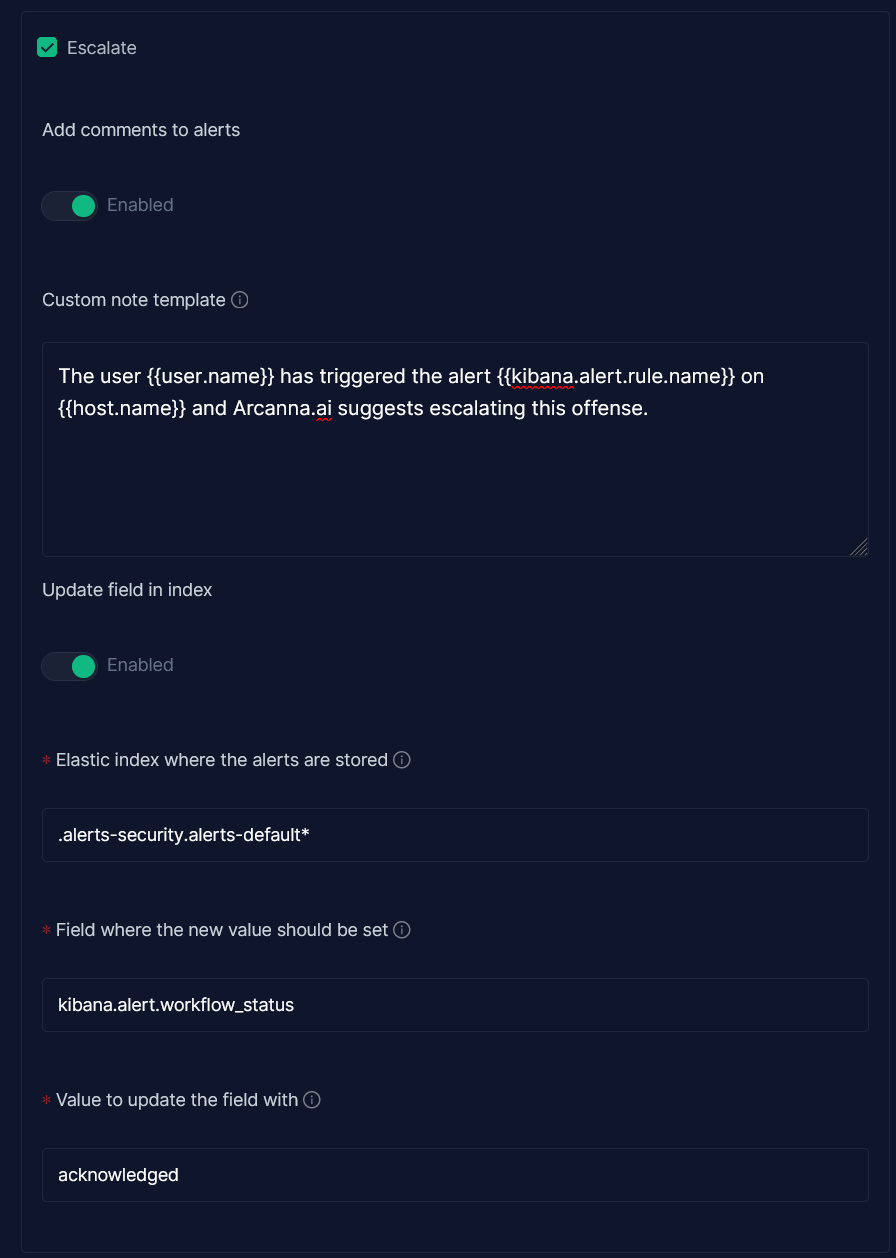
-
Once done, hit confirm.
-
Save Changes to enable the automation.
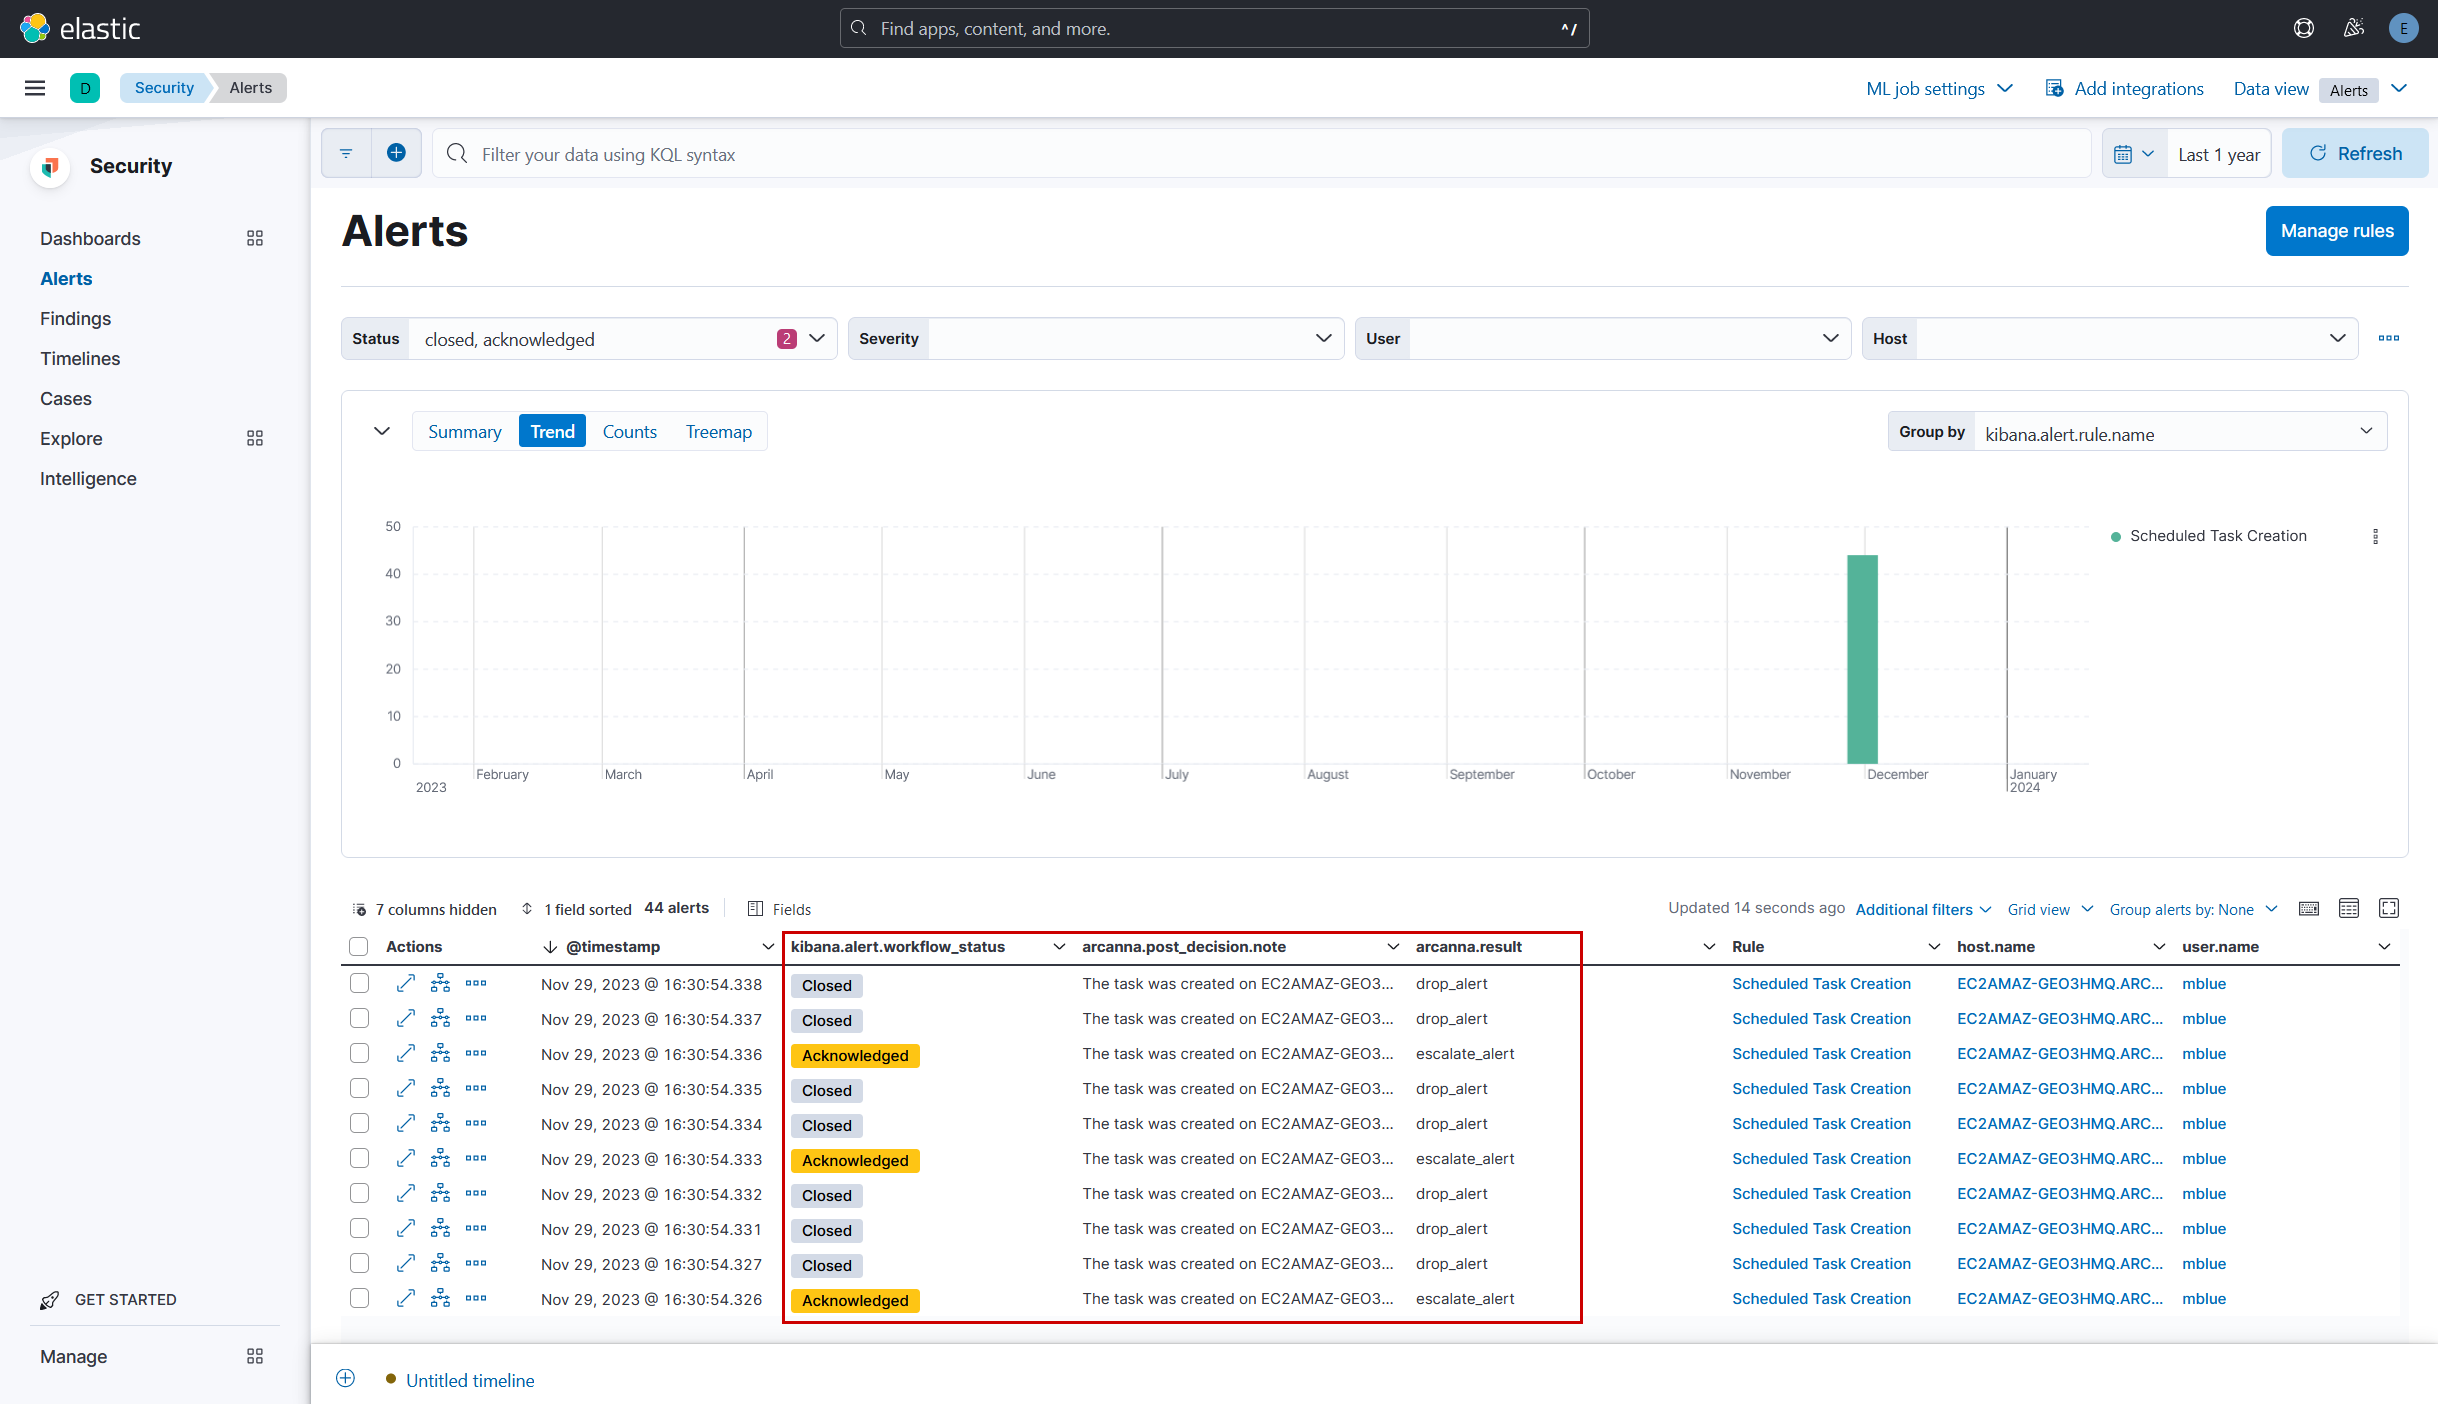
Kibana view
-
Once the setup is complete, the AI Pipeline will start making decisions and updating the alerts live.