Arcanna.ai and Google Chronicle
Introduction
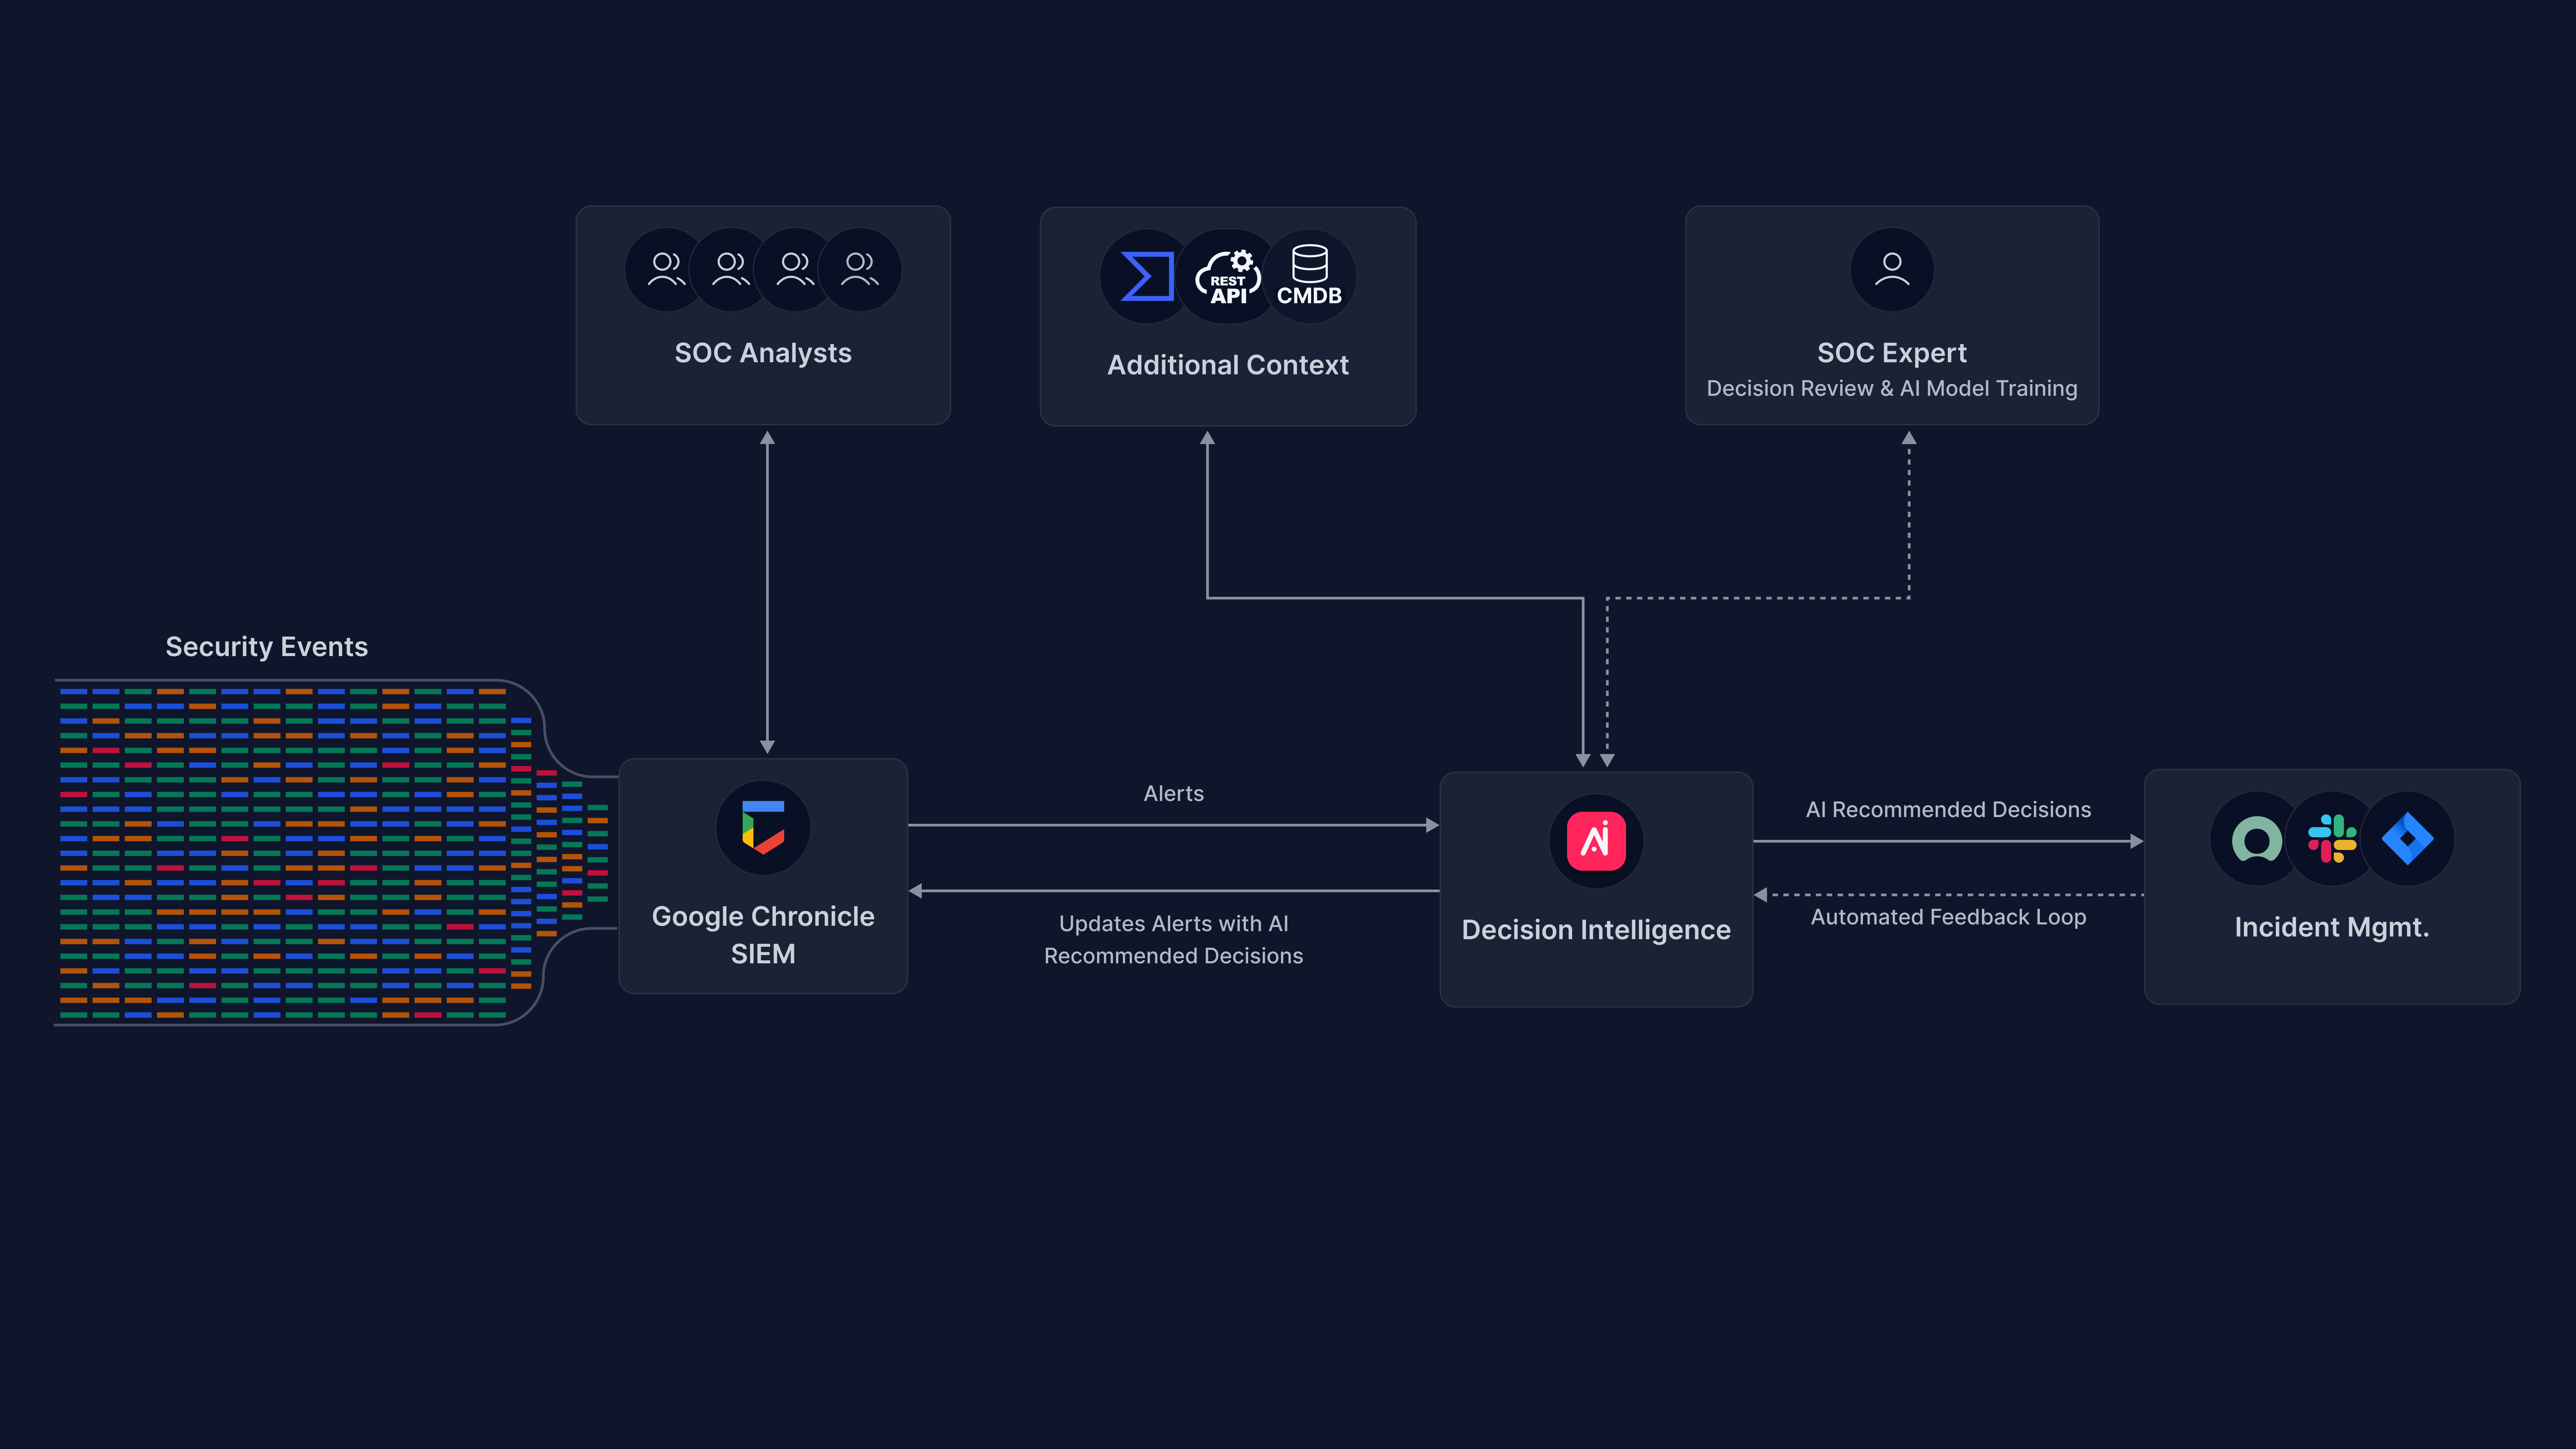
This is a step-by-step guide on how to use Arcanna.ai’s decision intelligence capability on top of Google Chronicle SIEM.
The decisions on alerts/detections read from Google Chronicle can optionally be raised as incidents into an external platform such as TheHive.
Prerequisites
-
Arcanna.ai - Arcanna.ai can be deployed on-premise or in your Kubernetes cluster. For setup, you can follow this user guide. For flexibility reasons, Arcanna.ai is exporting the AI processed alerts to an internal Elasticsearch/Opensearch data warehouse, that needs be installed at the same time with Arcanna.ai. You can use an Elasticsearch/Opensearch instance you already have, or a new one dedicated just for Arcanna.ai backend.
-
Chronicle - Chronicle is available as trial here.
How to connect with Chronicle
API key and JSON string of a service account
These are provided to you by the Chronicle service representative, so you need to get in touch with him/her here.. You will receive a Customer id, an API Key and a Service Account json, all of these will be required to create the integration.
Create the integration in Arcanna.ai
-
Go to the Integrations page and click on Add new integration
-
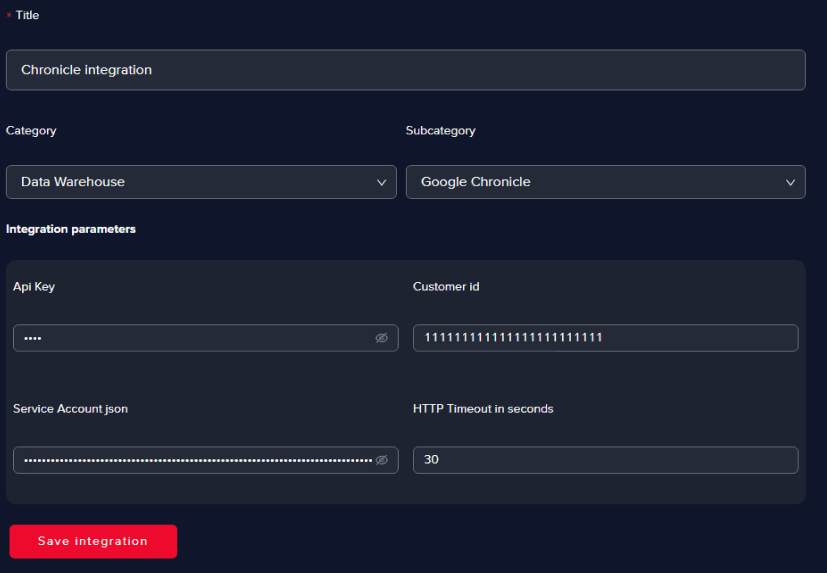
Fill in all the fields as in the image below and click Save
 info
infoYou can choose any title for the integration, but we recommend using a suggestive one. In the Integration parameters section, all the parameters except for the HTTP Timeout in seconds are proprietary to each Chronicle customer.
Processing alerts using AI
What the AI pipeline does
- reads the alerts (Input)
- processes the alerts with a universal AI model (Process)
- saves the results in the data warehouse (Output)
- creates incidents in an external system (Automation)
Creating an AI pipeline
To showcase this process, we will create a simple AI pipeline that will train an AI model to perform alert triage on Chronicle alerts and create incidents in TheHive.
-
Go on the AI Pipelines page and click on Create new pipeline
-
Give a name to the pipeline and select Alert Triage as Category

-
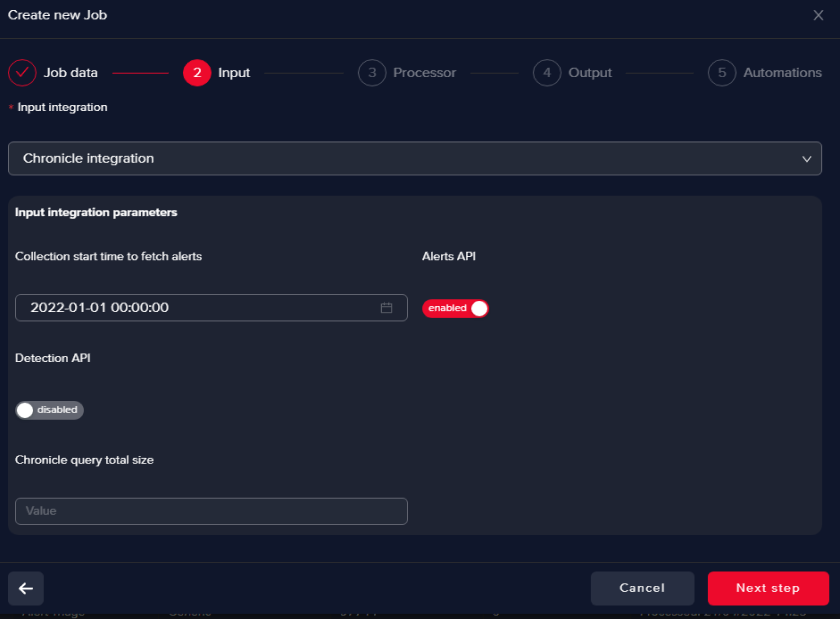
Pick the Chronicle integration you defined
Here you can filter based on timestamp (start time)
 info
infoAlerts API pulls Chronicle alerts, no enrichment involved, they come as they are.
Detection API is used to ingest context-aware decisions, all the supporting information from authoritative sources (e.g. CMDB, IAM, and DLP) including telemetry, context, relationships, and vulnerabilities are available as a “single” detection event.
Below you can find documentation links regarding the difference between alerts and context-aware detections and the difference between Alerts API and Detection API
Resources:
-
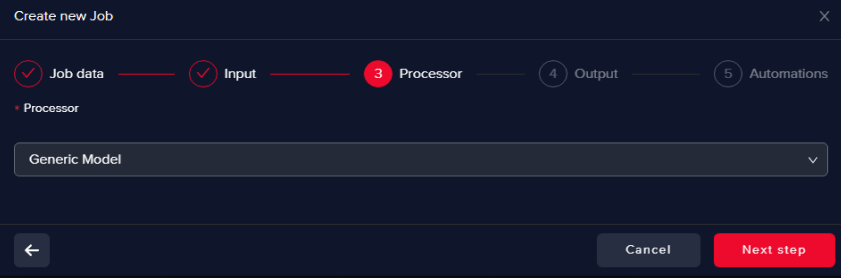
Select Generic Processor
This will help us to train an AI model from scratch.
-
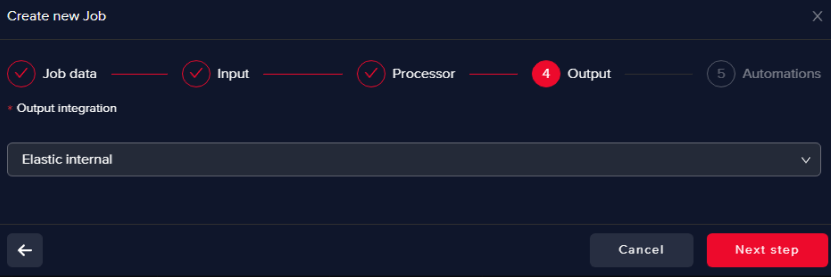
Select an Output data warehouse
It can be the same or a different one as the Input data warehouse.
-
Choose the Automation Integration
At this point, you can define:
-
post-decision automations, such as opening an incident in TheHive, or other compatible integrations.
-
enrichment automations, such as Virus Total or Umbrella.
For more details check Integrations section.
Train an AI model
-
Start the AI pipeline
Start the pipeline by selecting it and clicking on Play
Check if the status of the pipeline turns into STARTED
You will notice that the Processed count increases, meaning that the alerts are collected by Arcanna.ai
You can always EDIT the pipeline to tune the above parameters


-
Select AI features
You need to pick some relevant alert fields that the AI will use for training and decision-making. These are called features. and are also used to create buckets.
Buckets are grouped alerts with the same values for the selected features.
Go to the Pipeline feedback page and click on Feature Selection
Since the selection of features defines the fields used to make a decision, in this step we should either select only the fields from the list that are relevant for the investigation, or decide first-hand if an alert is false-positive.
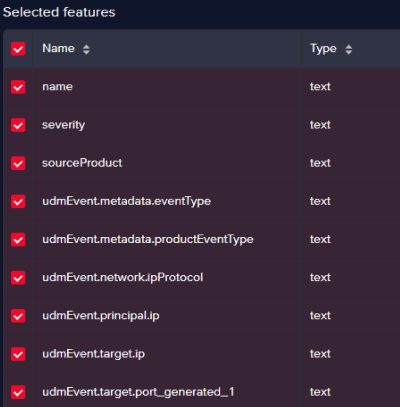
The pipeline created in this tutorial will perform alert triage on all alerts and look at high-level information. Thus, to achieve this target, we can pick the following fields:
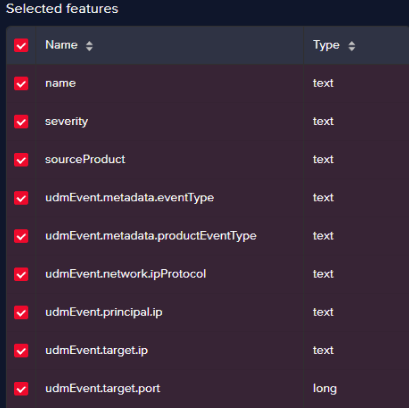
Alert information:
Field name Description namethe name of the alert severitythe severity of the alert sourceProdcutthe source product that generated the alert in Chronicle (e.g. Check Point firewall) udmEvent.metadata.eventTypetype of event (e.g. NETWORK_CONNECTION) udmEvent.metadata.productEventTypelower level event type (e.g. THREAT – vulnerability) udmEvent.network.ipProtocolnetwork protocol (e.g. TCP) udmEvent.principal.ipsource IP udmEvent.target.iptarget IP udmEvent.target.porttarget Port Since Arcanna.ai AI/ML engine uses NLP, parsing the last 3 fields (source IP, target IP, target Port) which contain numerical values is not possible.
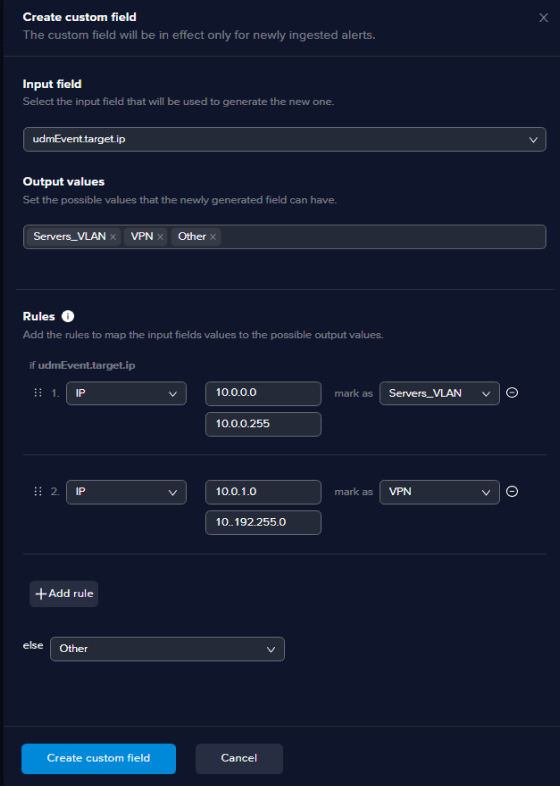
Instead, we need to create custom features to ‘translate” numbers into text.
Click on the Create custom field button on the top right of the feature selection page and configure as in the example below:
 info
infoFor the Output values section, after each value you enter for mapping hit Enter.
After you click the Create custom field your new field will be created and the name will depend on the field you selected as input.
In this example the input field is udmEvent.target.port and the new custom field will be named udmEvent.target.port_generated_1.
The new field should replace the old field in the selection feature process as below:
The same process should be followed for IP containing fields, except that when you create such fields, you enter the subnet or the IP range, as below:
After saving the Feature Selection, an async automated process will kick in and start computing the ML buckets to be used and the buckets will appear in the Feedback page.
Process time will vary depending on the number of alerts.
-
Feedback and Retrain
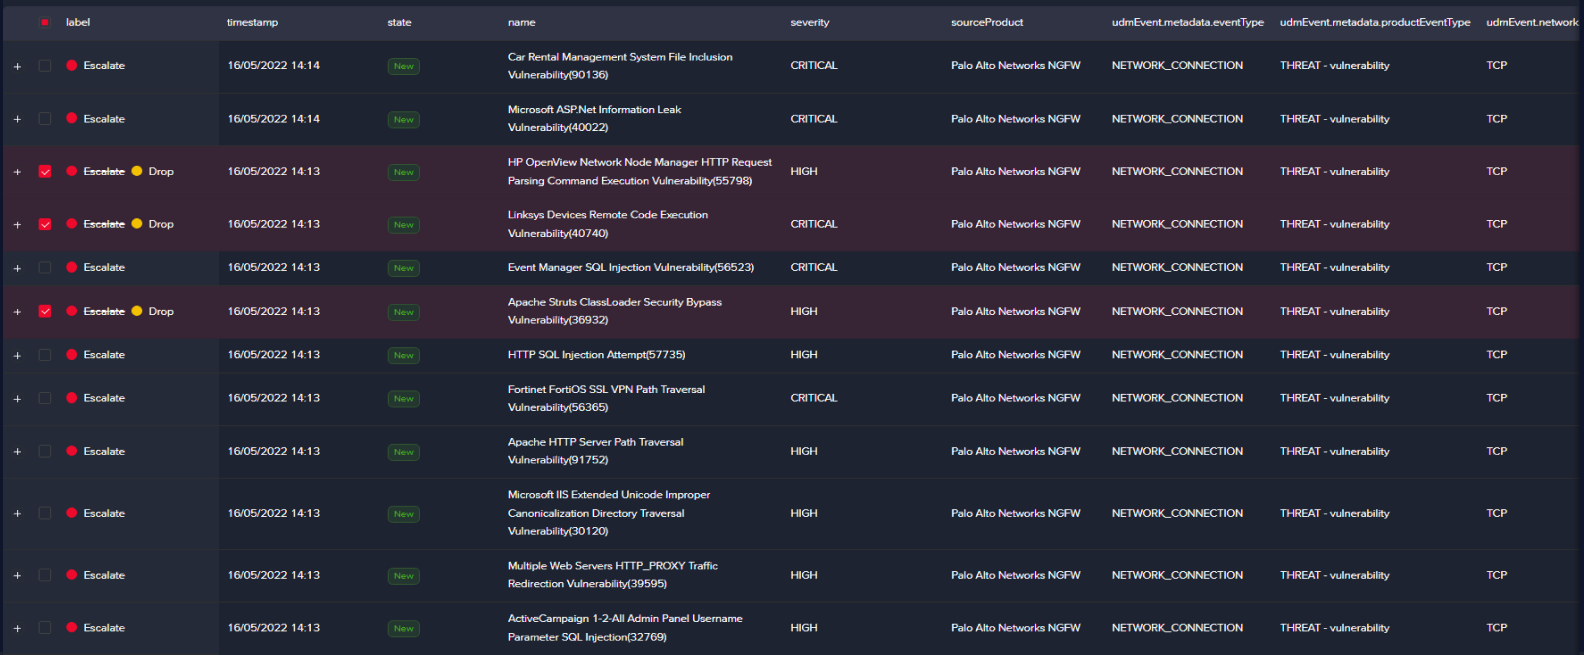
With buckets being generated, you can provide feedback. By default, the Arcanna.ai labels with "ESCALATE" all alerts before training a model.
Based on the selected features, you should be able to make a decision of ESCALATE or DROP.
Make sure you express your feedback for both cases because unbalanced feedback might result in an unwanted bias.
With the help of automation, REST API, or just by reading the results in the Output data warehouse, ESCALATE and DROP results mean opening a ticket in TheHive and investigating the alert further, in this case.
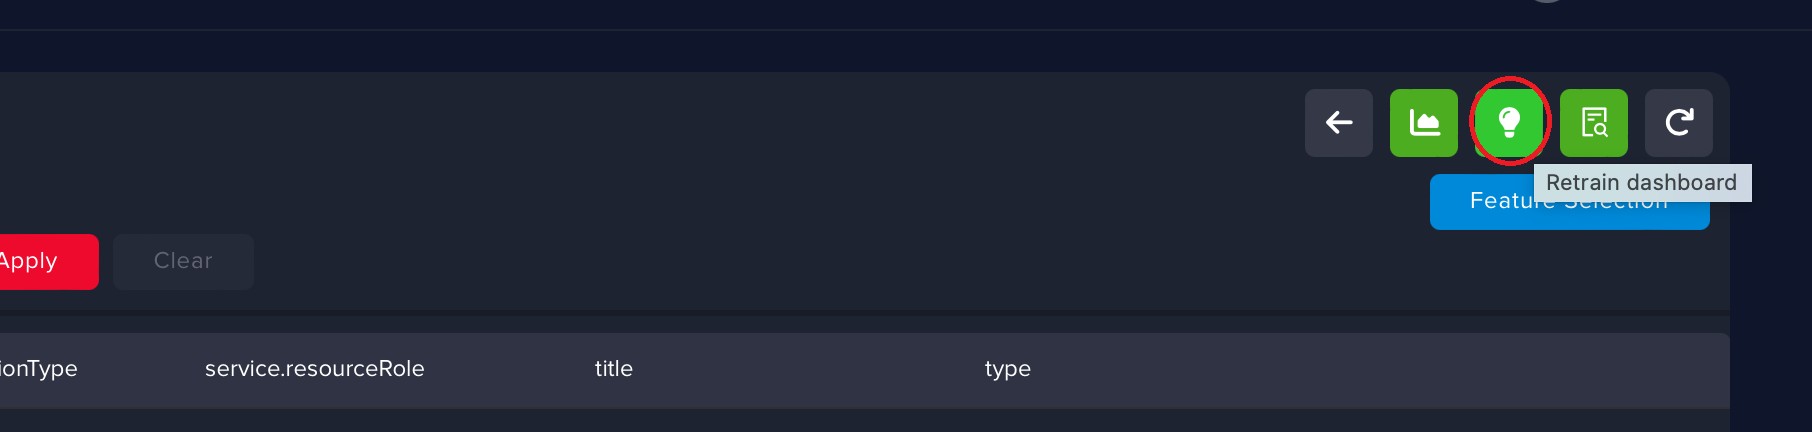
After you finish, go to the Retrain Page and click Retrain.
When the retraining session is finished, you can see the feedback statistics, things like how many buckets got changed, how many buckets were confirmed, and who performed the feedback session.
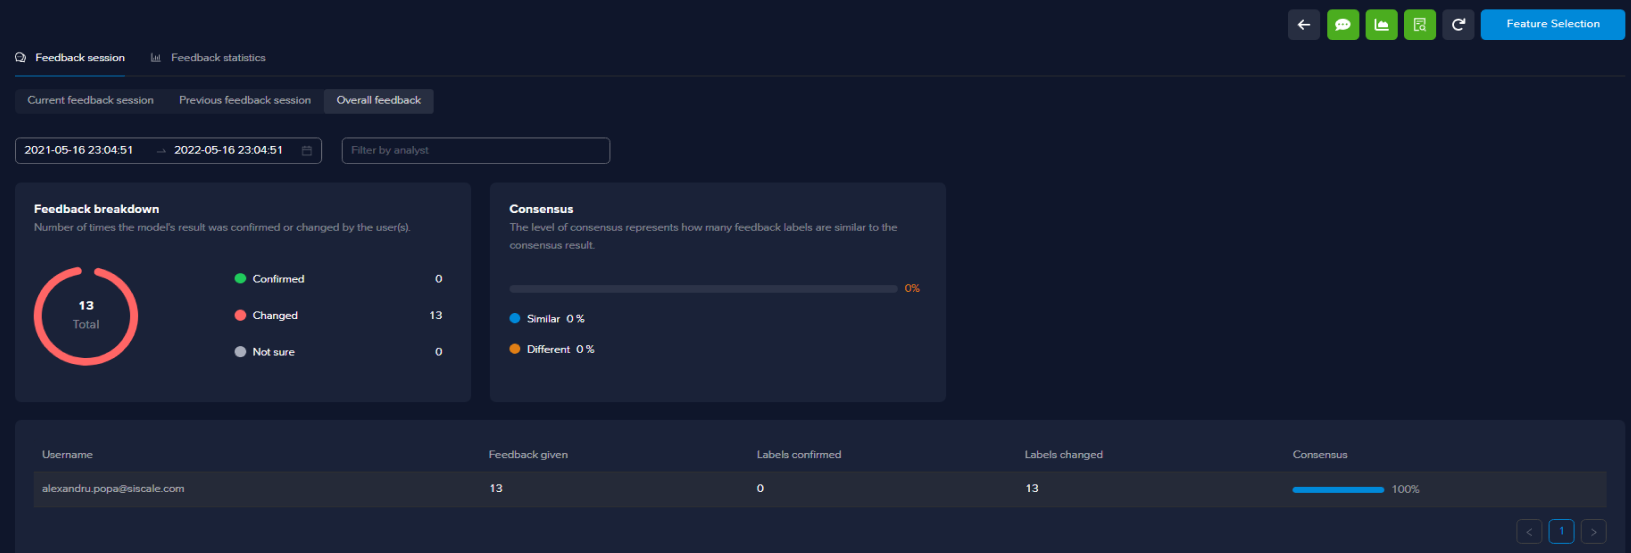
On the Pipelines page, you can see when the pipeline last processed alerts and also when the last train took place (start time and finish time).

Once the training is finished, you have a trained AI model, ready to make decisions according to your feedback.
For checking the results, you can go to the Events page to check the inference for each alert.

Now, all newly generated alerts will be processed by the AI model.
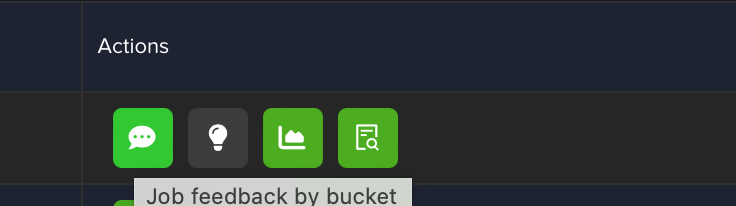
You can check the new AI model applied to new alerts in the Pipeline feedback by bucket page or on the Events page.
This process needs to be repeated every time you identify and select new features.
Raise incidents for investigation
In case you want to configure a post-decision automation such as TheHive, Arcanna.ai will automatically create incidents to be investigated by security analysts. The incidents will include the necessary details required for investigation, populated in a structured format. Arcanna.ai also populates observables and triggers Cortex analysers for Threat Intel.
More details on how to install TheHive and Cortex:
How to connect with TheHive & Cortex
Access tokens
-
Obtain the API Key from the Hive Dashboard
- Under the Account section in the top right corner, click on Settings and then on API Key.
-
Obtain the API Key for Cortex here
Create the integration in Arcanna.ai
-
Go to the Integrations page and click on Add new integration
-
Fill in all the fields as in the image below and click Save
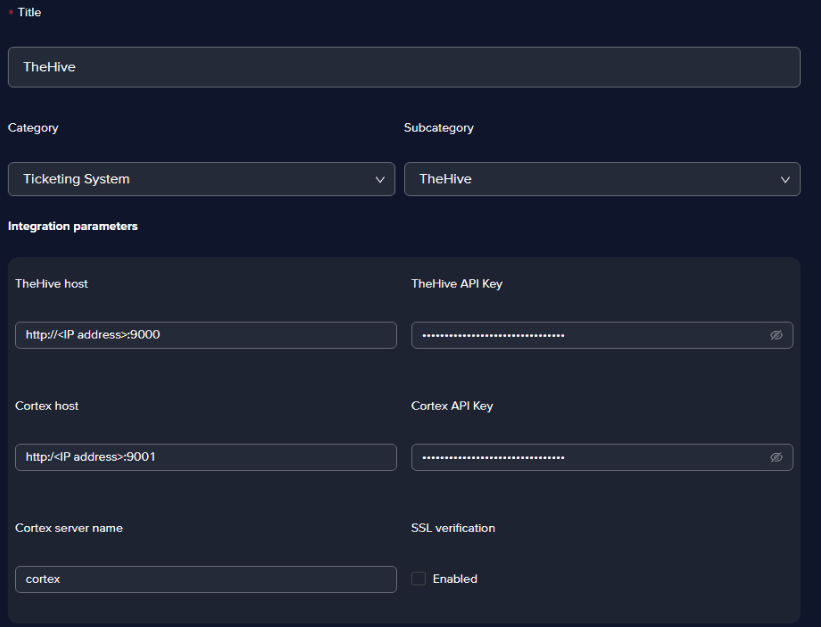 info
infoYou can choose any title for the integration, but we recommend using a suggestive one. In the Integration parameters section, all the parameters except for the HTTP Timeout in seconds are proprietary to each Chronicle customer.
Choose the Automation Integration
This step can be done at pipeline creation, or when editing an existing pipeline.
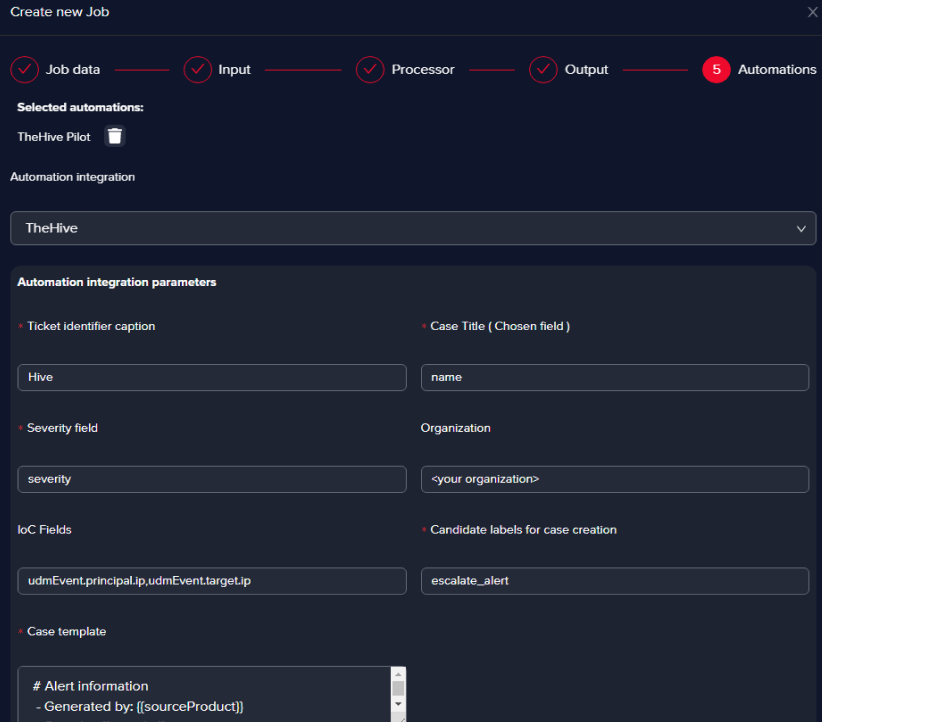
- Case title and Severity fields
You must pick the fields in the Chronicle alerts that point exactly to a case title name that’s suggestive (the title of the alert usually) and the severity of the alert, which is what we did in the example.
- IoC Fields
We picked the source IP and the destination IP as they appear in the Chronicle alert (udmEvent.principal.ip, udmEvent.target.ip). The purpose of the IoCs we picked is that they can be enriched in TheHive with the help of Cortex.
Resource: https://blog.thehive-project.org/2017/06/19/thehive-cortex-and-misp-how-they-all-fit-together/
- Candidate labels for case creation field
We’ve chosen escalate_alert as this translates into every bucket that will be escalated in Arcanna.ai will create an incident in TheHive for the alerts within the specific bucket.
- Case template fields
We suggest picking fields from the Chronicle alert that give you as much info as you need in a ticketing system, please see below one suggestion of how the template should be configured in Arcanna.ai to look good in the Hive:
                  # Alert information
                  - Generated by: {{sourceProduct}}
                  - Severity: {{severity}}
                  - Time: {{timestamp}}
                  - Chronicle link: {{uri}}
                  - Event description: {{name}}

                  # Flow information:
                  - Source: {{udmEvent.principal.ip}}
                  - Destination {{udmEvent.target.ip}}
                  - Protocol: {{udmEvent.network.ipProtocol}}
                  - Destination Port: {{udmEvent.target.port}}
                  - Action: {{udmEvent.securityResult.action}}

                  # Raw log entry
                  {{rawLog_decoded}}
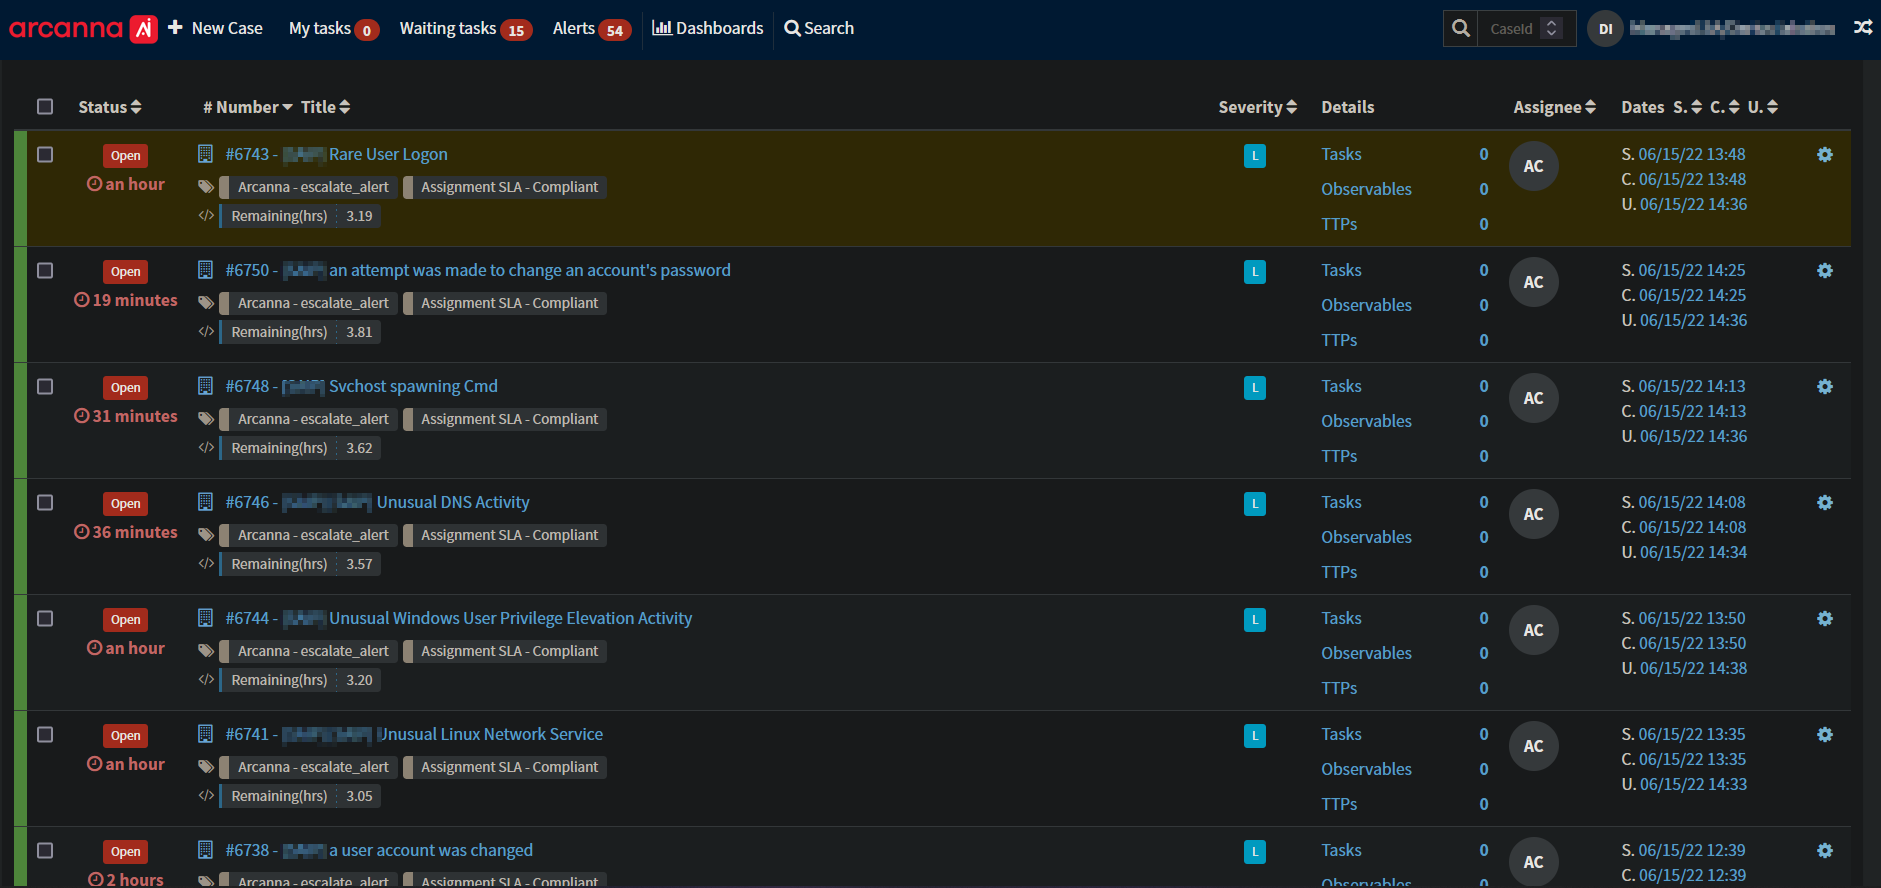
A snippet with tickets automatically created by Arcanna.ai in TheHive can be seen below.