Arcanna.ai and TheHive
Introduction
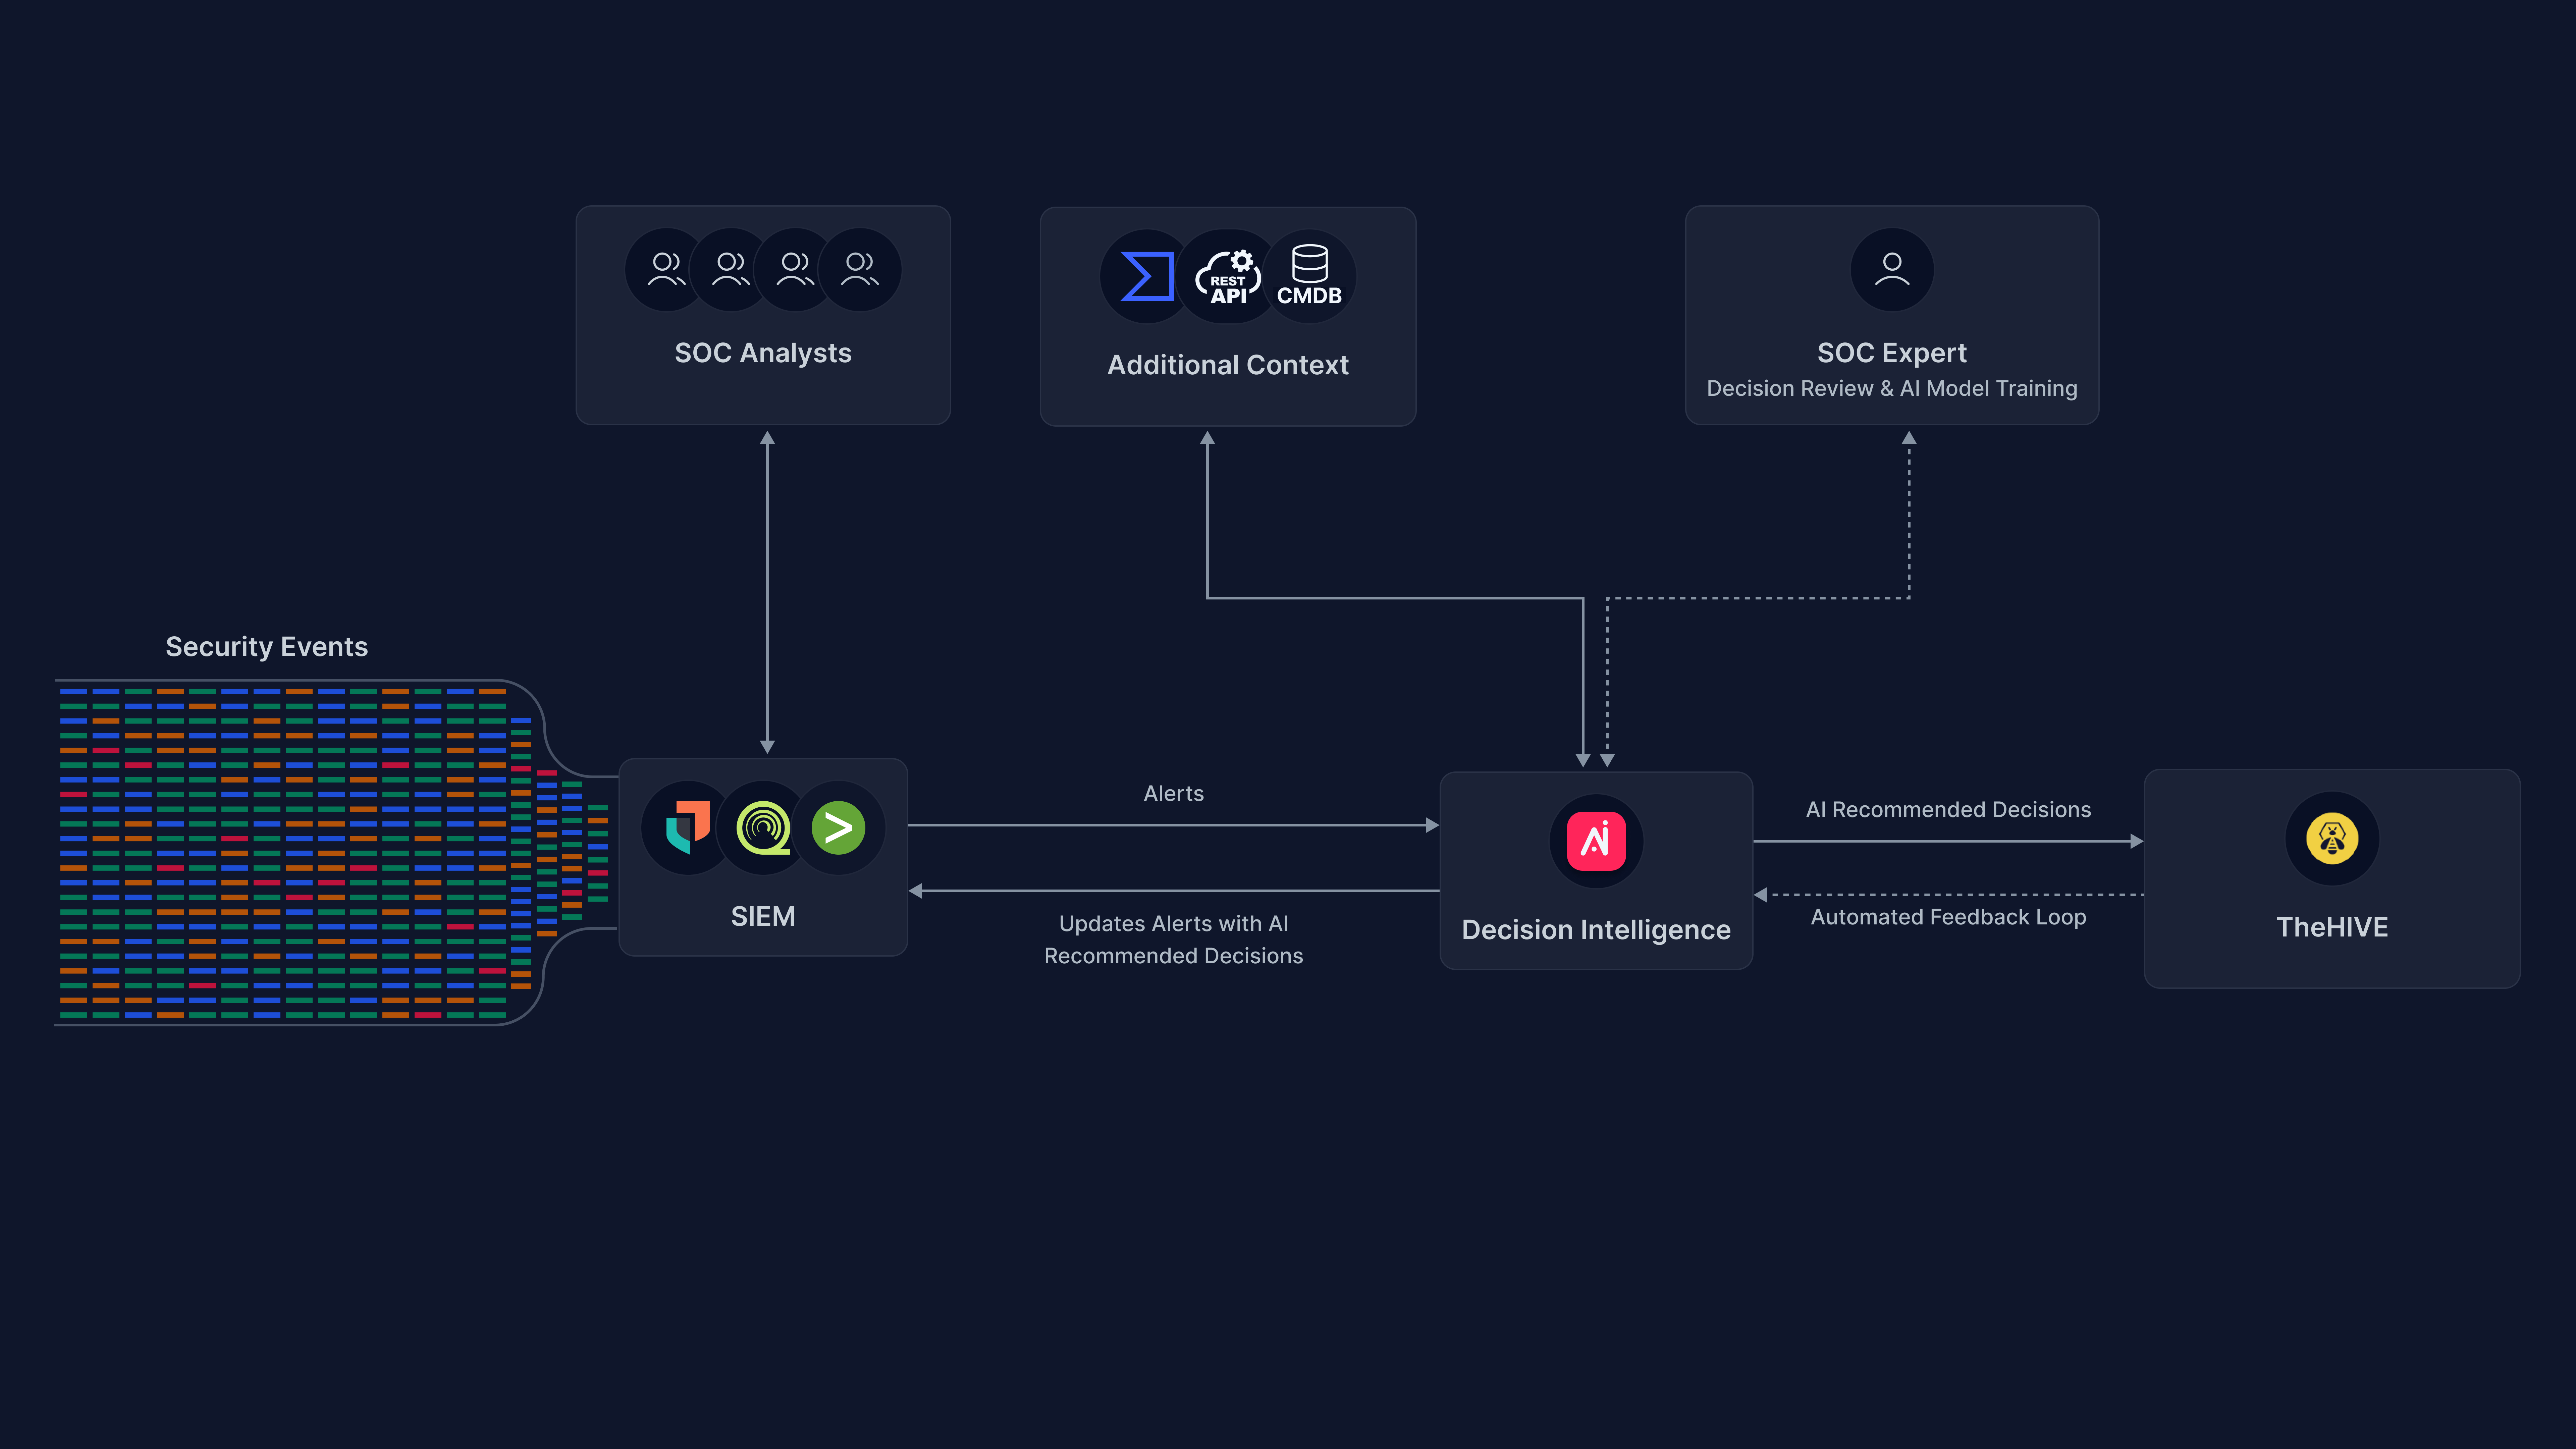
Arcanna.ai integrates with TheHive for post-decision automations such as creating a ticket including the alert's details and Arcanna.ai decision on escalate or drop the alert.
Prerequisites
-
Arcanna.ai - Arcanna.ai can be deployed on-premise or in your Kubernetes cluster. For setup, you can follow this user guide. For flexibility reasons, Arcanna.ai is exporting the AI processed alerts to an internal Elasticsearch data warehouse, that will be installed at the same time with Arcanna.ai. This can be the same Elasticsearch instance you already have, or a new one dedicated just for Arcanna.ai backend.
Create the integration in Arcanna.ai
To create an integration with TheHive, select the Category: Ticketing System and Subcategory: TheHive.
You will need to generate API Keys from TheHive and Cortex Dashboards, under the Account section in the top right corner, click on Settings and then on API Key.
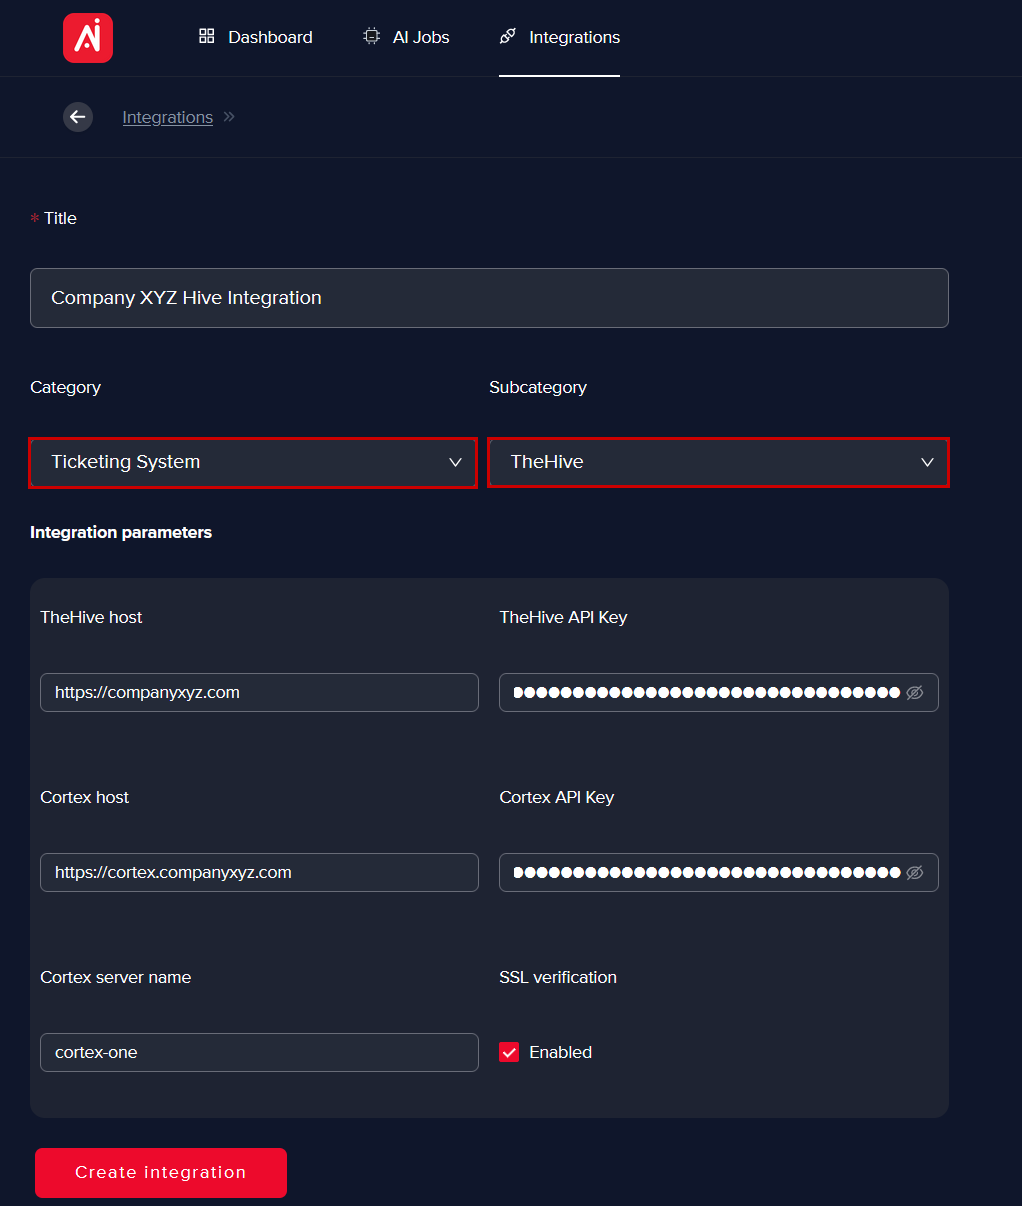
Fill in the necessary connection details and parameters, following the template and hit the Create integration button. From this point, your integration will be available in the Integrations and can be edited/deleted at any time.
TheHive listens by default on port 9000 and Cortex on 9001.
Configure the post-decision automation
All automations are configurable on the last step of pipeline creation process. Here you should be able to select the previously configured integration.
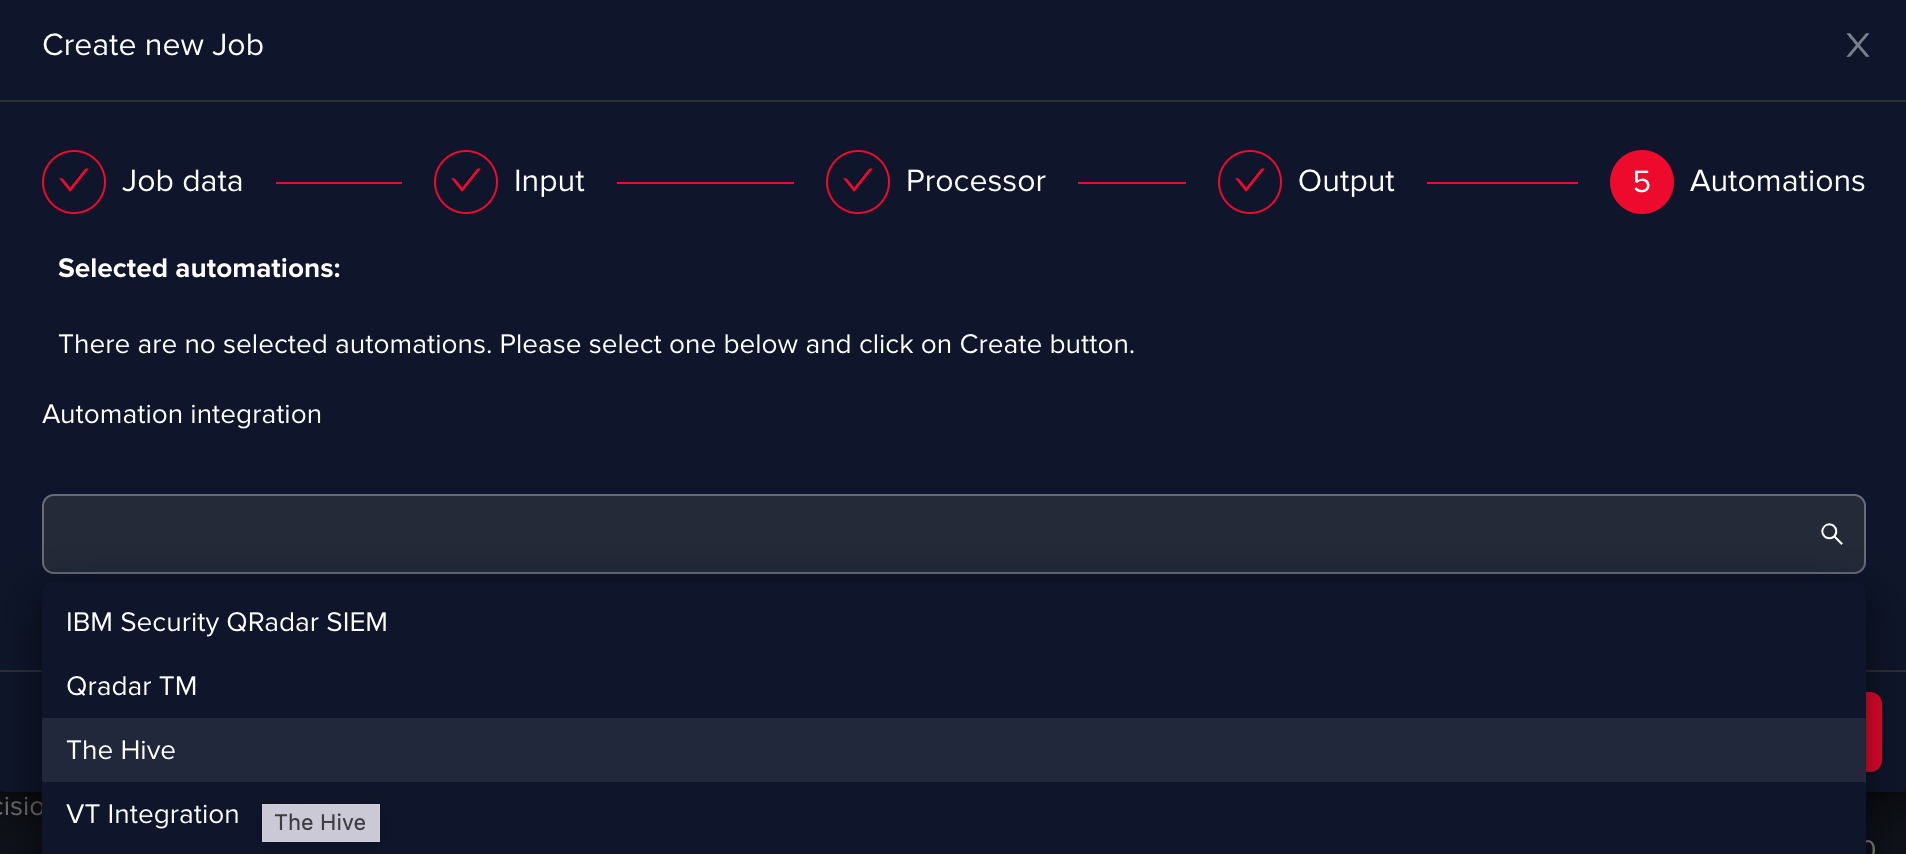
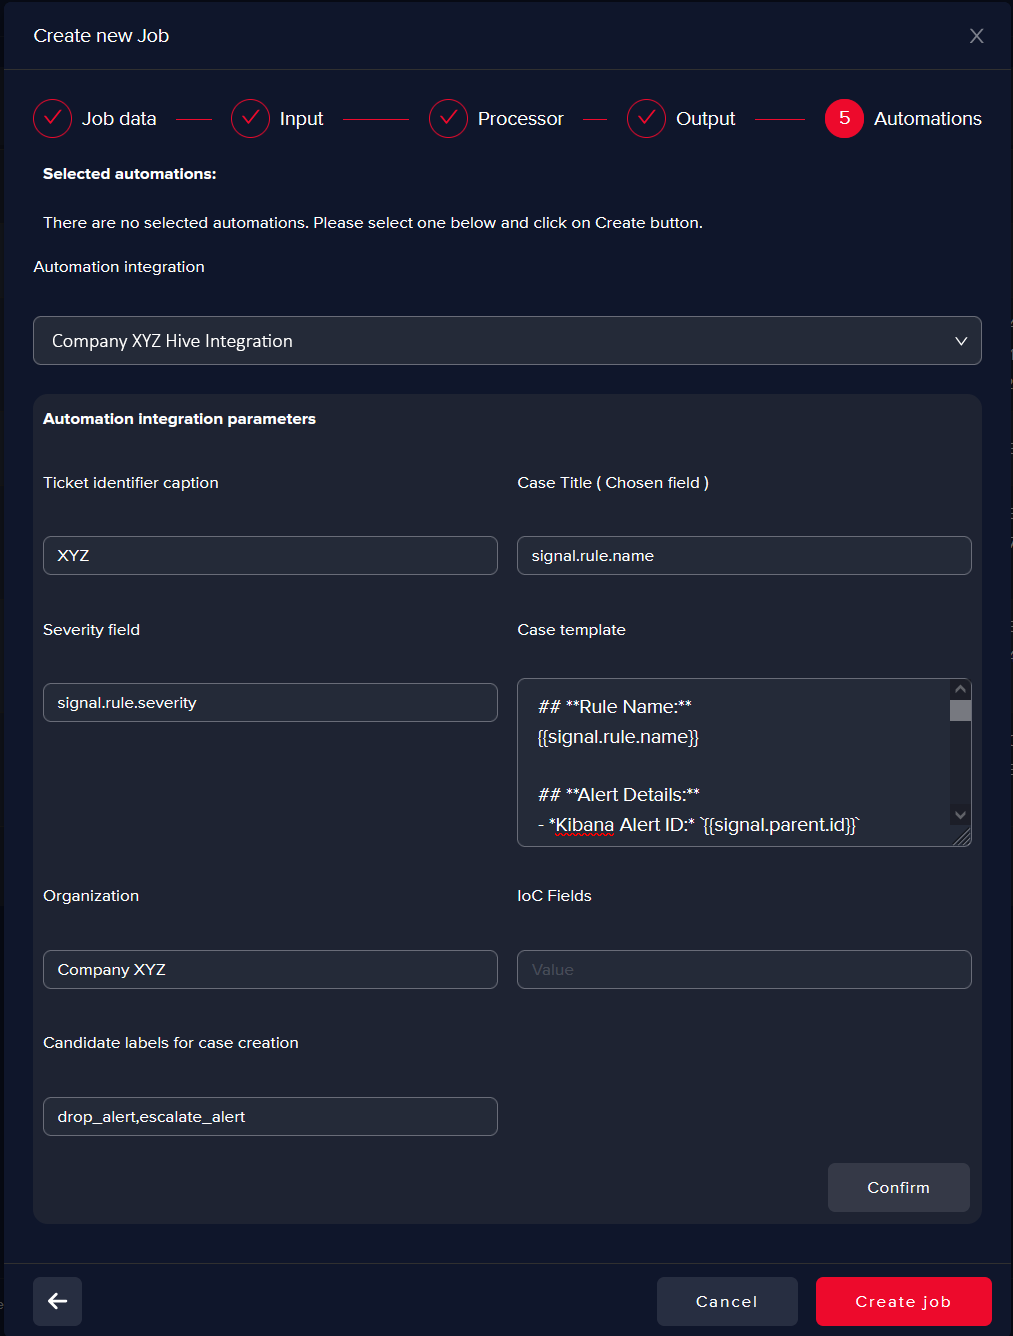
A windows with all available Automation integration parameters will expand:
- Ticket identifier caption: A custom text, identifier for tickets opened by Arcanna.ai It will appear in front of the ticket title between braces.
- Case title: Allows the user to specify the exact field from the ingested alerts that will represent the name of the case.
- Case severity: It’s similar to the case title functionality and allows the user to specify the field from ingested alerts that will dictate the severity of the case.
- Case template: It’s a text field (editable using markdown) that allows the user to define the exact information that will be completed automatically by Arcanna.ai inside the case in the format of
field:value, based on the existent information inside the ingested alerts. - Organization: If you’re using TheHive in a multi-tenant environment, having multiple organizations defined inside the platform, this option will provide you with the ability to select the organization space inside TheHive where you want Arcanna.ai to create cases. This will allow you to streamline multiple case management processes to run in parallel with predefined automation augmented with AI.
- IOC fields: Allows you to specify the fields inside the ingested alerts that you consider to be IOCs (e.g.: IP addresses, email addresses, file hashes, etc). Arcanna.ai will automatically mark that information as IOC inside TheHive cases and will allow TheHive to automatically run Cortex analyzers against these IOCs and enrich the case with Threat Intelligence information collected.
- Candidate labels for case creation: Based on the level of training provided to the AI model used for processing alerts, Arcanna.ai will automatically predict a course of action for each alert, resulting in alerts being labeled with either
drop_alertorescalate_alert. This functionality allows the user to specify what is the label condition used by Arcanna.ai to create cases.
We suggest picking fields from the alert that give you as much info as you need in a ticketing system, please see below one suggestion of how the template should be configured in Arcanna.ai to look good in the Hive:
                  ## **Rule Name:**
                  {{signal.rule.name}}
                  ## **Rule Description:**
                  {{signal.rule.description}}
                  ## **Rule Classification:**
                  {{signal.rule.type}}
                  ## **Alert Details:**
                  - *Kibana Alert ID:* `{{signal.parent.id}}`
                  - *Original time:* {{signal.original_time}}
                  - *Severity:* {{signal.rule.severity}}
                  - *Risk Score:* {{signal.rule.risk_score}}
                  - *Host Name:* {{host.name}}
                  - *User Name:* {{user.name}}
                  - *Source IP:*  {{source.ip}}
                  - *Destination IP:* {{destination.ip}}
                  - *MITRE Tactic (if applicable):* {{signal.rule.threat.tactic.name}}
                  - *MITRE Technique (if applicable):* {{signal.rule.threat.technique.name}}
                  ## **IOC:**
                  <Completed by Assignee>
                  ## **Investigation notes:**
                  <To be completed by Assignee>
-
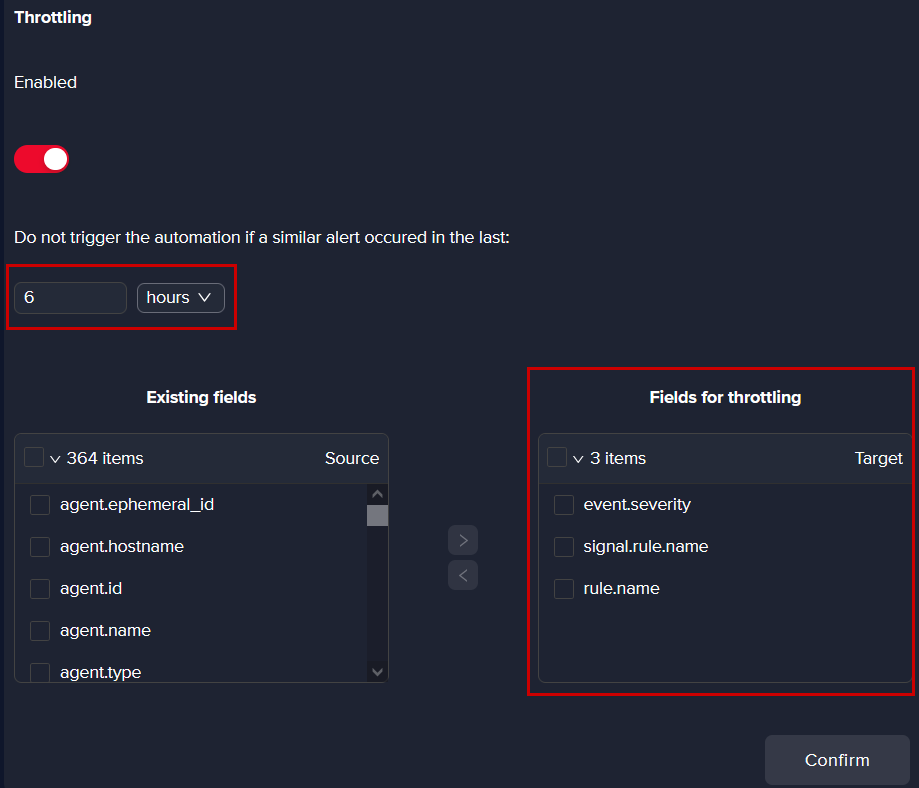
Throttling:
- This mechanism allows you to define the cadence of case creation, based on predefined filters from the ingested alerts' fields and the on the time you want Arcanna.ai to wait before creating another case that is matching the filters.
- This mechanism, together with the candidate labels described above, help the user to define the case creation process in such a way that duplicate cases are avoided as much as possible.
- Example: You can create cases only for alerts labeled as
escalate_alertand set the throttle so that if the alerts are having the same rule name -signal.rule.nameand severity -event.severity, another case will not be created for the next 4 hours.
infoThis step can be done at a later stage, after training an AI model, by editing the AI pipeline and adding the Automation:

From the pipeline edit page, scroll down to the Automation Integration section and using the drop-down menu function, select the integration with TheHive you have created in the previous step.
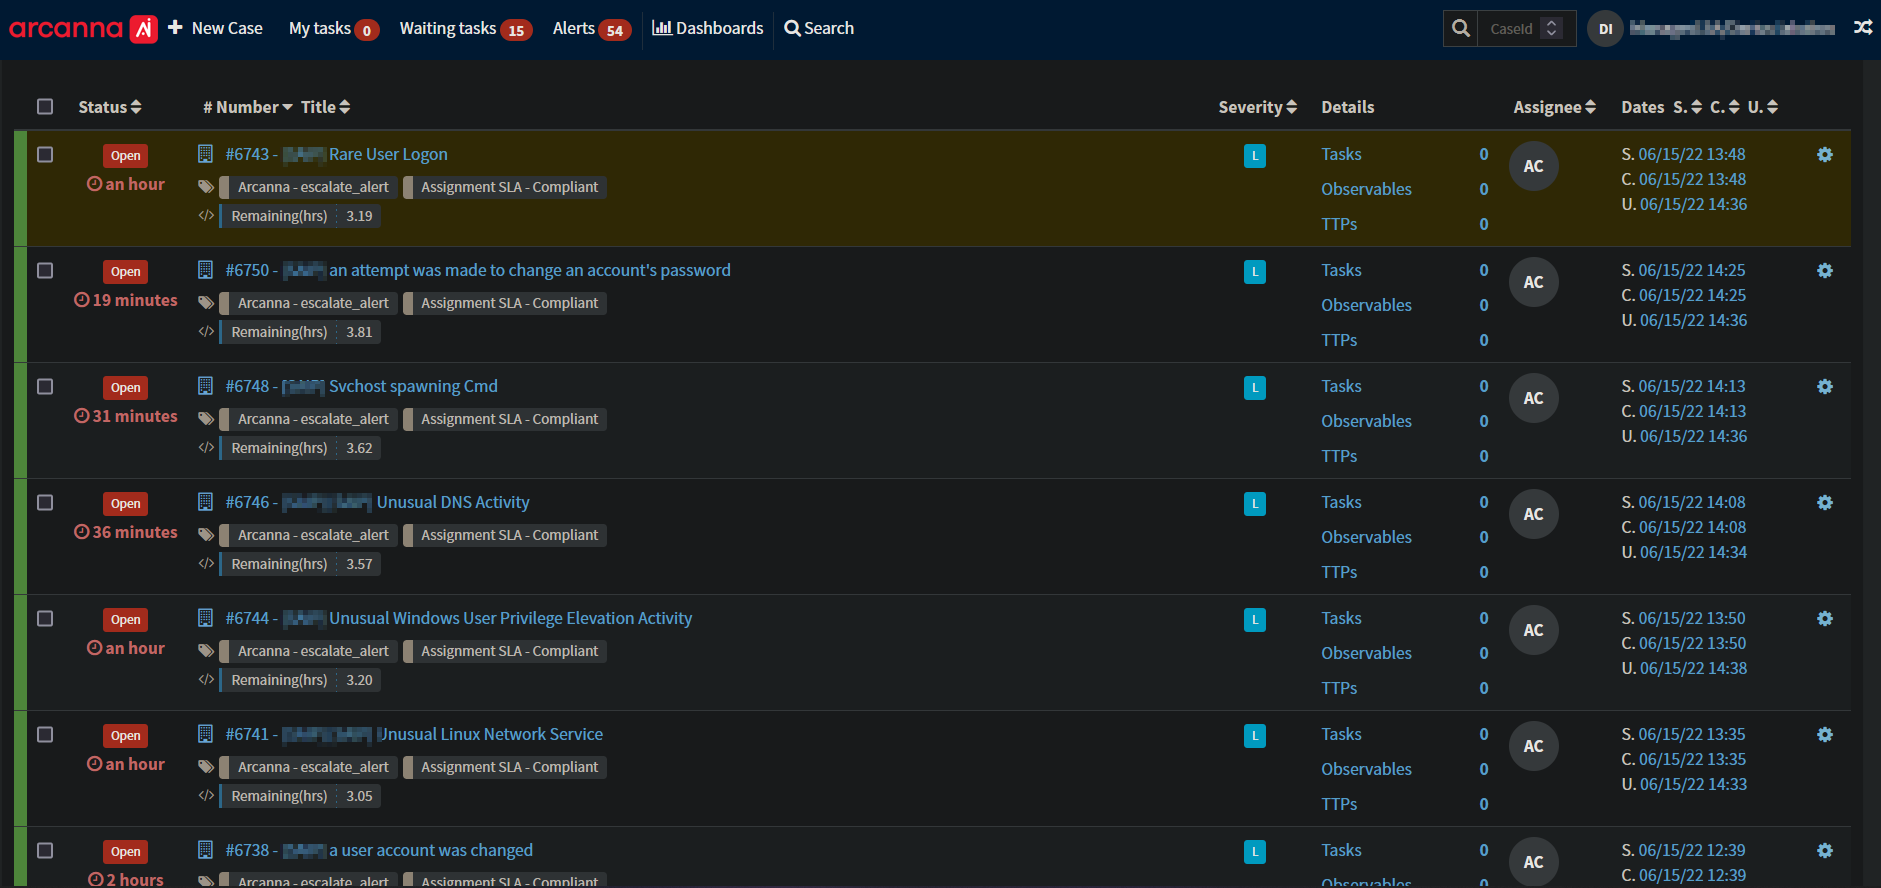
A snippet with tickets automatically created by Arcanna.ai in TheHive can be seen below.