Elasticsearch
Elasticsearch is a distributed, open-source search and analytics engine built on top of the Apache Lucene library. It is commonly used for full-text search, structured data querying, and real-time data analytics. Elasticsearch is a core component of the Elastic Stack (ELK Stack), which includes Logstash, Kibana, and Beats, allowing users to ingest, visualize, and analyze data.
Arcanna - Elasticsearch integration
The Arcanna integration with Elasticsearch serves multiple roles: it acts as storage for processed alerts, an input for gathering data, as context enrichment to enhance alerts with information from an external Elasticsearch, and a post-decision mechanism to update the original alert based on Arcanna's predictions.
Steps to configure Elasticsearch integration:
Prerequisites
- A valid Arcanna instance - for setup, follow this user guide.
- Elasticsearch instance - for setup, follow this user guide.
- Kibana, free under basic license (guide).
How to connect
Go to Arcanna instance:
Create the integration
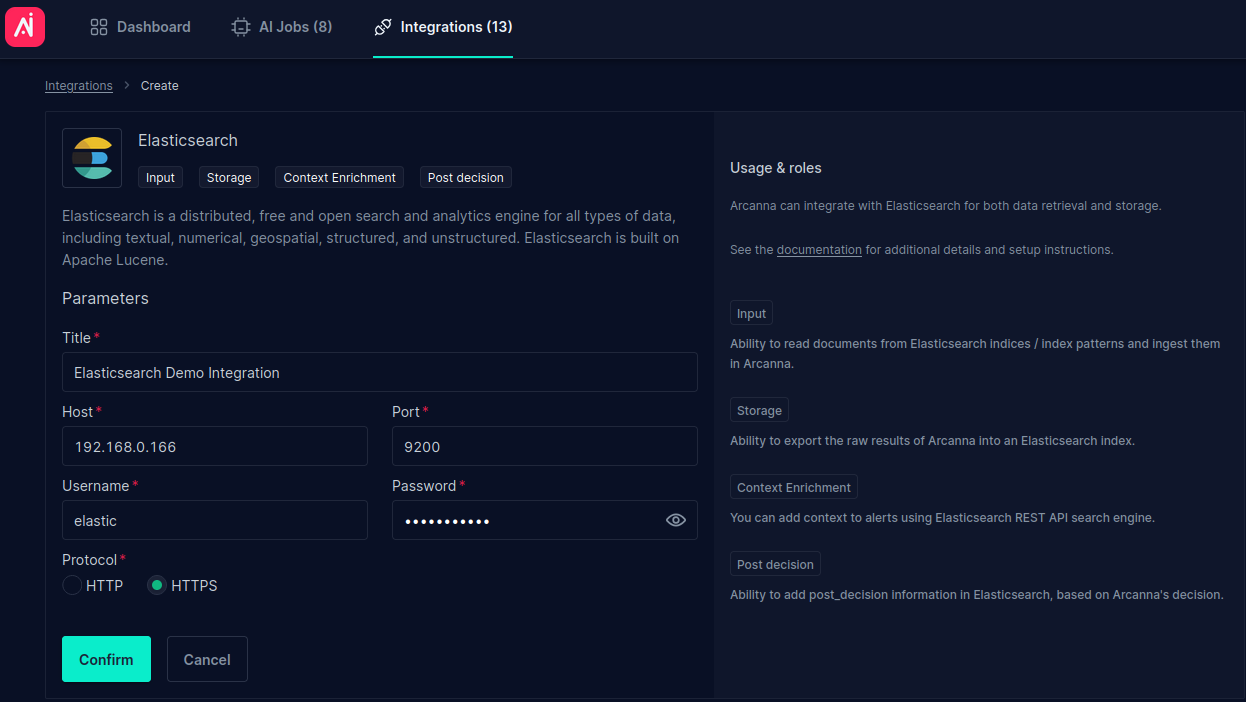
- Go to Integration tab and search for Elasticsearch:
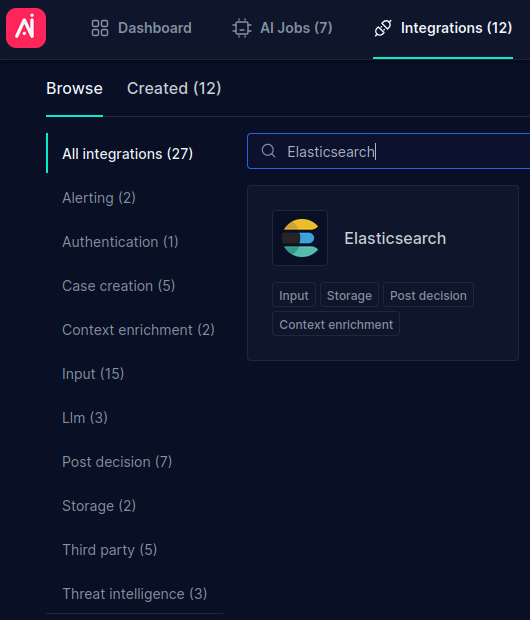
- Click on it and complete it with your Elasticsearch instance information. You can find a short description of each of its roles here:
Use as storage integration
Arcanna uses an internal Elasticsearch to store data by default. You can skip this step if you prefer to use Arcanna's internal storage.
- Create an Arcanna pipeline using Elasticsearch integration:
- Go to AI Pipelines tab and click Create Pipeline
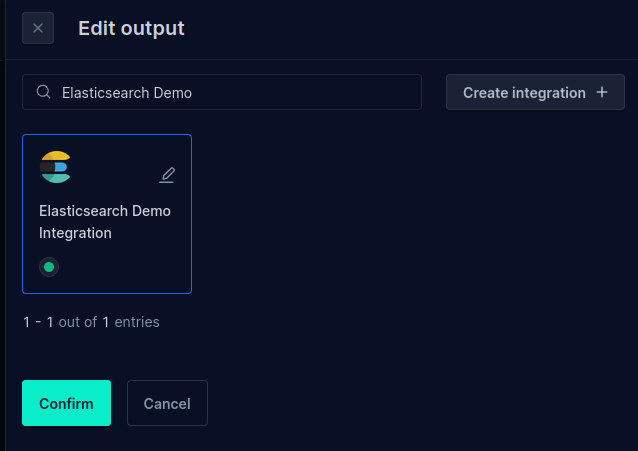
- Expand the storage tab:
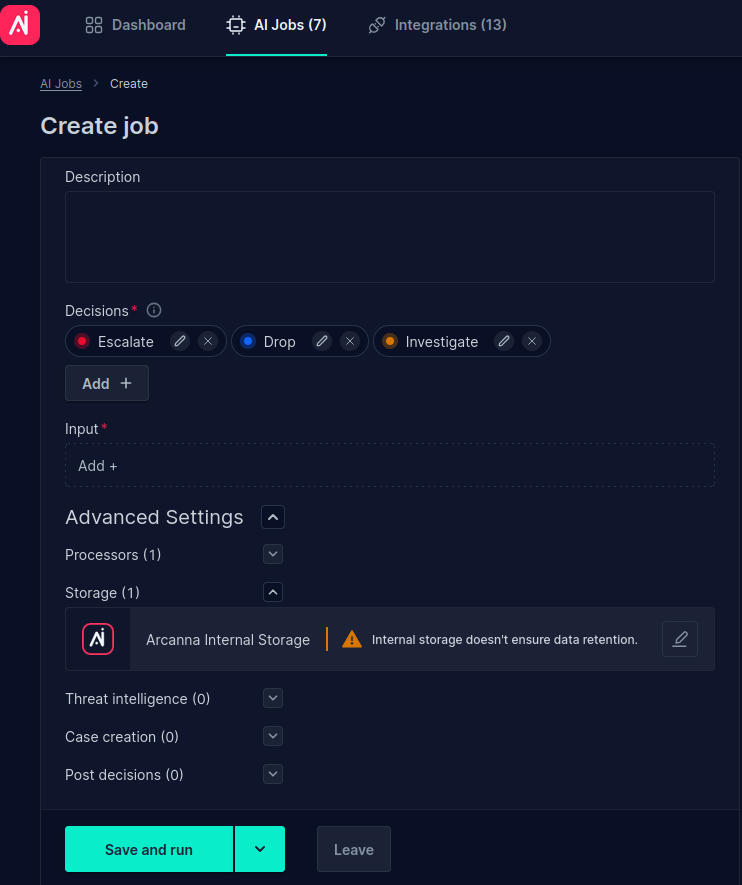
- Select the Elasticsearch just created as the new storage
Use as input integration
- Click add input integration (Add +) and select the Elasticsearch integration
- Complete the fields with the desired configuration. The only required field is the
Index pattern. EnablePreserve original idto ensure that documents in Arcanna retain the same ID as in Elasticsearch. Here's an example:
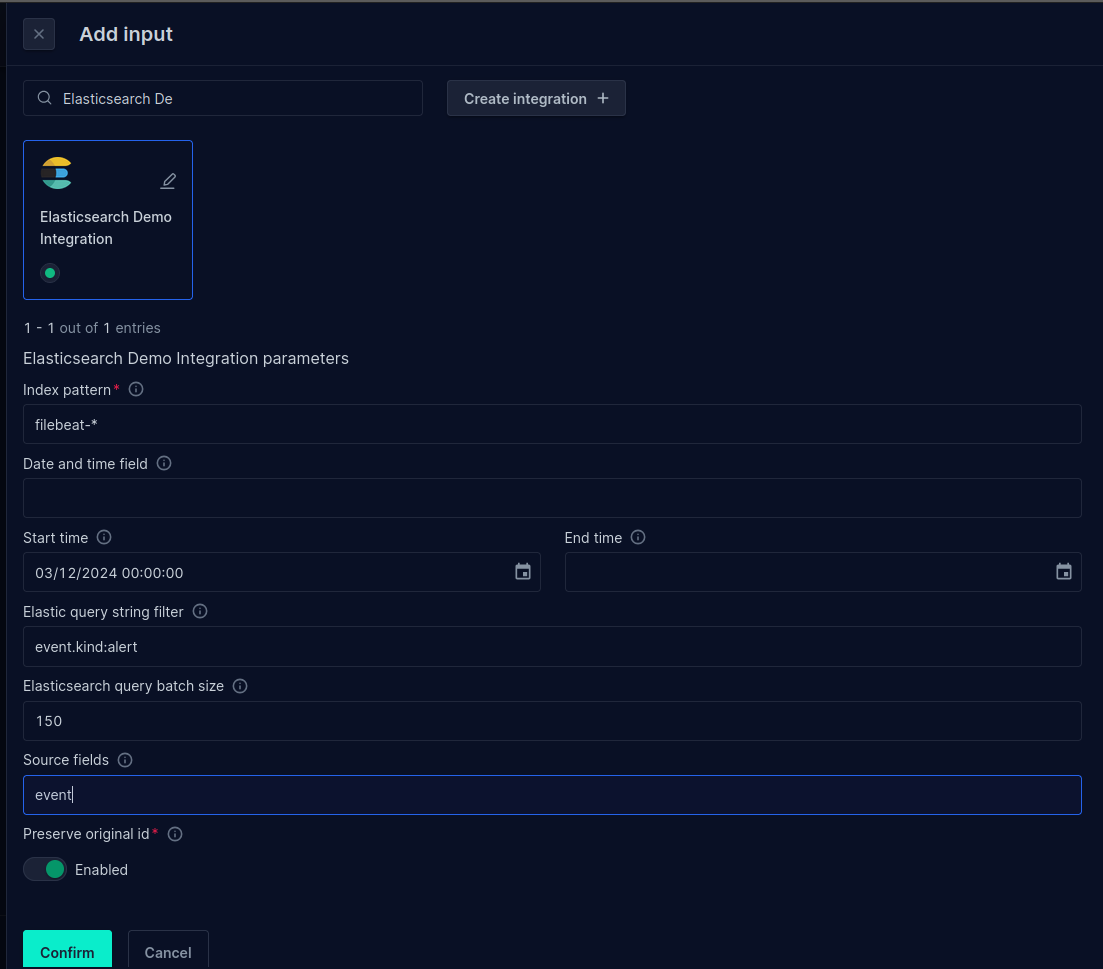
- Click Save and run to save and start the job.
Use as context enrichment integration
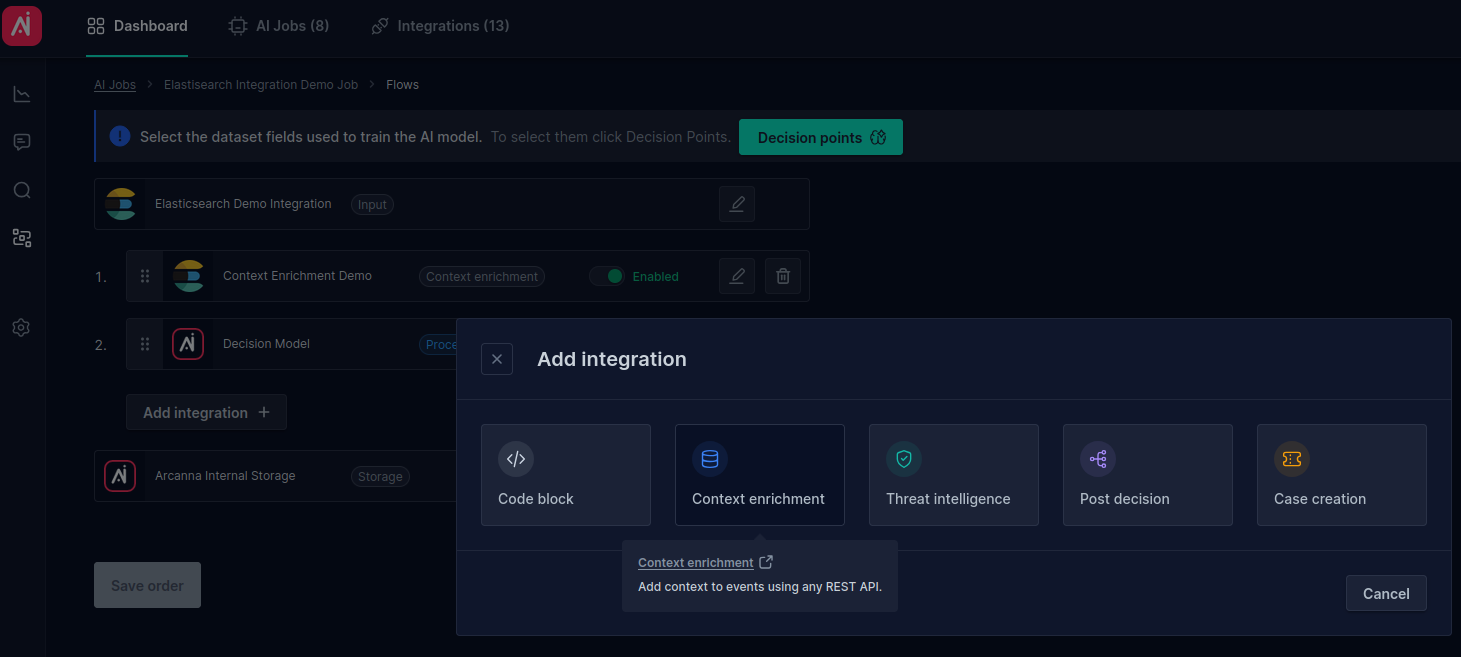
- Go to Flows page, click Add integration + and select Context Enrichment:
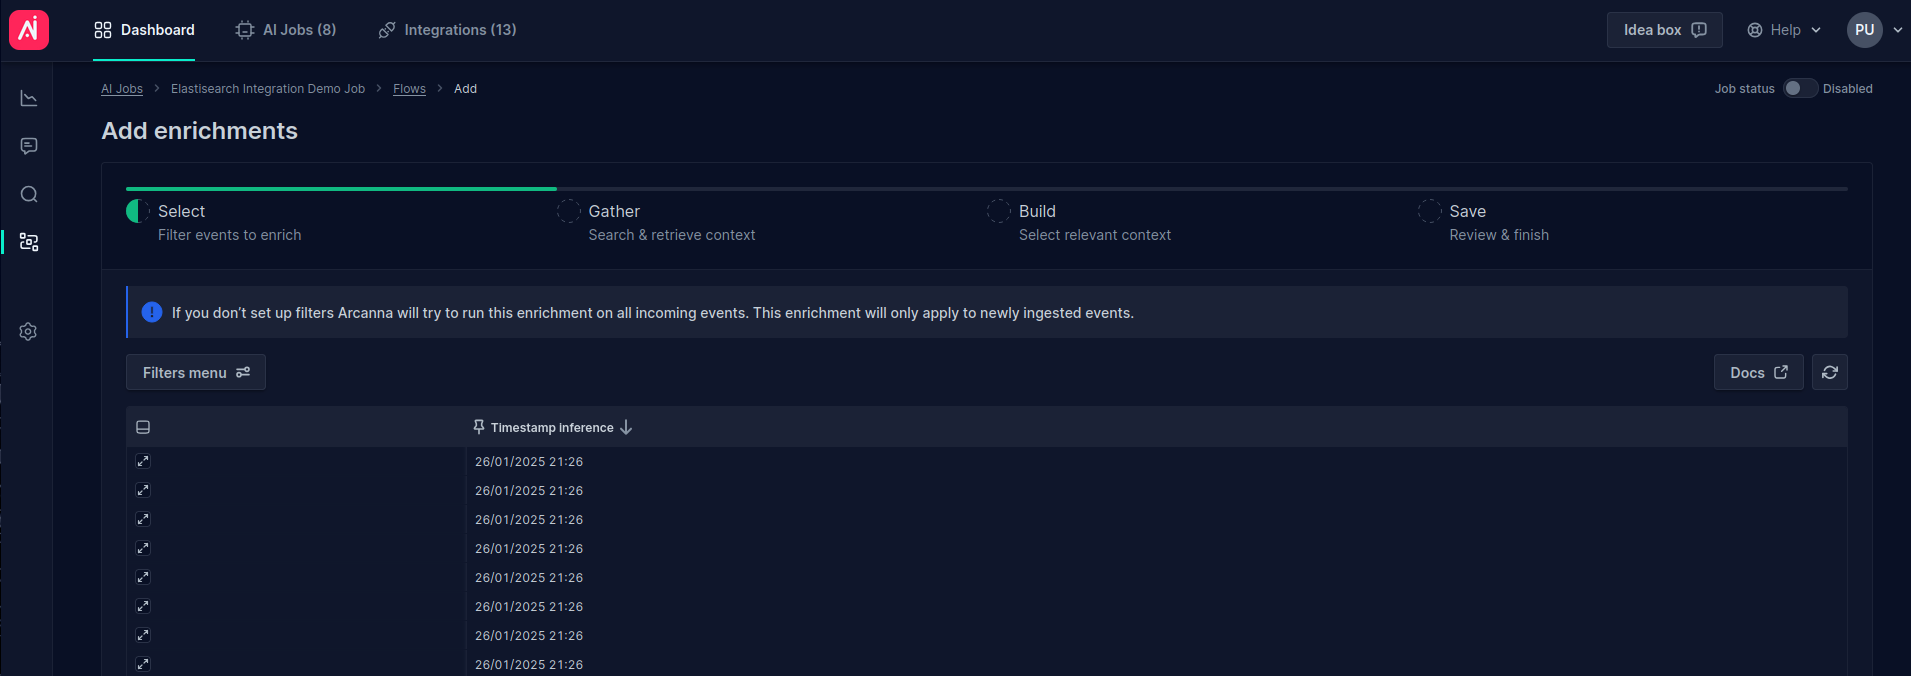
- Select filters for the data to be used for context enrichment, or leave it as-is to apply context enrichment for all data:
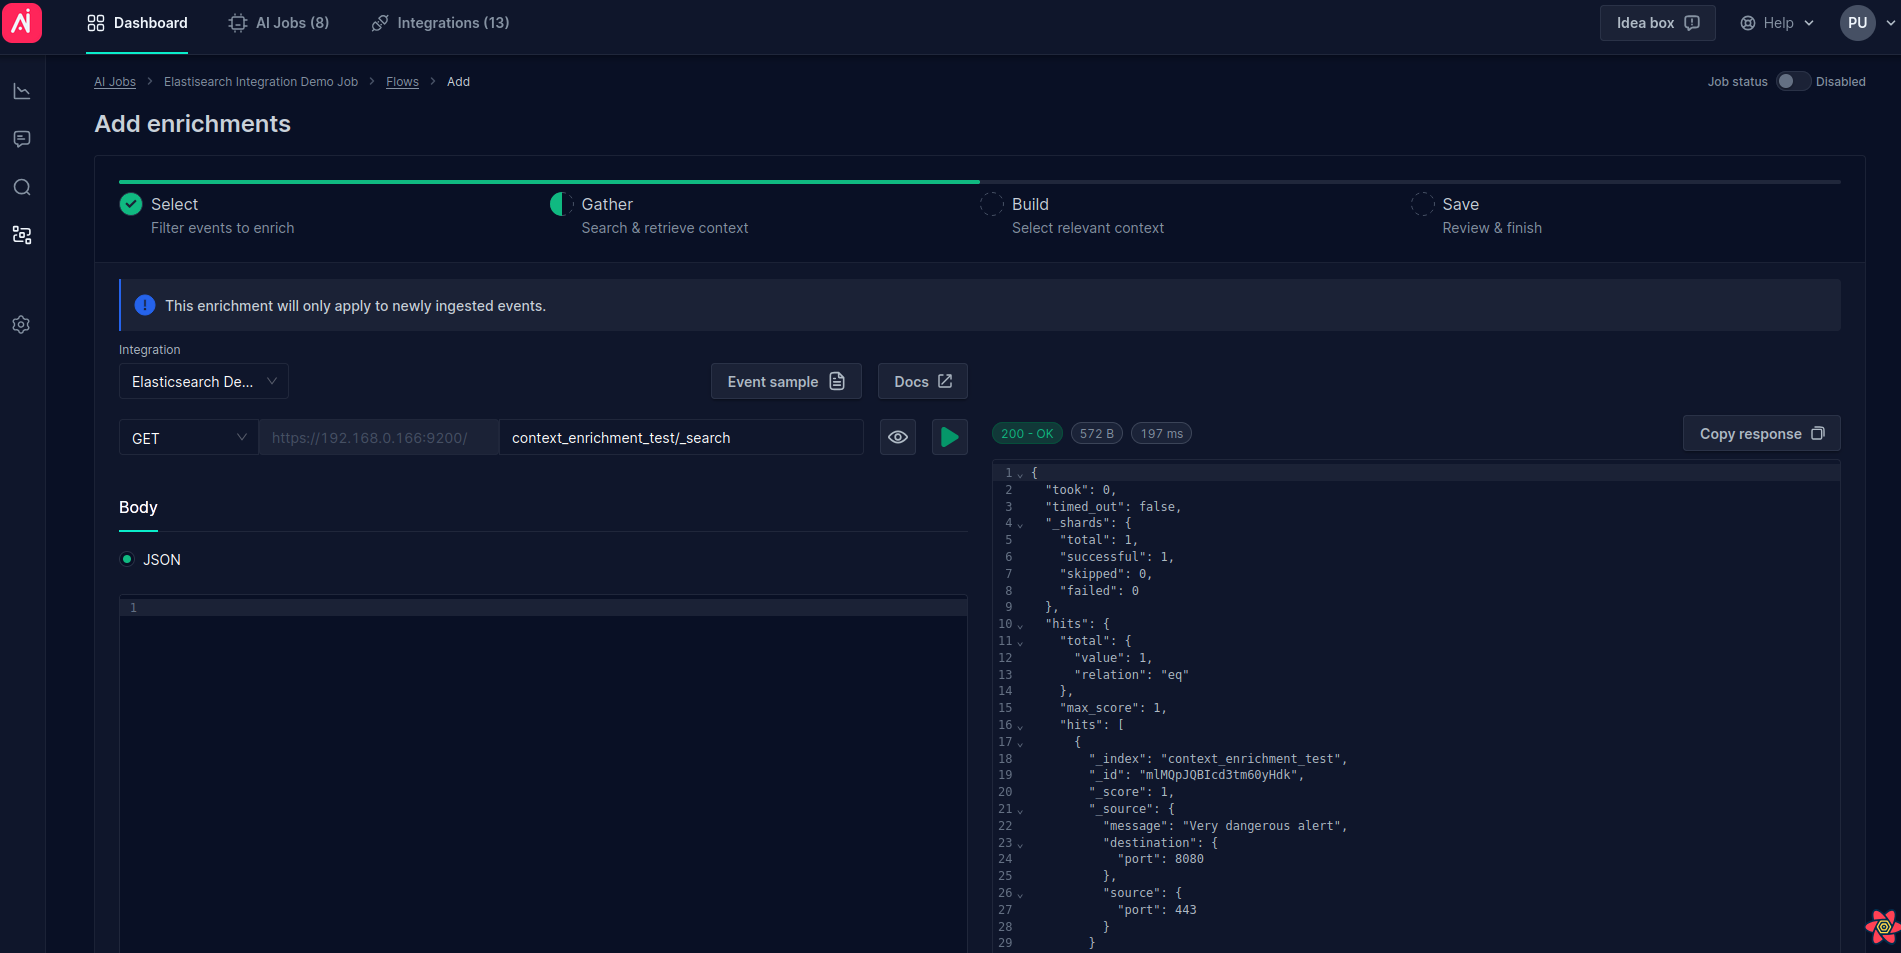
- Select the Elasticsearch integration, complete the URL with the index used for context enrichment, and provide the desired query in the body:
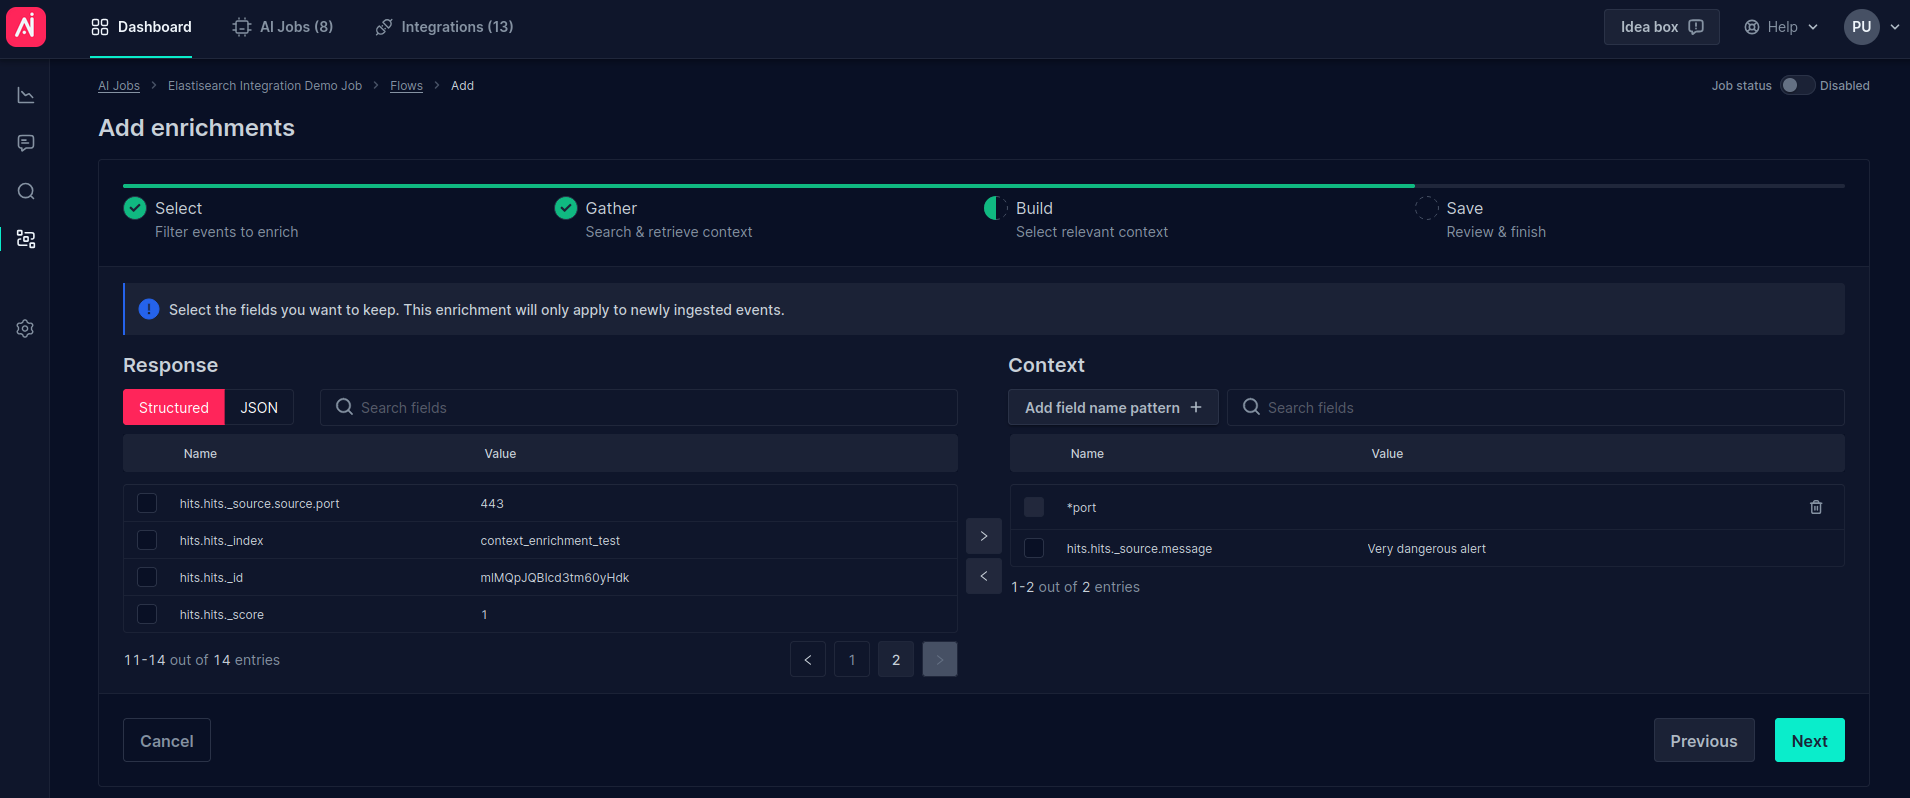
- Then, select the fields or field patterns from the document to be added as enrichment to the alert:
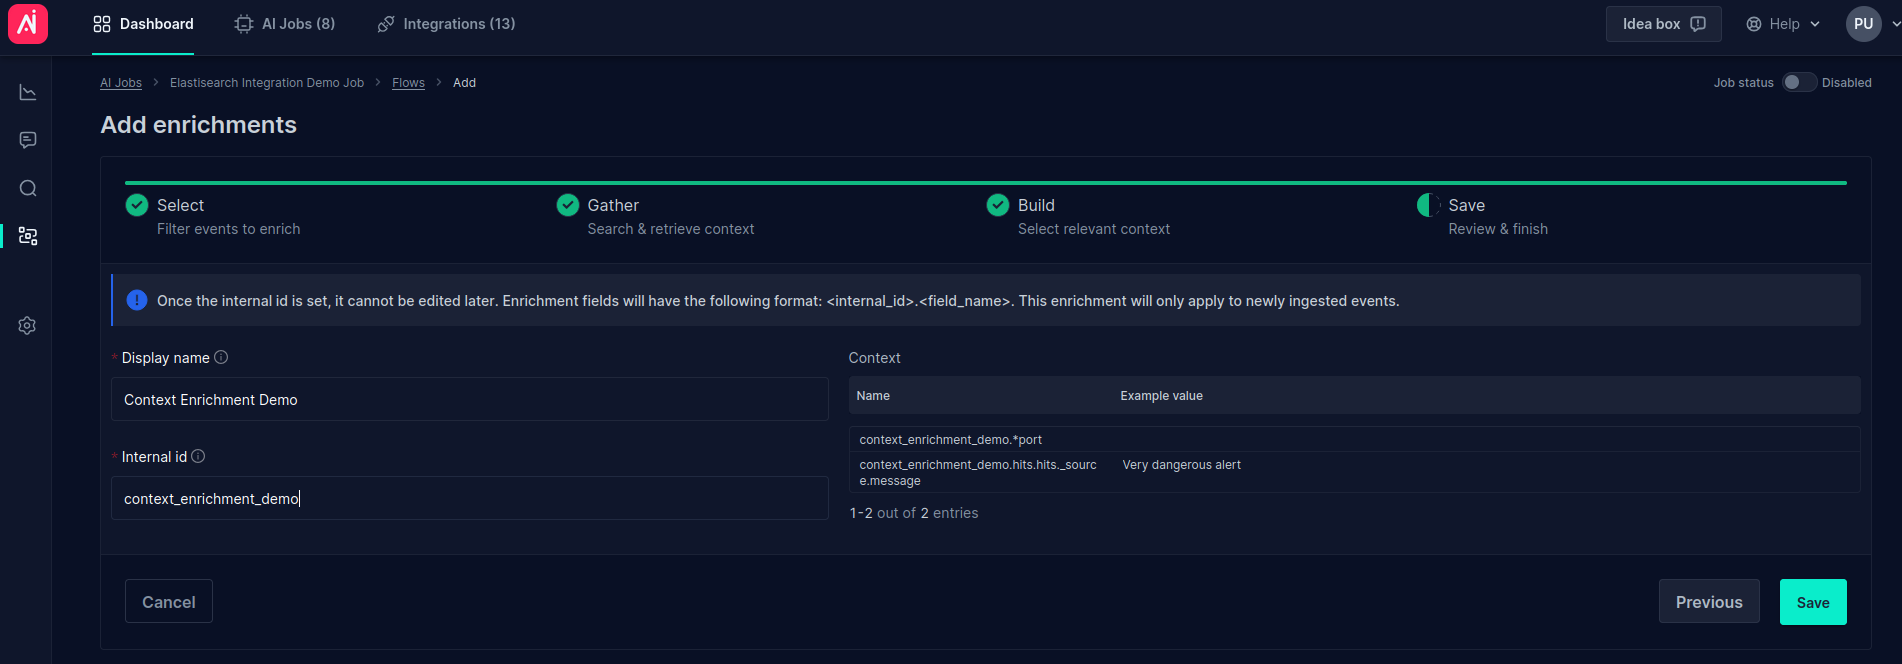
- In the final step, complete the Title for the context enrichment and click Save:
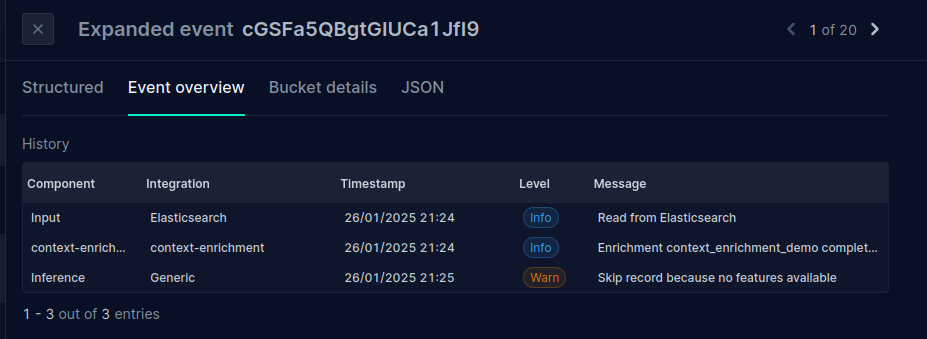
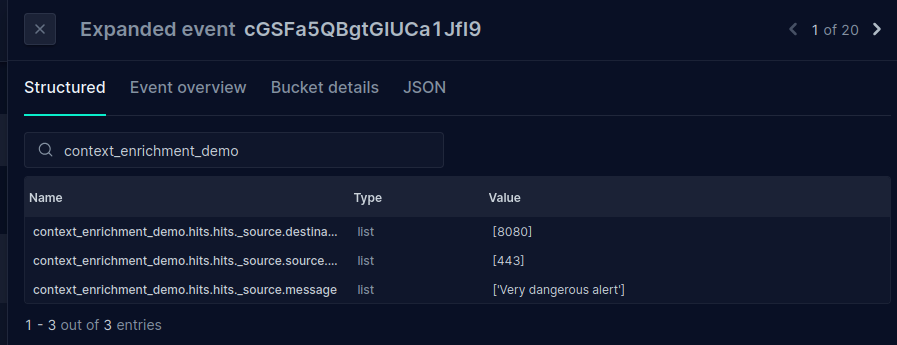
- Navigate to the Event Explorer, expand a new alert, and observe how the context enrichment fields have been applied to the alert:
Use as post decision integration
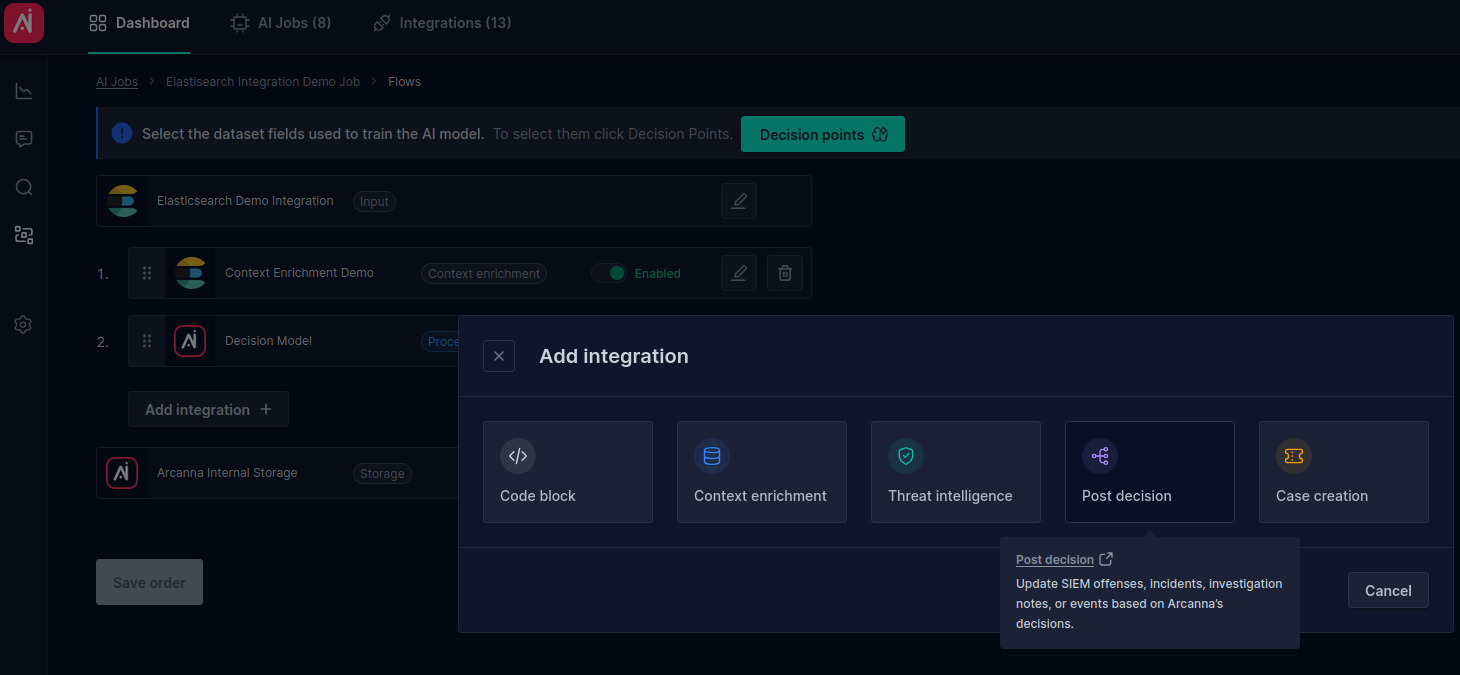
Use Elasticsearch post-decision capabilities to update SIEM offenses, incidents, investigation notes, or events based on the Arcanna decision.
- Go to Flows page, click Add integration + and select Post decision:
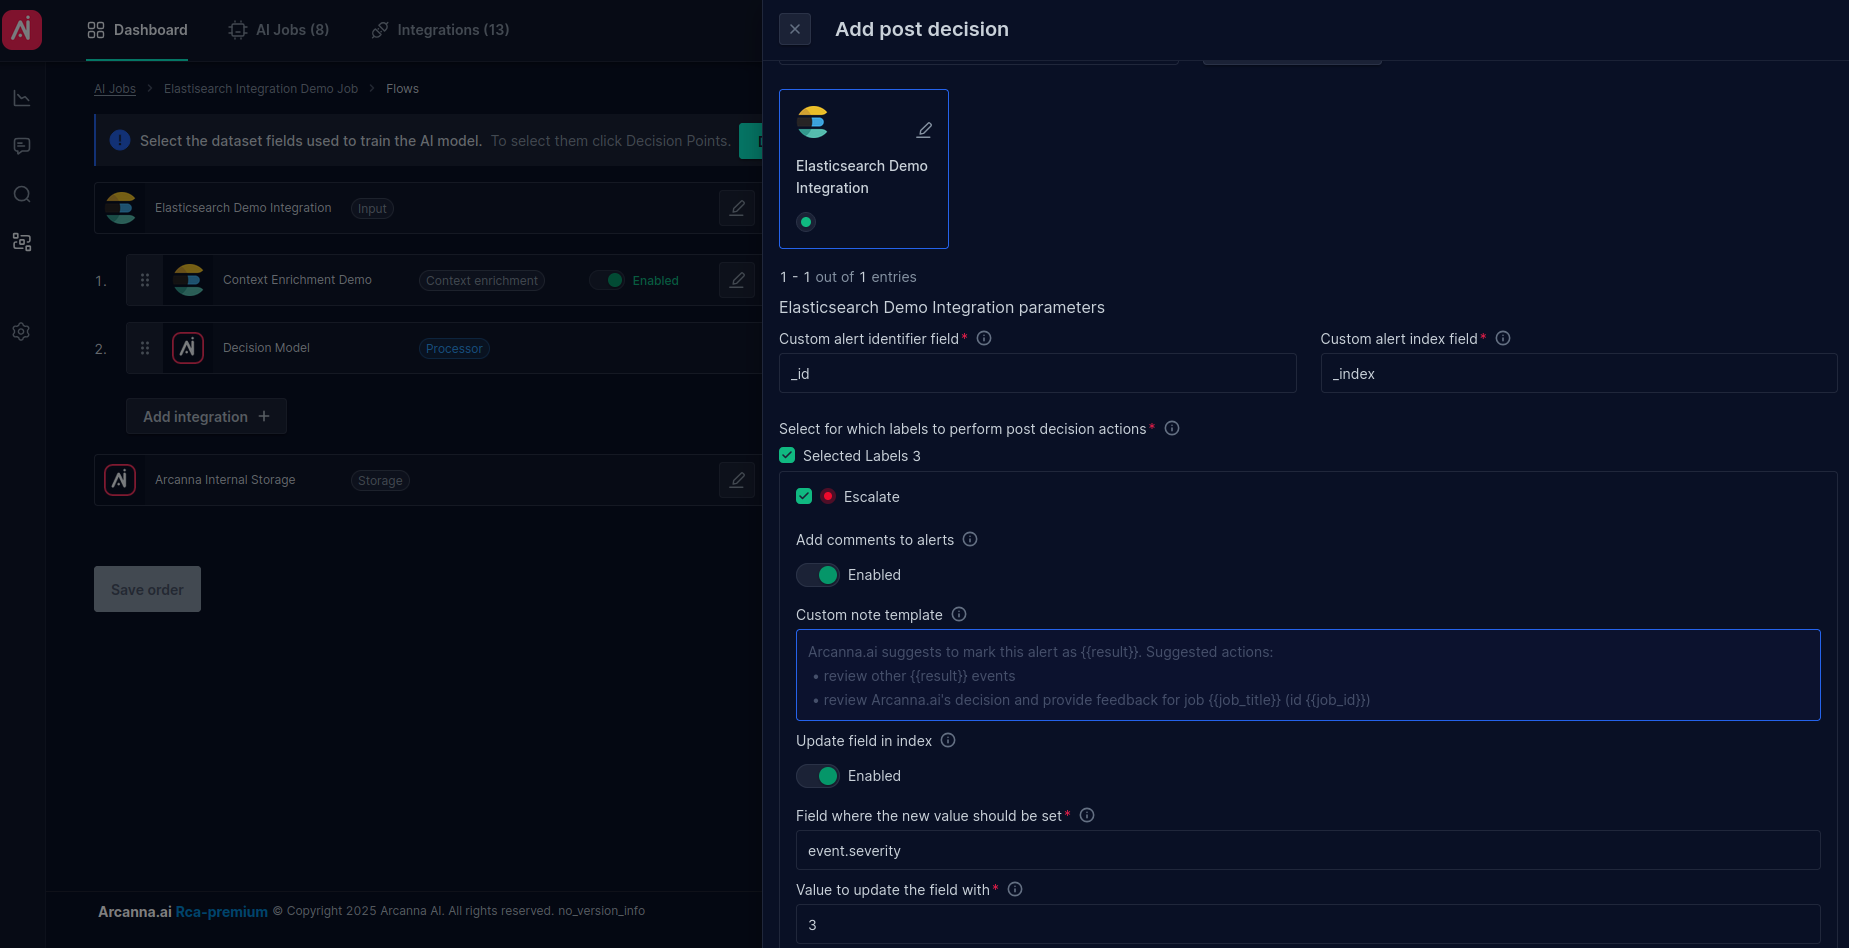
- Configure the post-decision settings.
- The Custom alert identifier field and Custom alert index field settings are used to identify the alert for applying the post-decision. By default, Elasticsearch internal,
_idand_index, are used. - Select the decision labels to apply the post-decision to.
- Enable Add comments to alerts to include a custom note in the alert. Here, the default message is used, which specifies the Arcanna decision and the job.
- Enable Update field in index to modify a field with a specified value. In this example, we use
event.severity=3for the Escalate label,event.severity=2for the Investigate label,event.severity=1for the Drop label:
- The Custom alert identifier field and Custom alert index field settings are used to identify the alert for applying the post-decision. By default, Elasticsearch internal,
For the post-decision to be applied, the job must have a trained model. Navigate to Decision Points, provide feedback on buckets or events, and initiate a training session
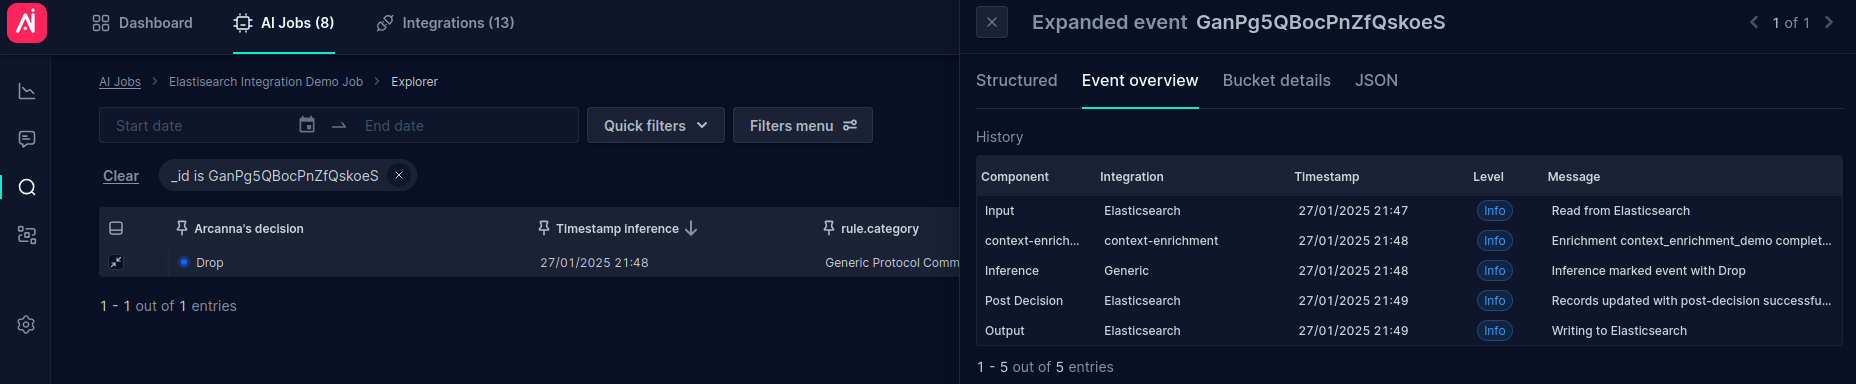
- Navigate to the Event Explorer, expand a new alert, and observe how the post-decision have been executed:
- Go to Kibana and search for the alert to observe the newly added fields by Arcanna. The index, in this case, is the same as the input index unless a different one is configured in Custom alert index in Step 2.

- We can observed that the
event.severityfield was updated to the value1based on the Drop decision.