Cortex XSOAR
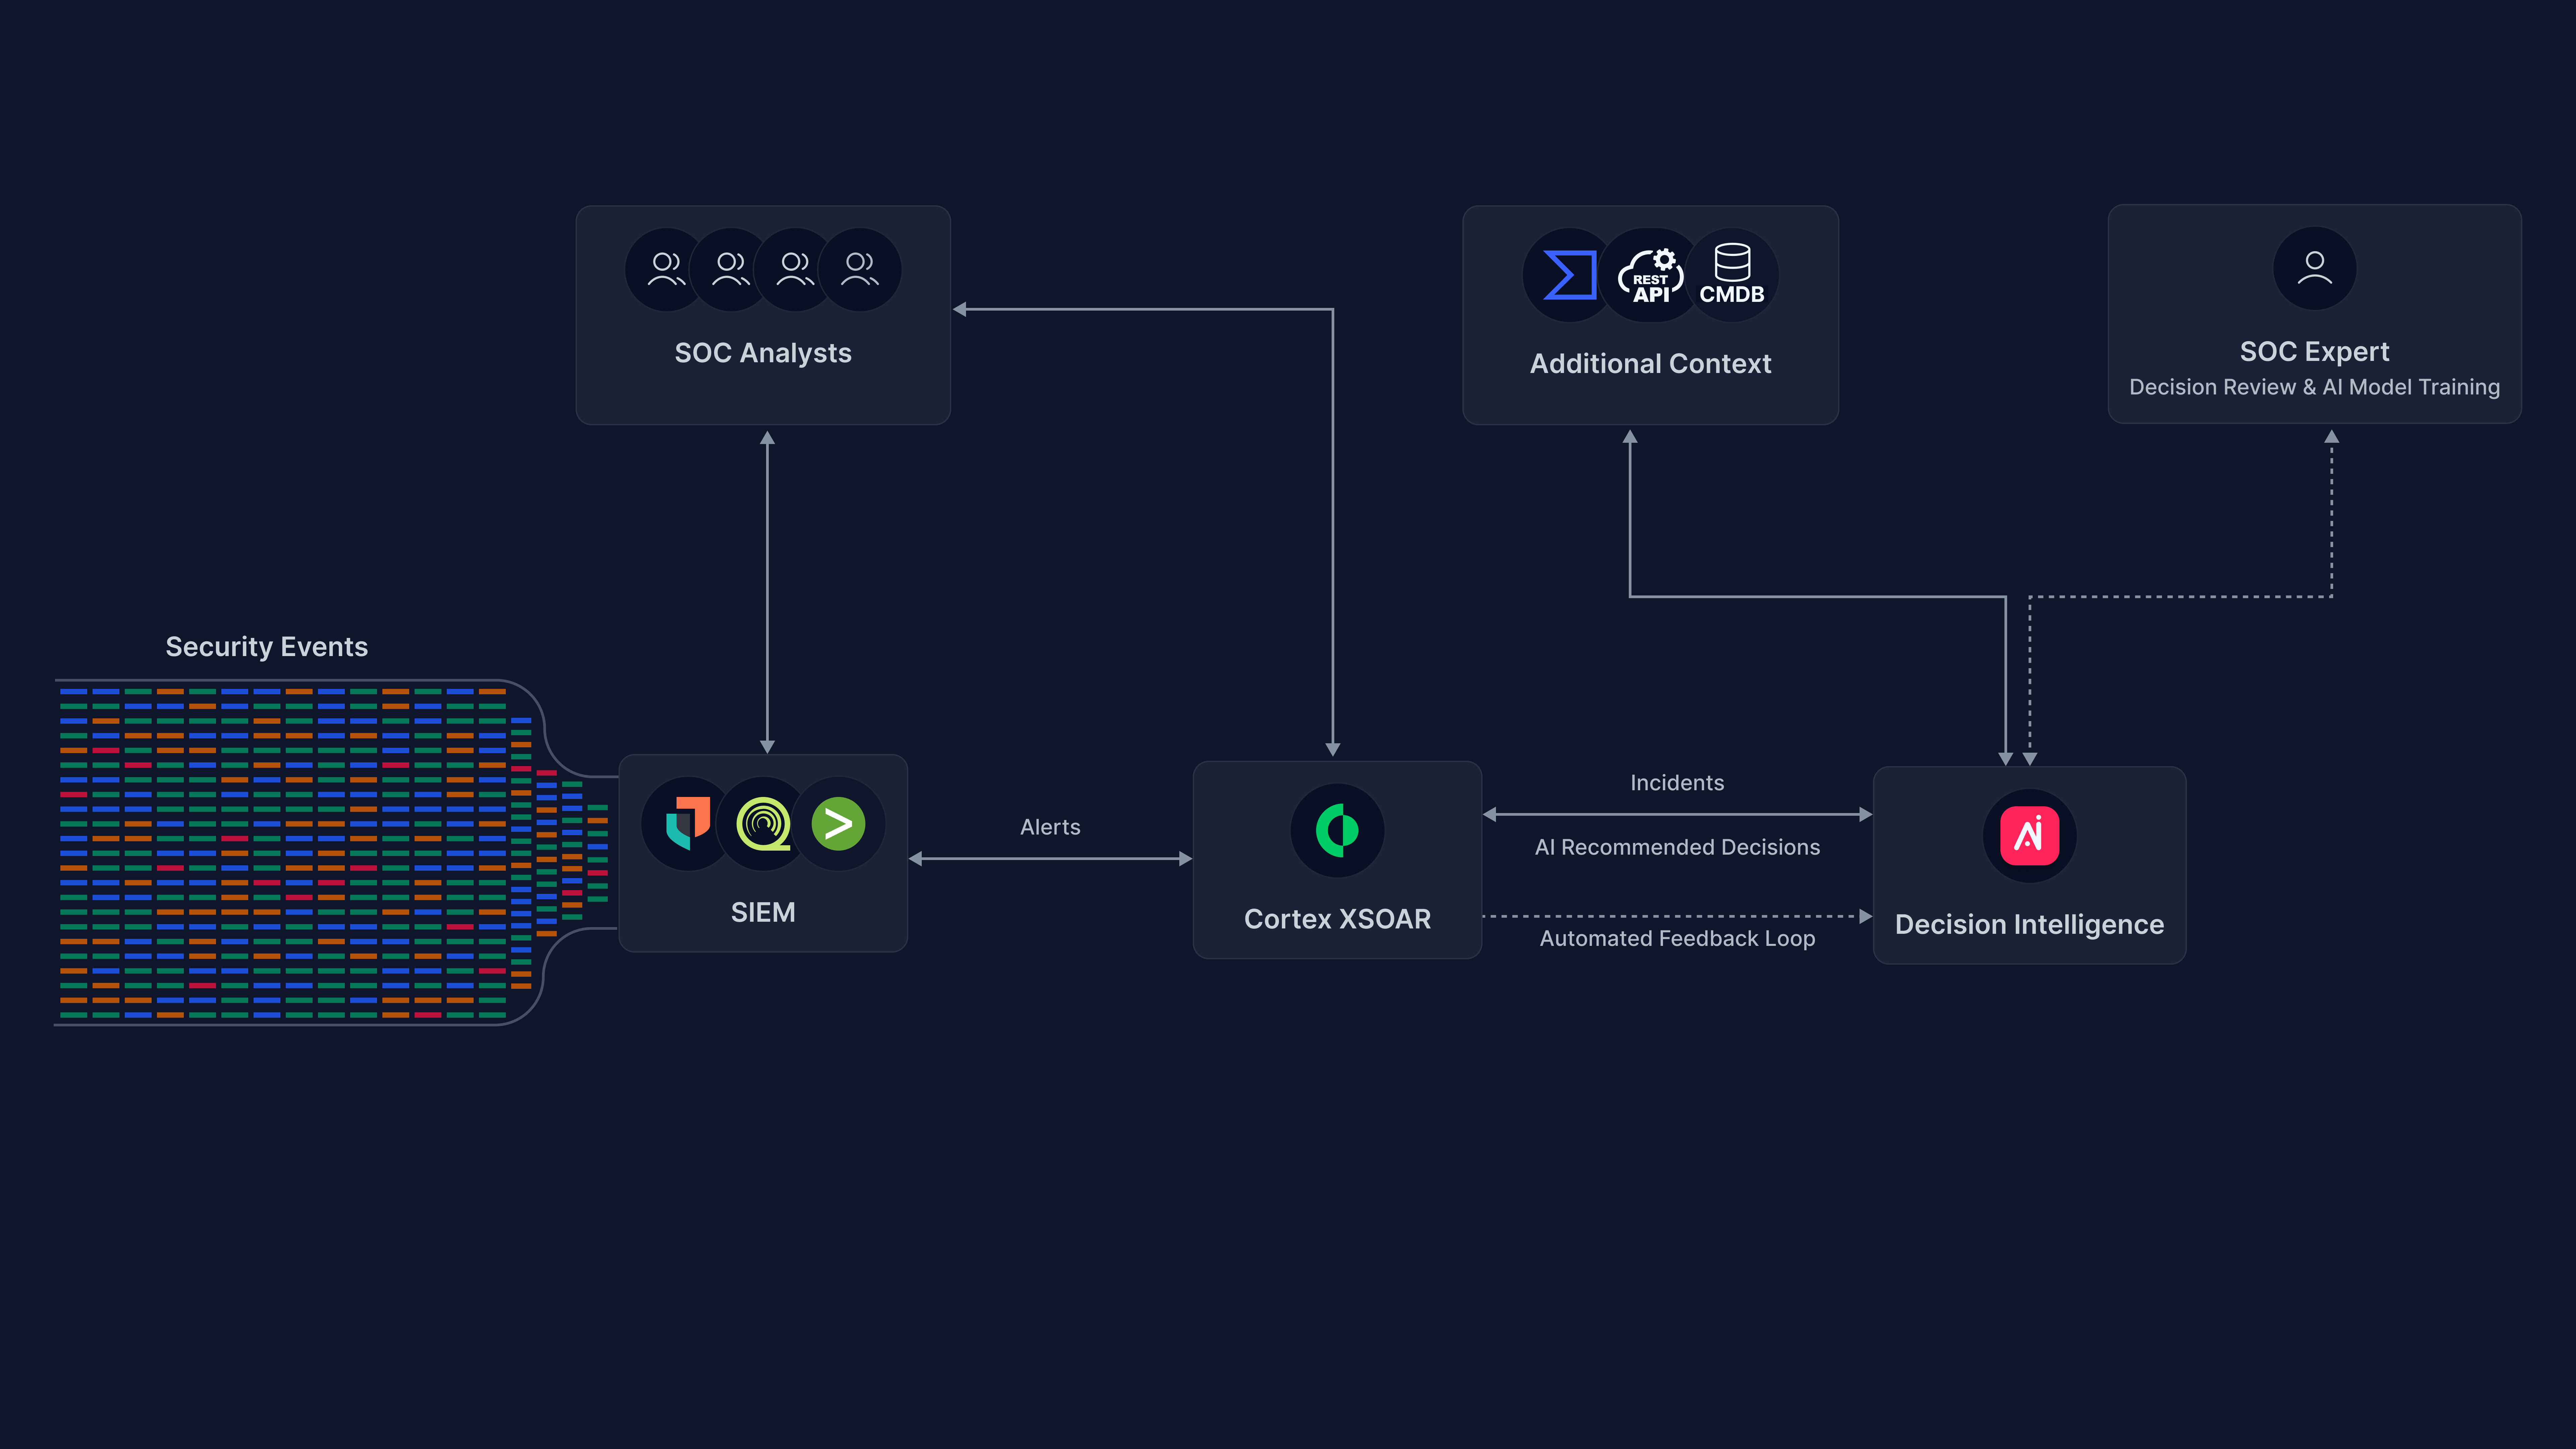
Palo Alto Cortex XSOAR is a security orchestration, automation, and response (SOAR) platform designed to ingest alerts from multiple data sources and automate playbooks for efficient incident response. It also offers robust incident management capabilities.
Arcanna - Cortex XSOAR integration
Arcanna integrates seamlessly with Cortex XSOAR, allowing users to interact with Arcanna directly within their playbooks, enhancing automation and decision-making processes.
Arcanna integration is available in the Cortex XSOAR marketplace and can be easily enabled directly from XSOAR. The Arcanna content pack enables you to ask Arcanna for a Decision at any point in a playbook, and to automatically close the feedback-loop by sending feedback to Arcanna when you close the incident with a reason.
Incidents created by Cortex XSOAR are usually enriched via automated investigation steps part of the SOAR playbook, resulting in a rich context that Arcanna can use to make the decision.
Main benefits on using Arcanna in conjunction with Cortex XSOAR are:
- Improve operational efficiency and response time by assisting human decisions in SOC.
- Reduce the number of false positives, making decisions on tickets with relevant context.
- Improve automated decision making by building your own deep learning model tailored to the particularities of your environment.
Steps to configure Cortex XSOAR integration:
Prerequisites
- A valid Arcanna instance - for setup, follow this user guide.
- Cortex XSOAR - is free as Community edition here.
How to connect
Go to Arcanna instance:
-
Connect to Cortex XSOAR:
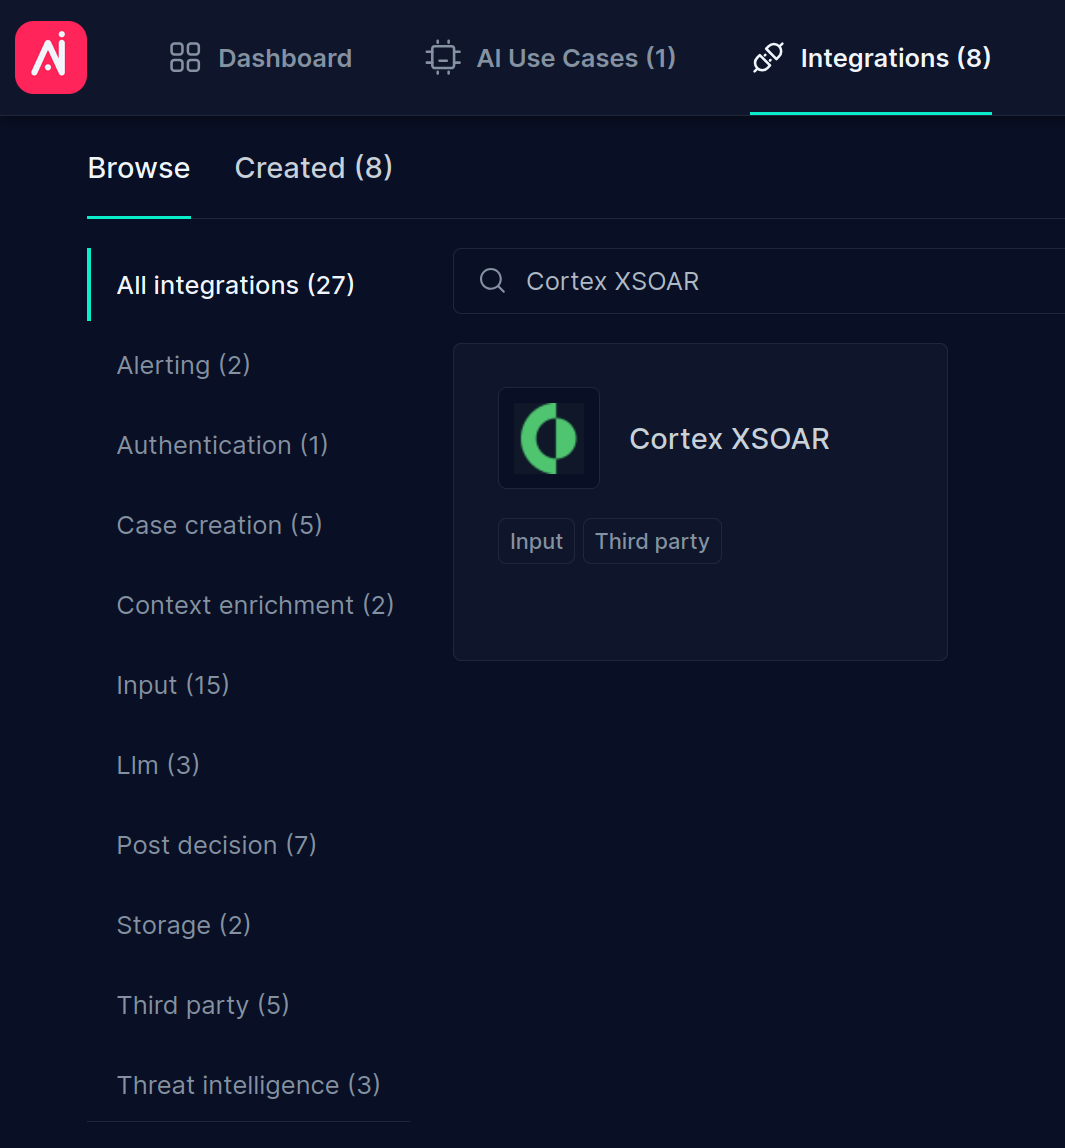
- Go to the Integrations tab
- Search for Cortex XSOAR integration and click on it:
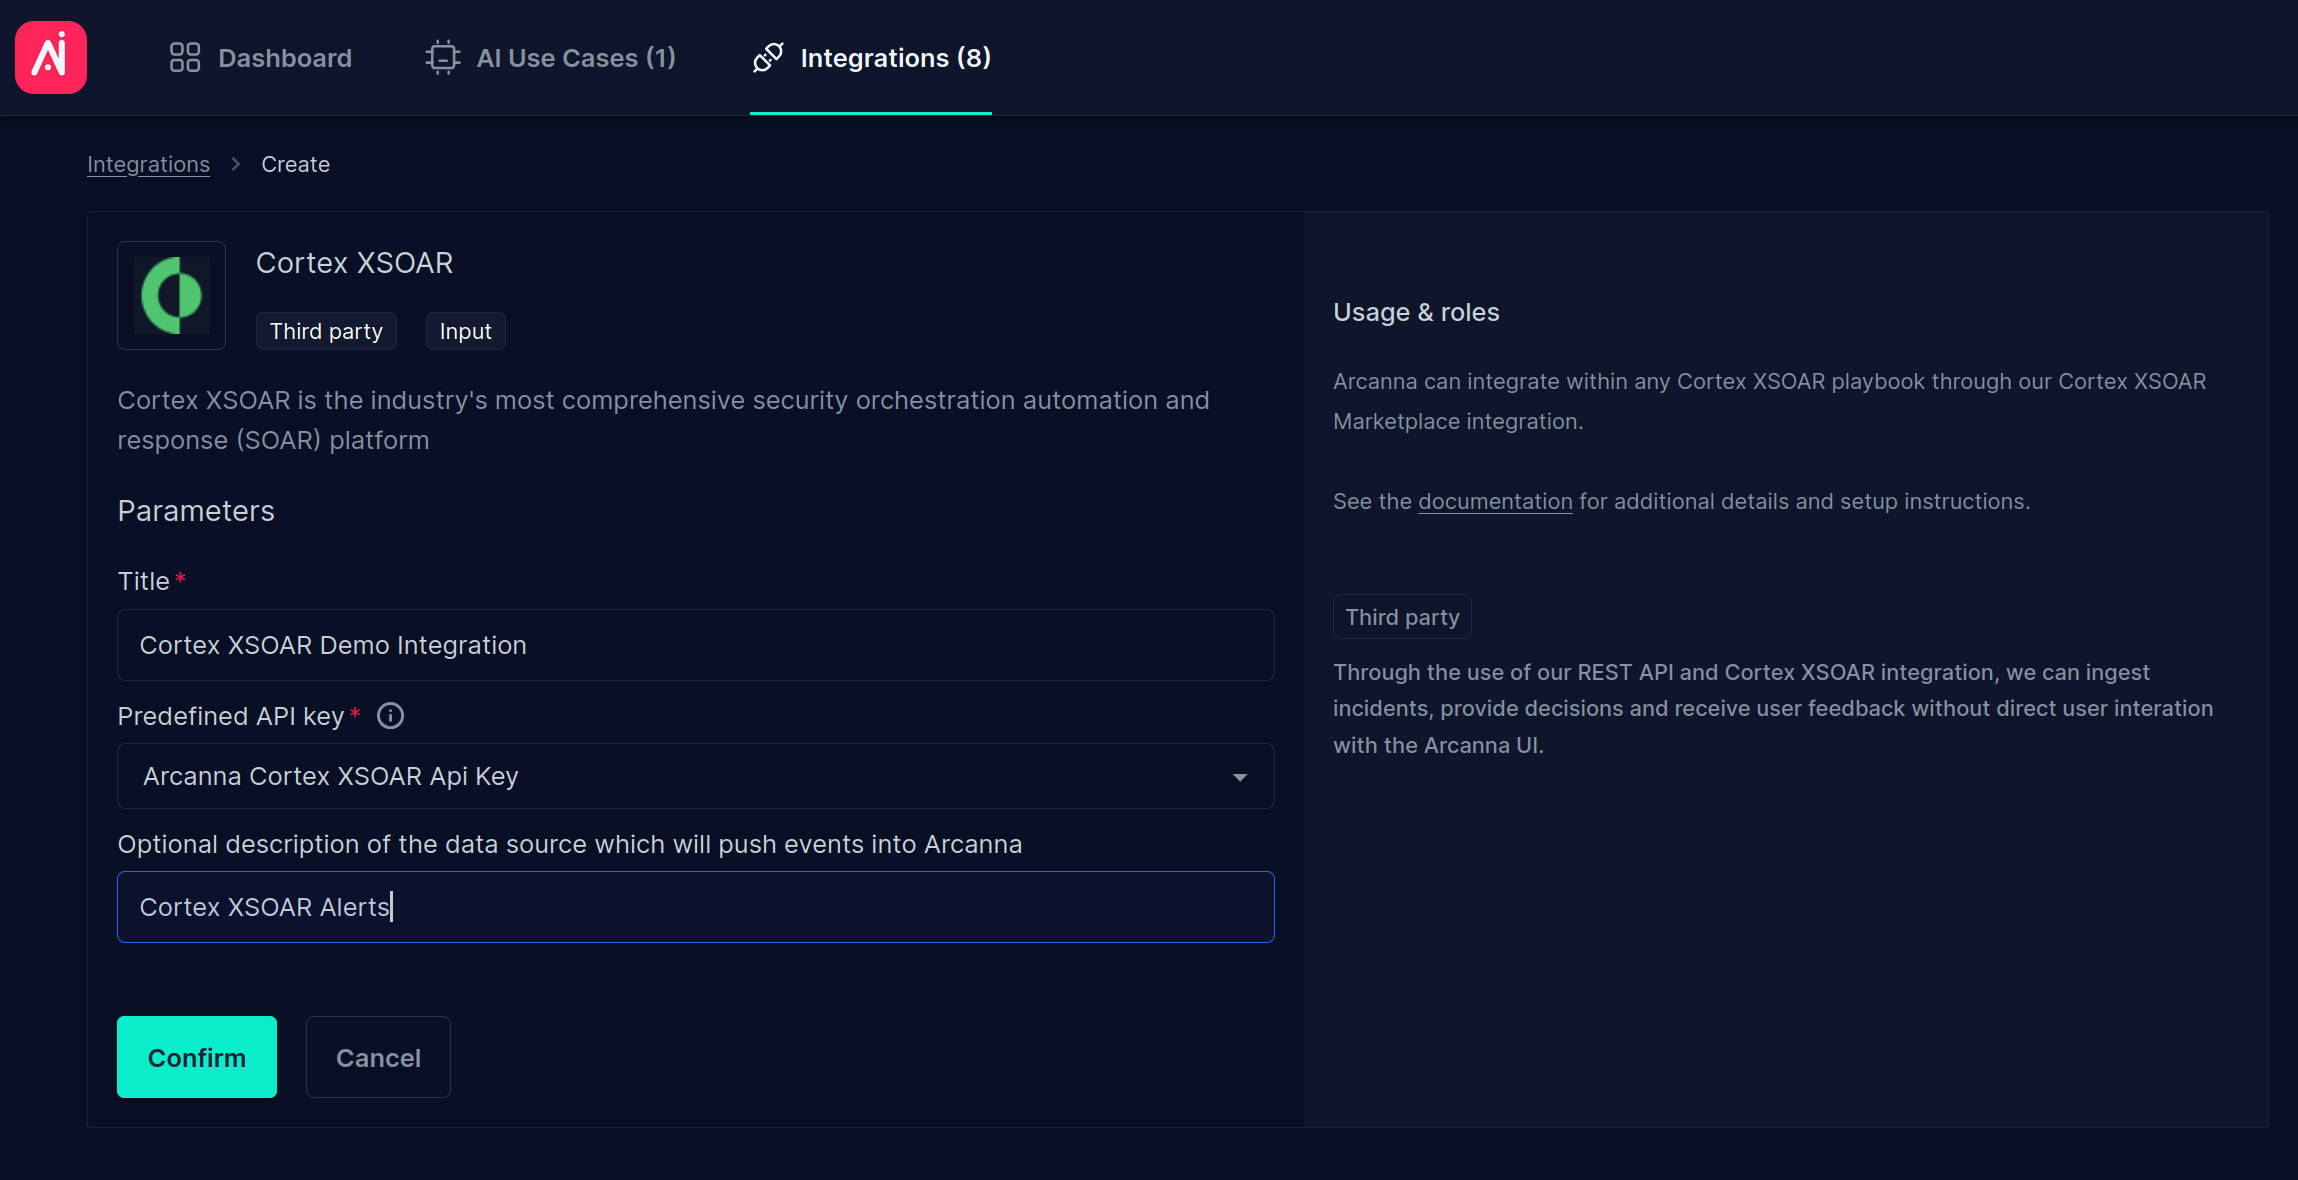
- Fill in all the fields as shown below using your own API Key and Title, and then click Confirm:
-
Create an Arcanna pipeline using Cortex XSOAR integration:
- Go to AI Pipelines tab and click Create pipeline
- Complete the Title and select the Cortex XSOAR integration just created as the input, as shown below:
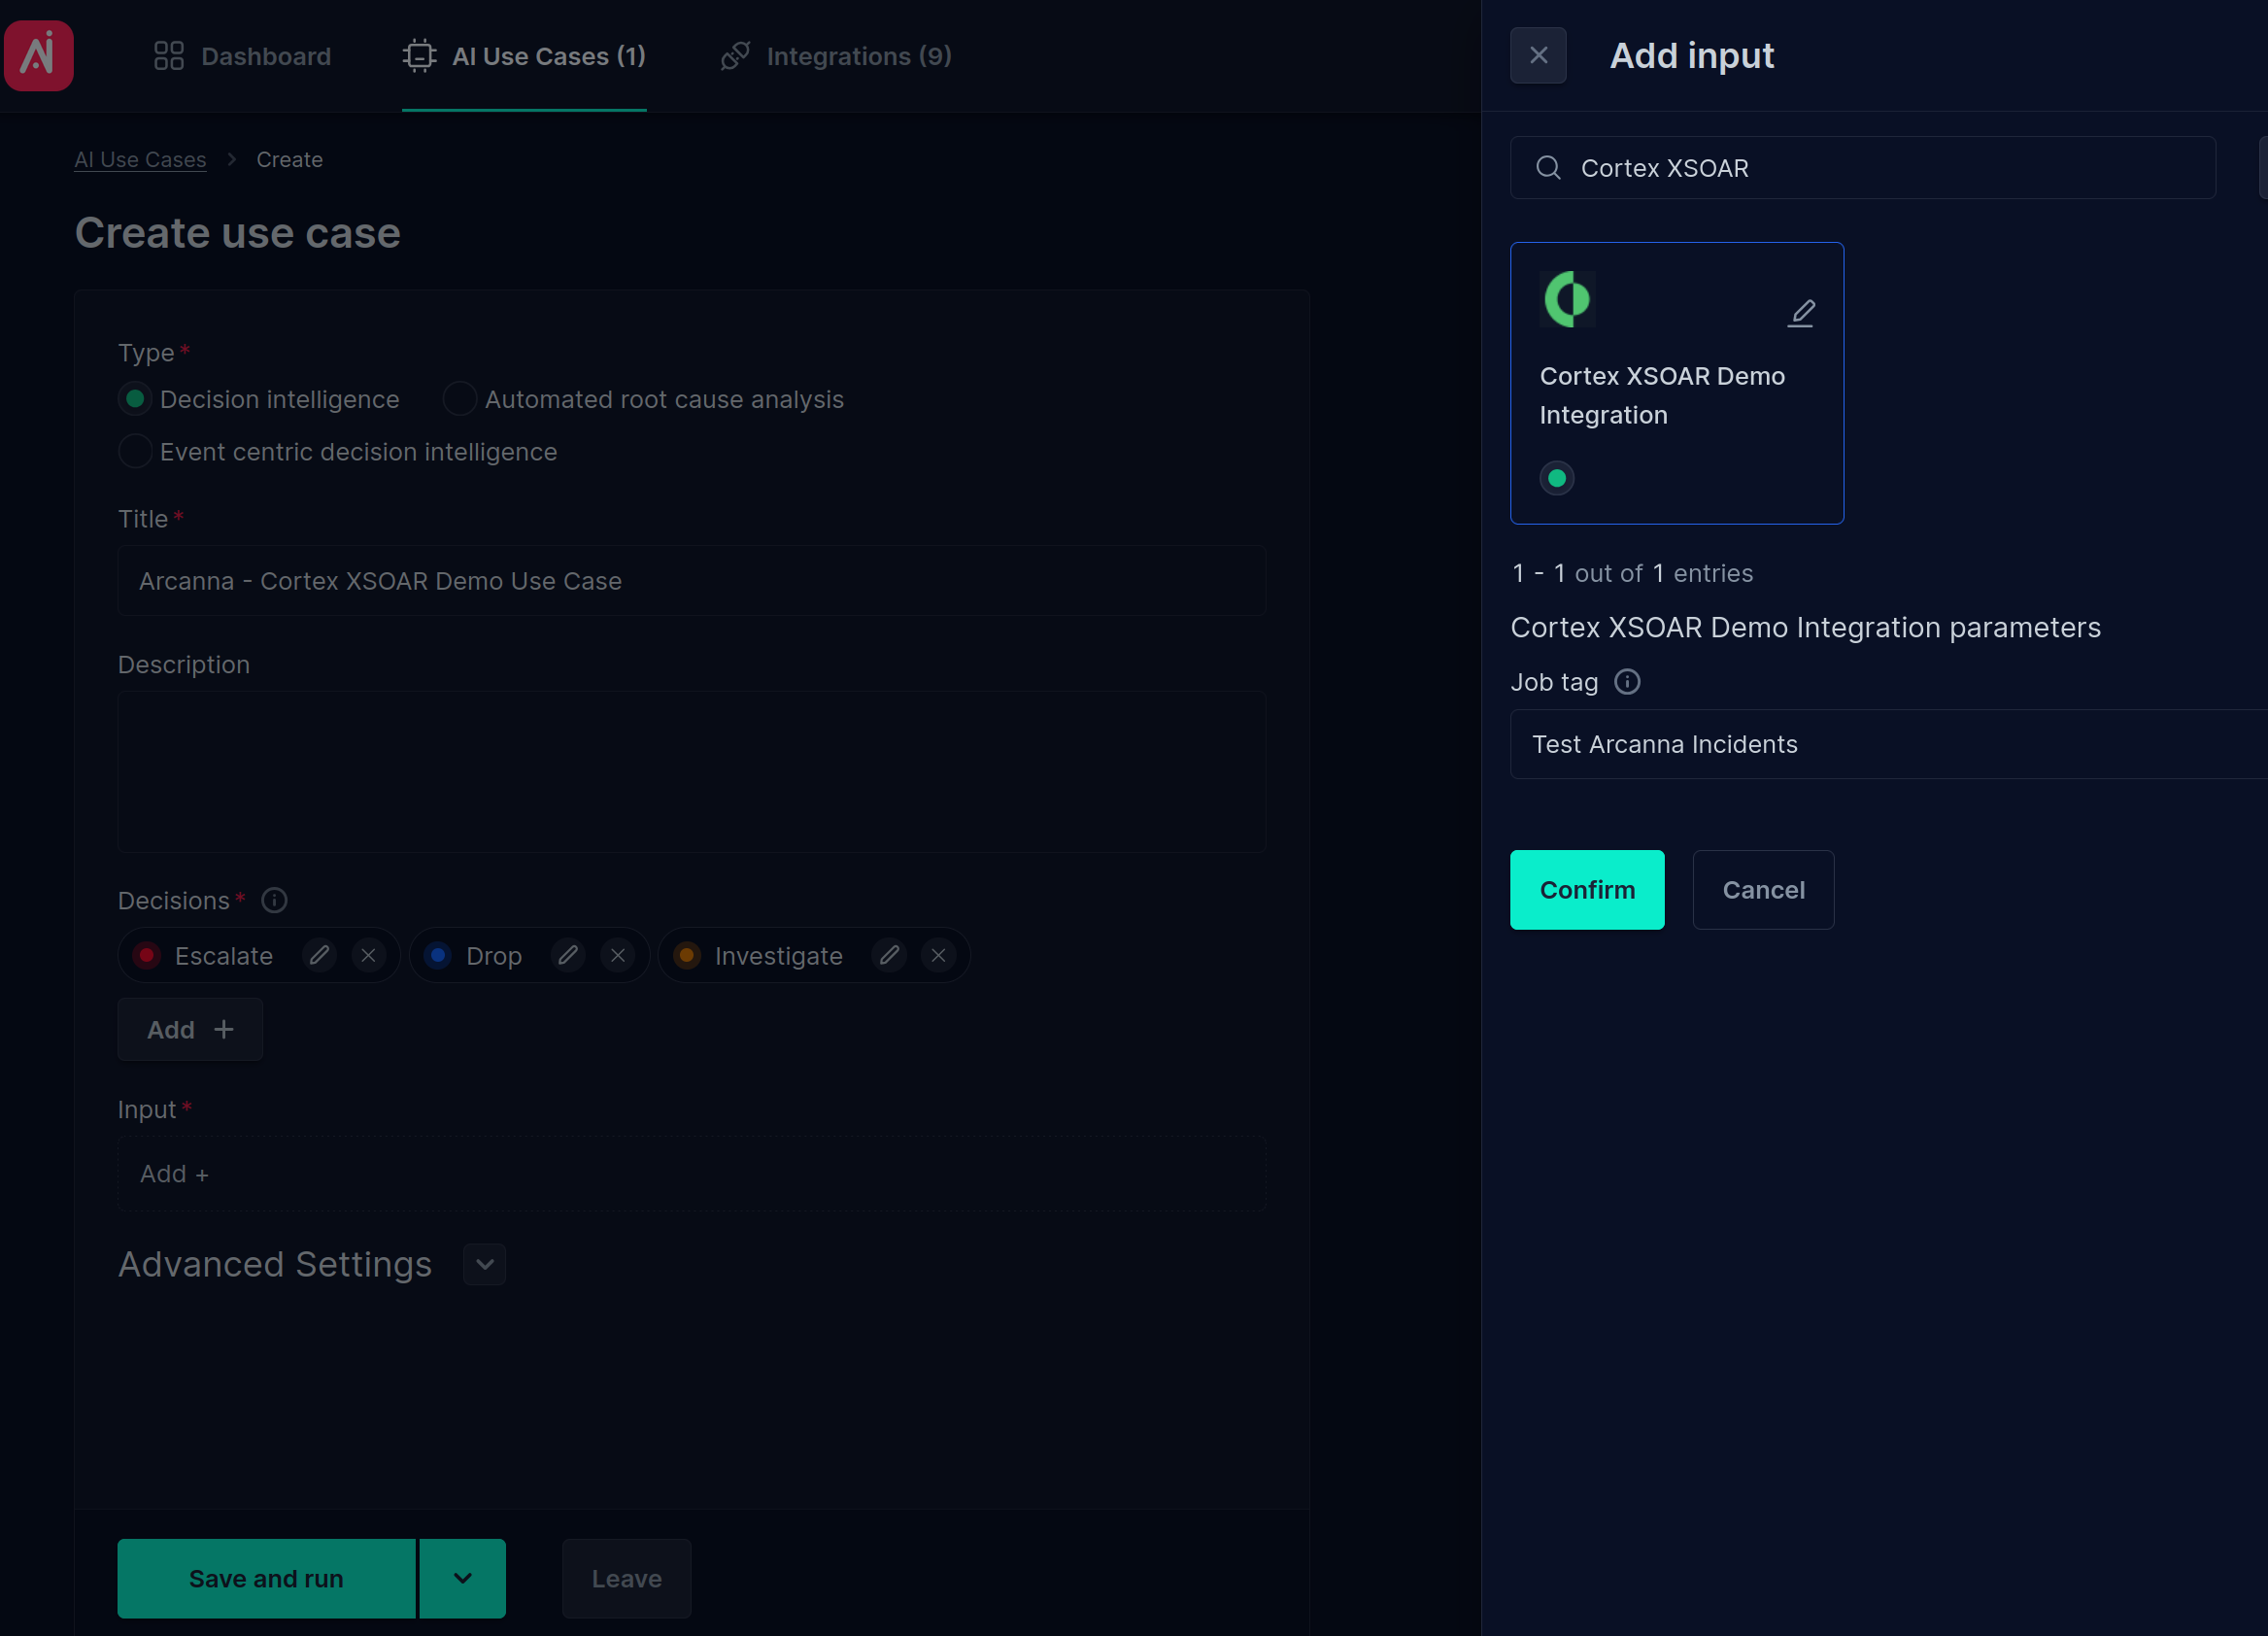
- Click Save and run to save and start the pipeline.
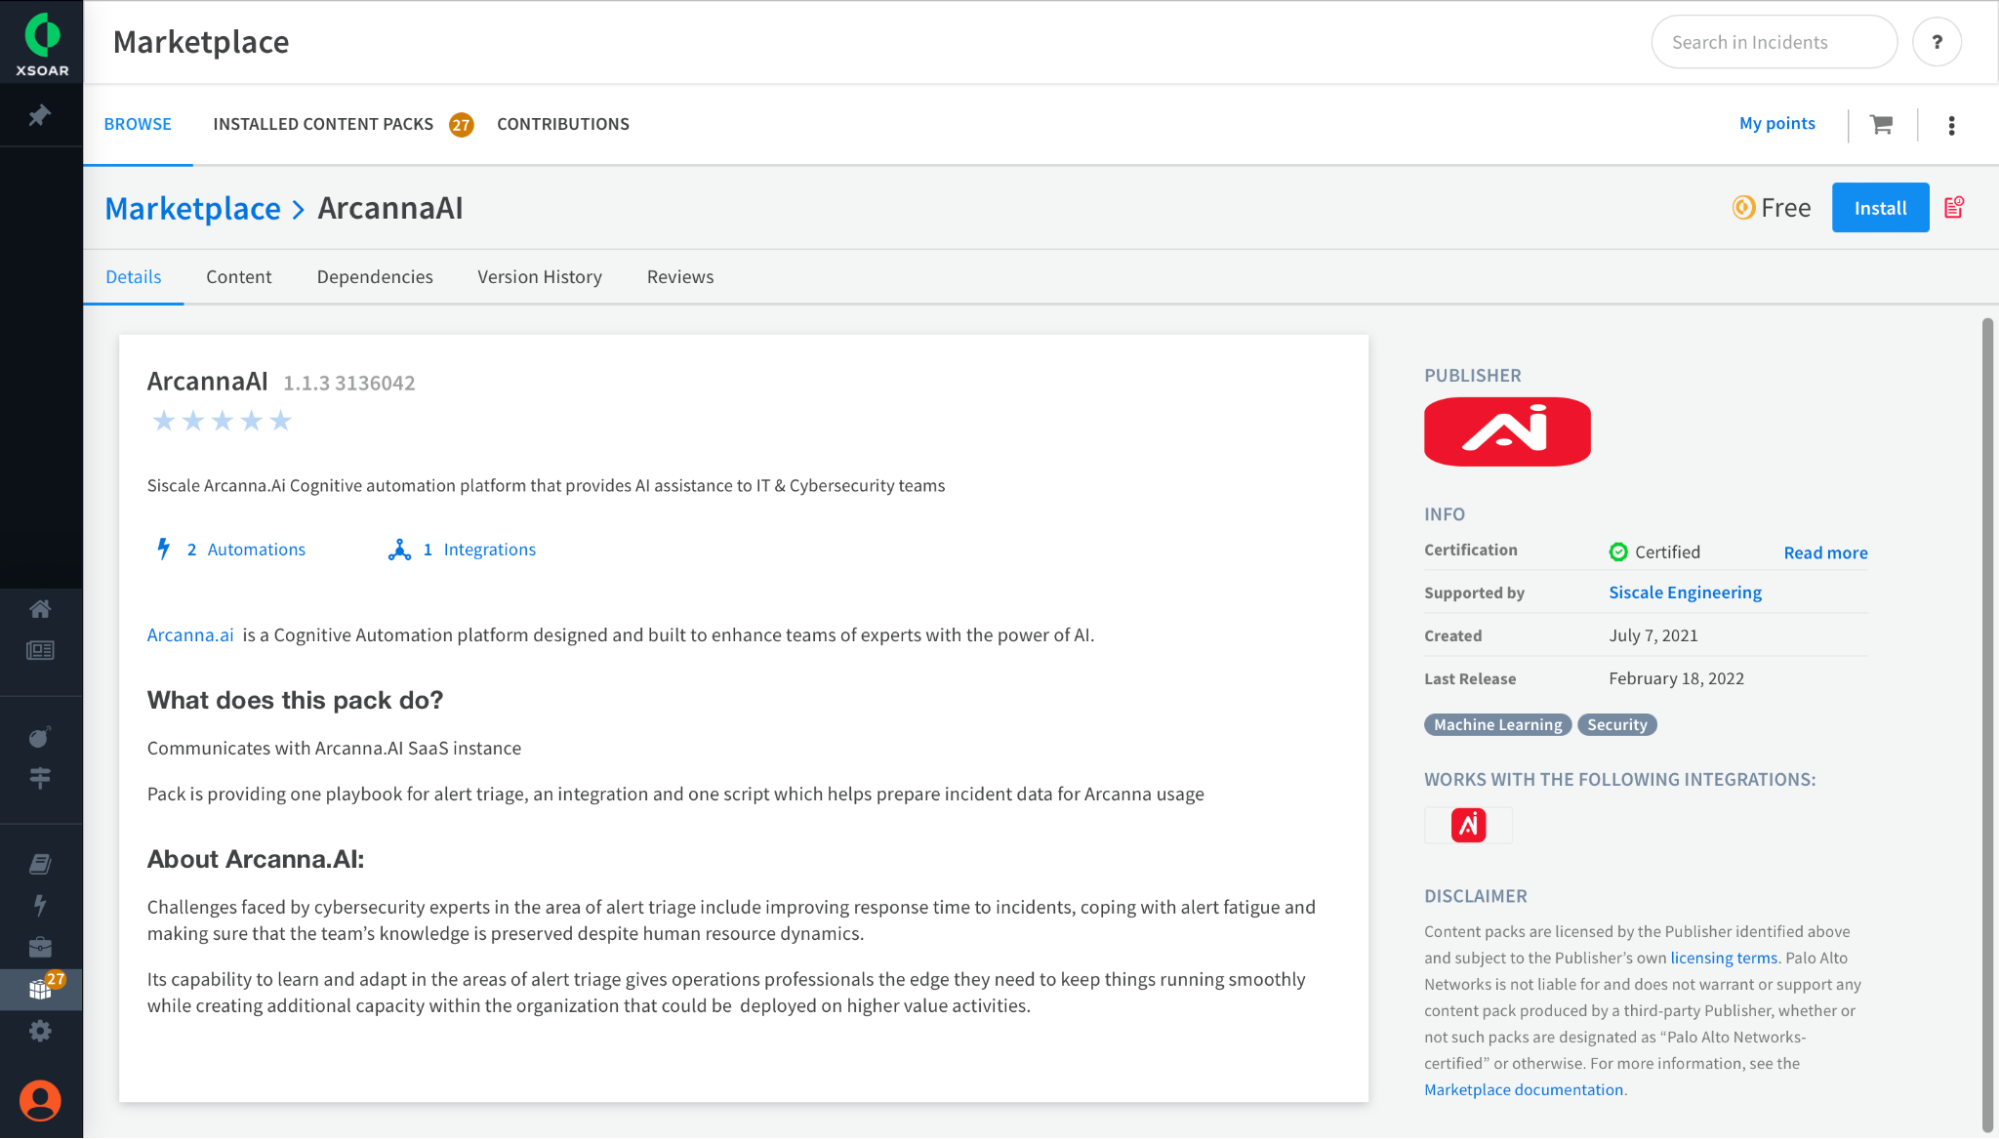
Go to Cortex XSOAR dashboard:
- Navigate to your Palo Alto Cortex XSOAR instance and open the Marketplace. Search for Arcanna, select it, and click the Install button:
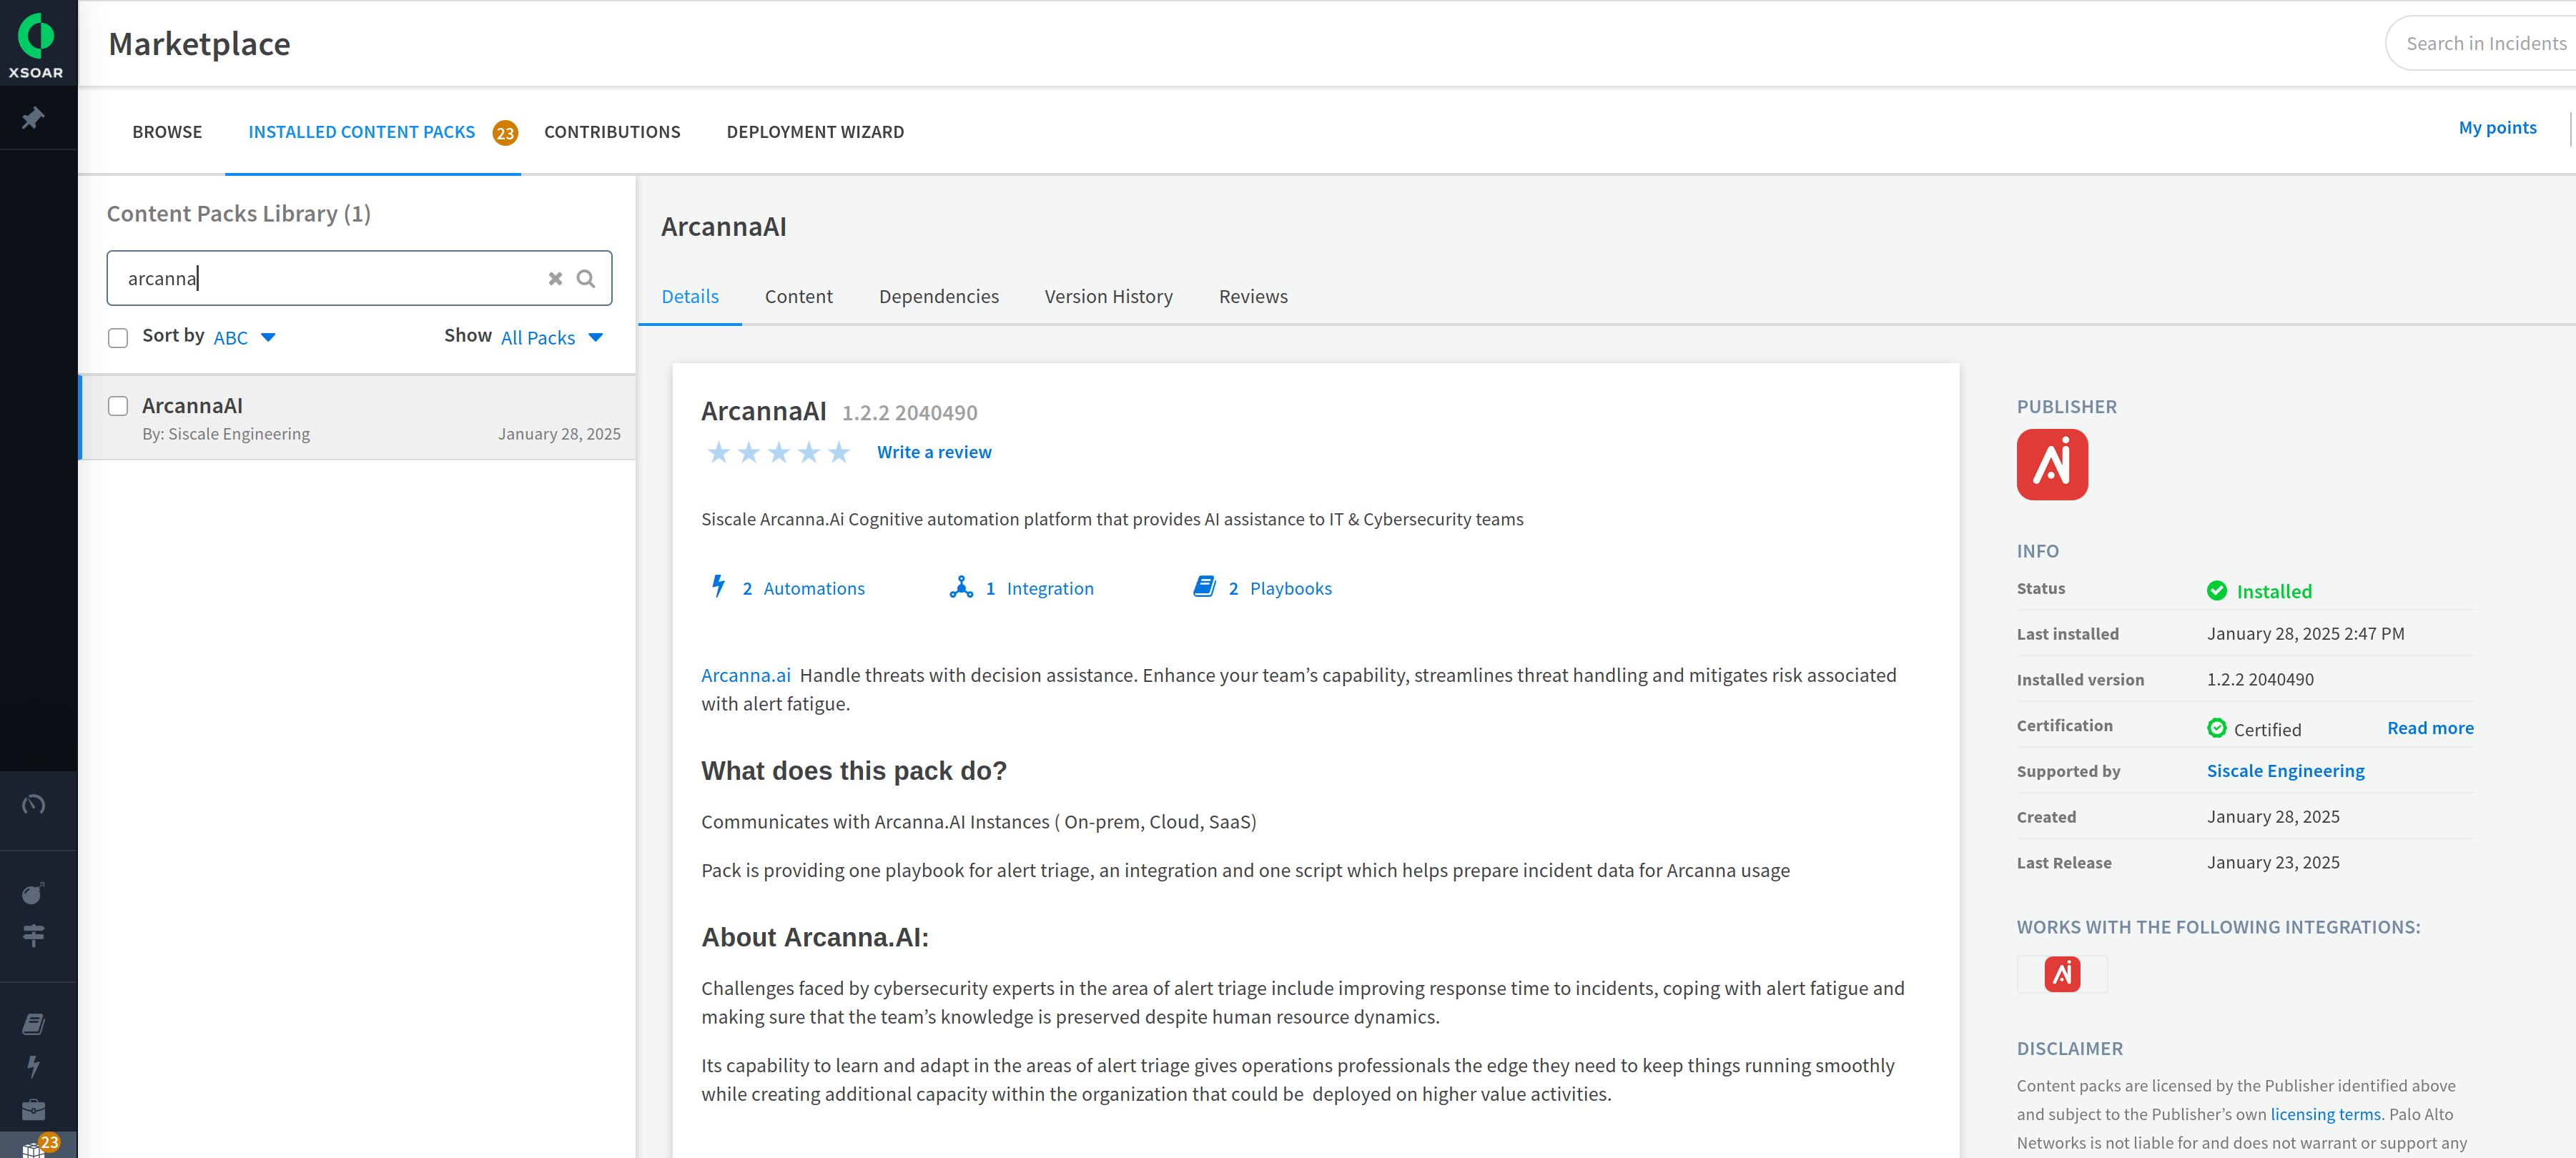
If Arcanna is already installed, you can find it under the Installed Content Packs tab:
After the installation is complete, go to Settings -> Integrations -> Servers & Services. Here you should see your newly installed Arcanna instance.
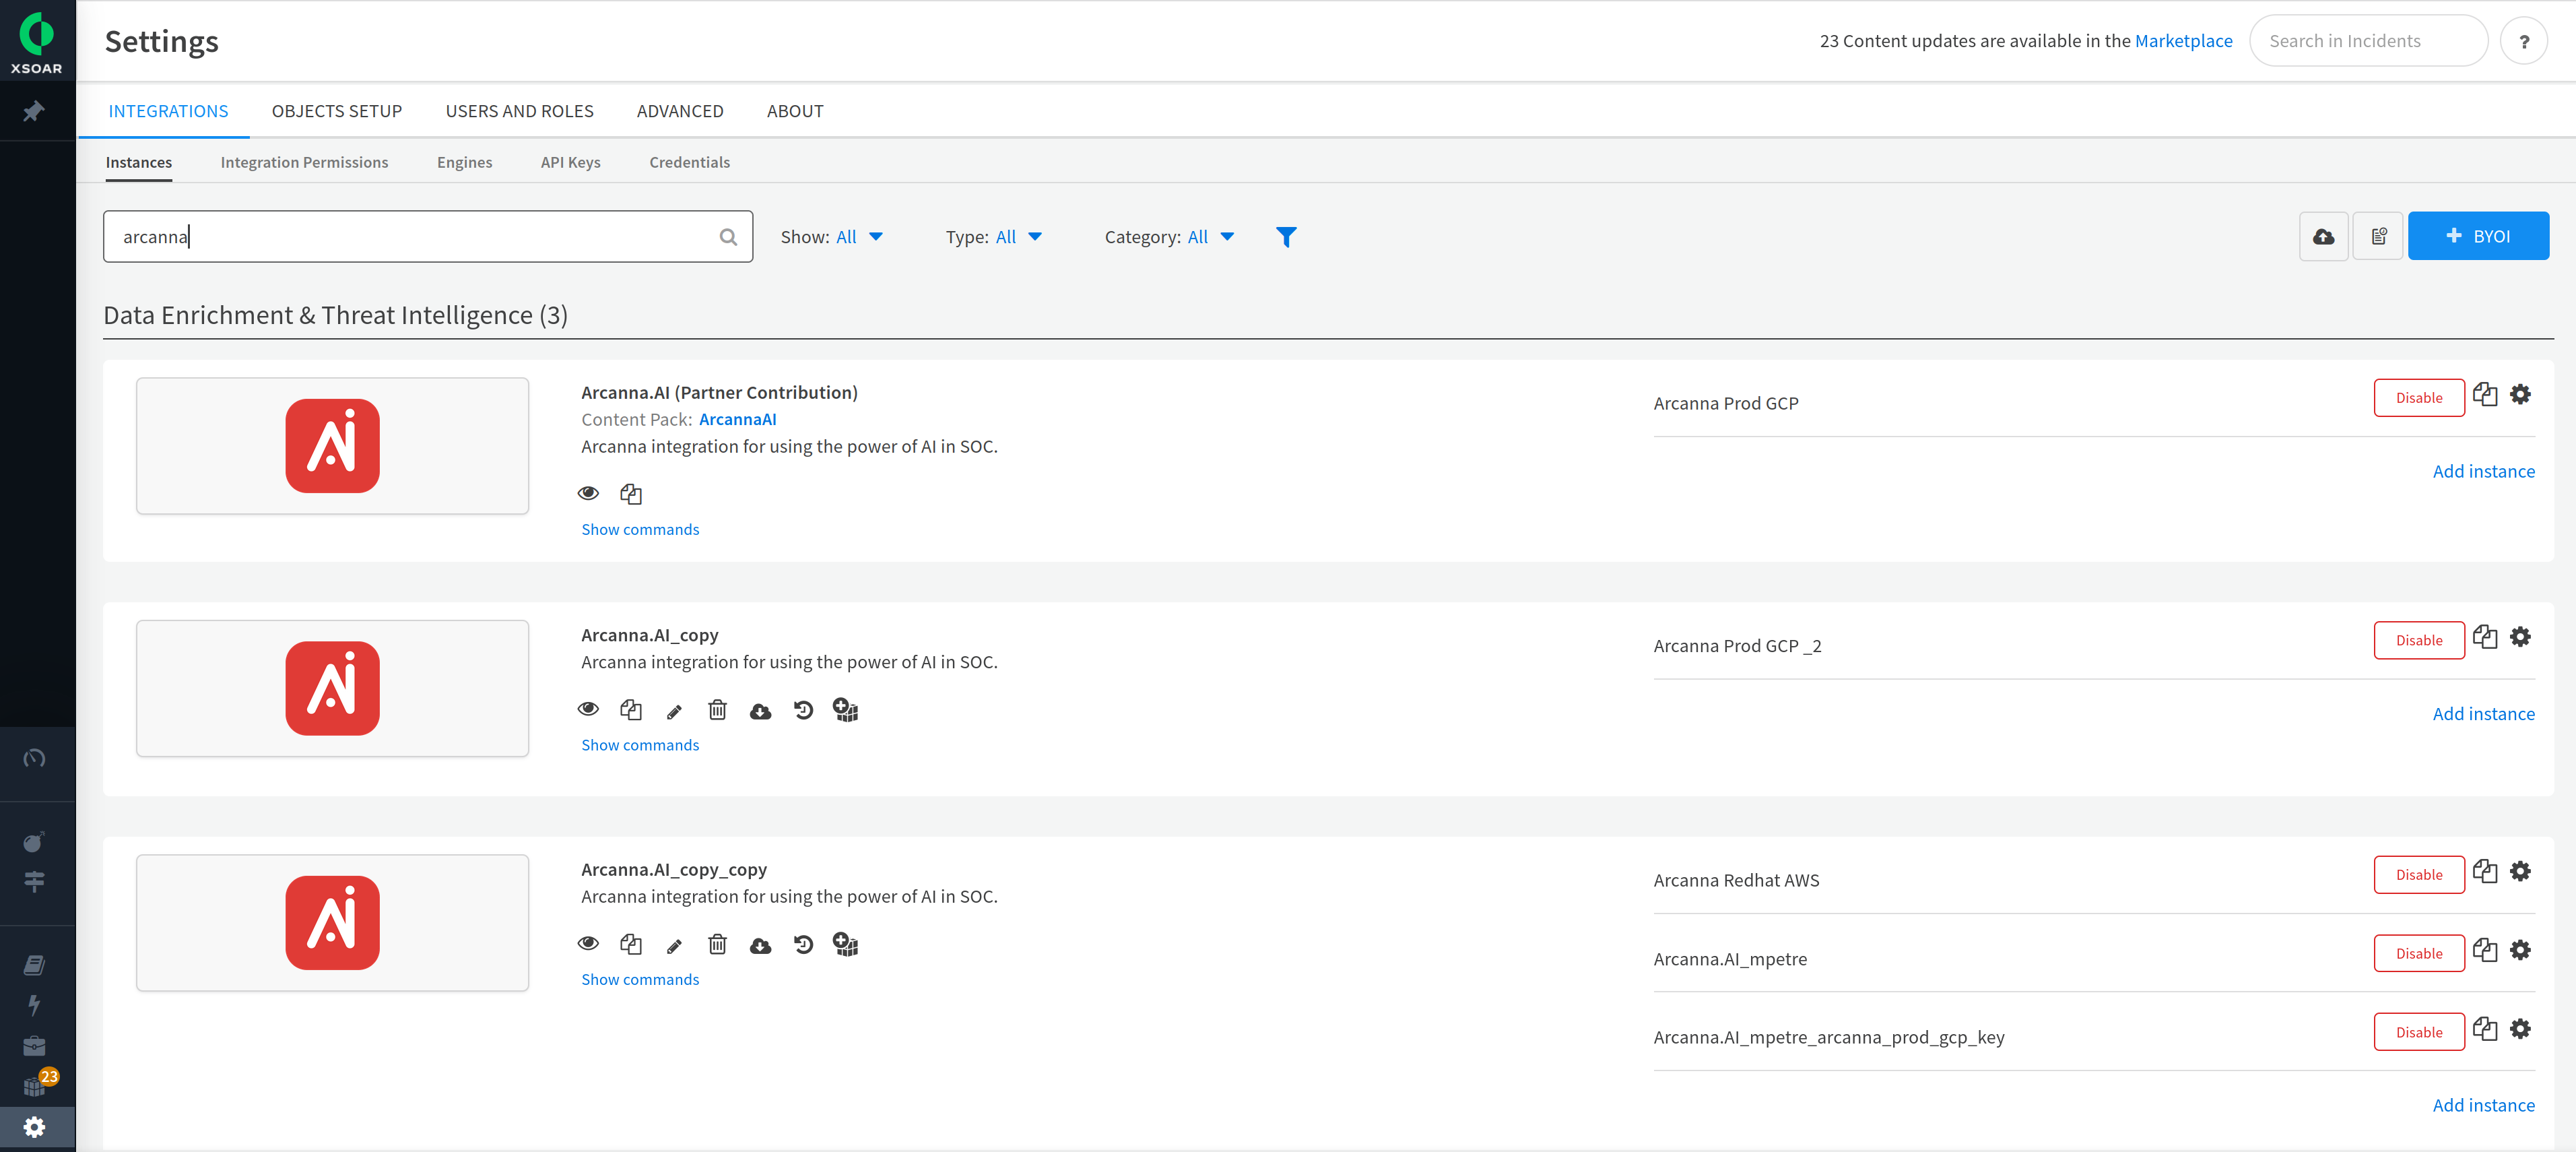
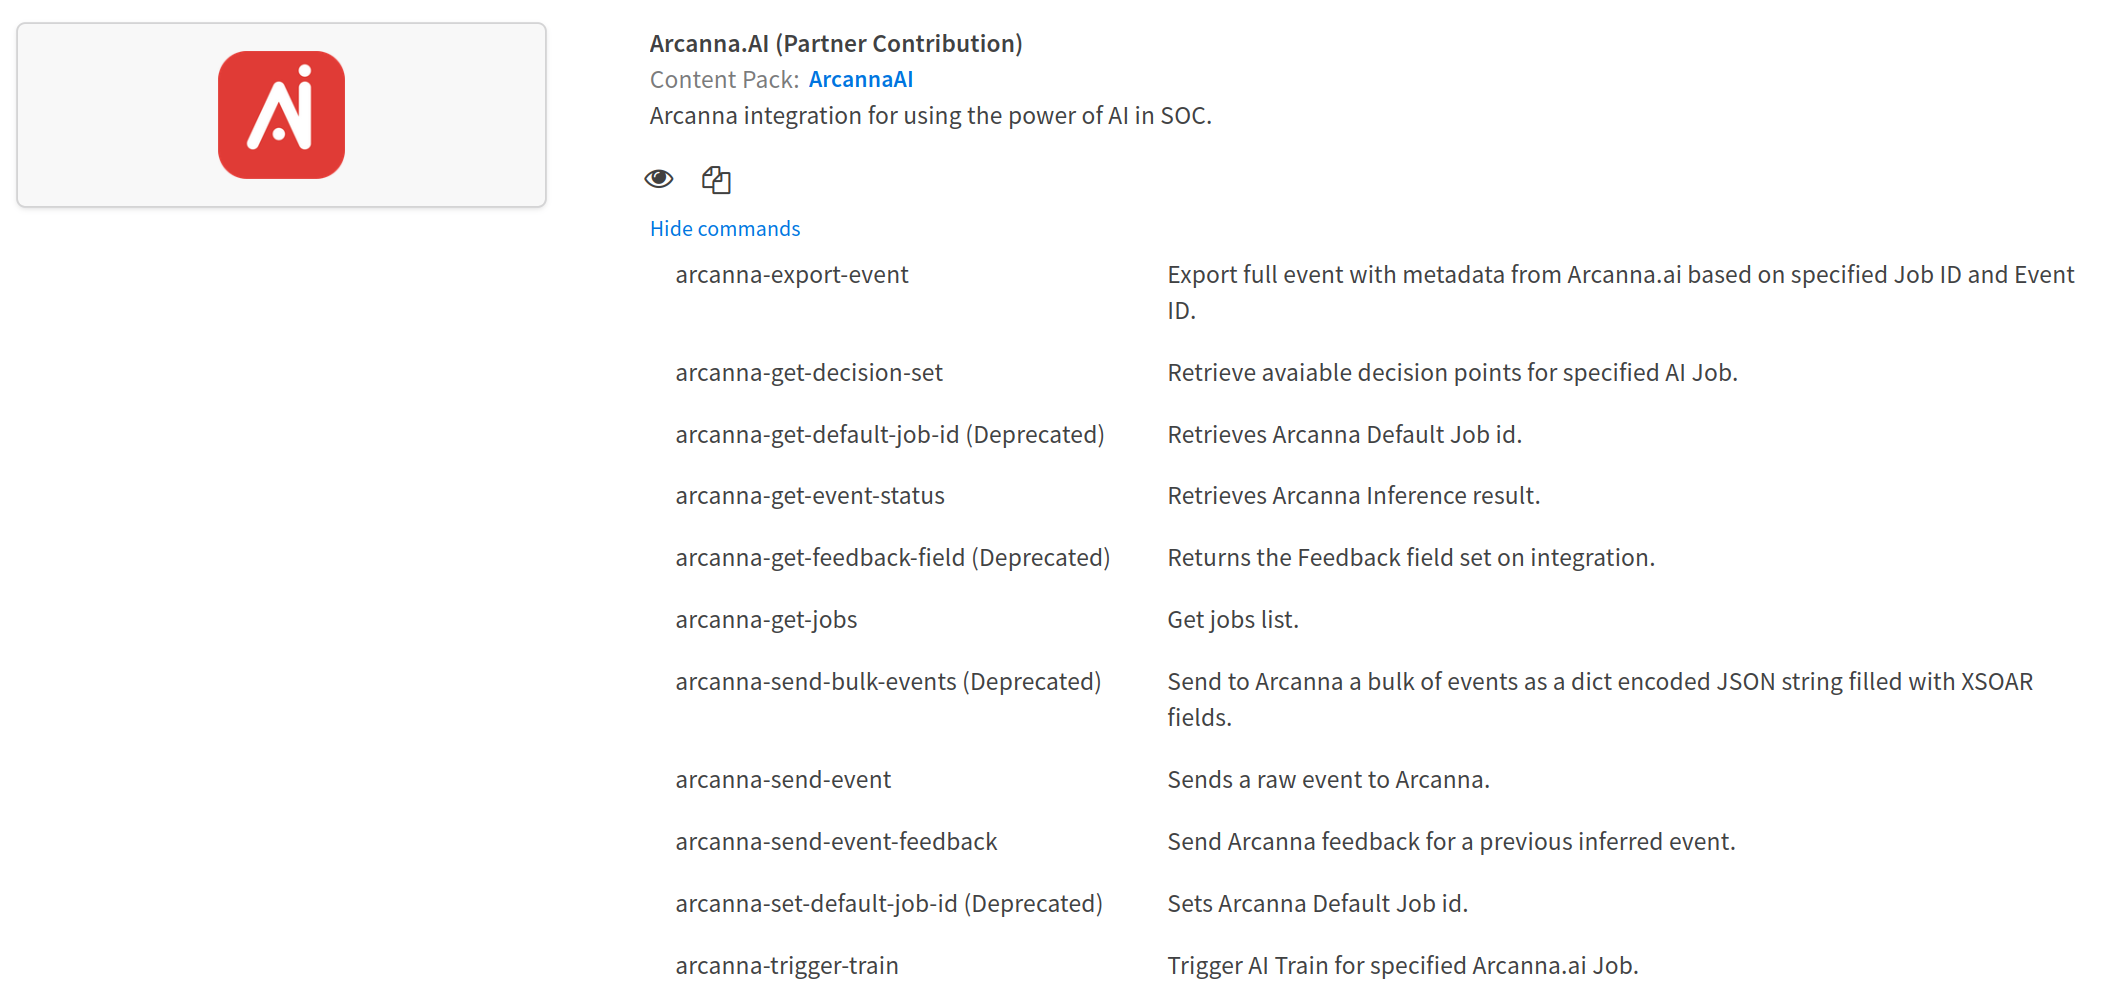
You can see all of the commands available for this integration by clicking on the Show commands button. Please note that these commands come by default from Arcanna and further commands can be added, based on the needs of the user.
In the beginning, you will not have any instances available, so click on Add Instance and you will be prompted with the following window, explained below:
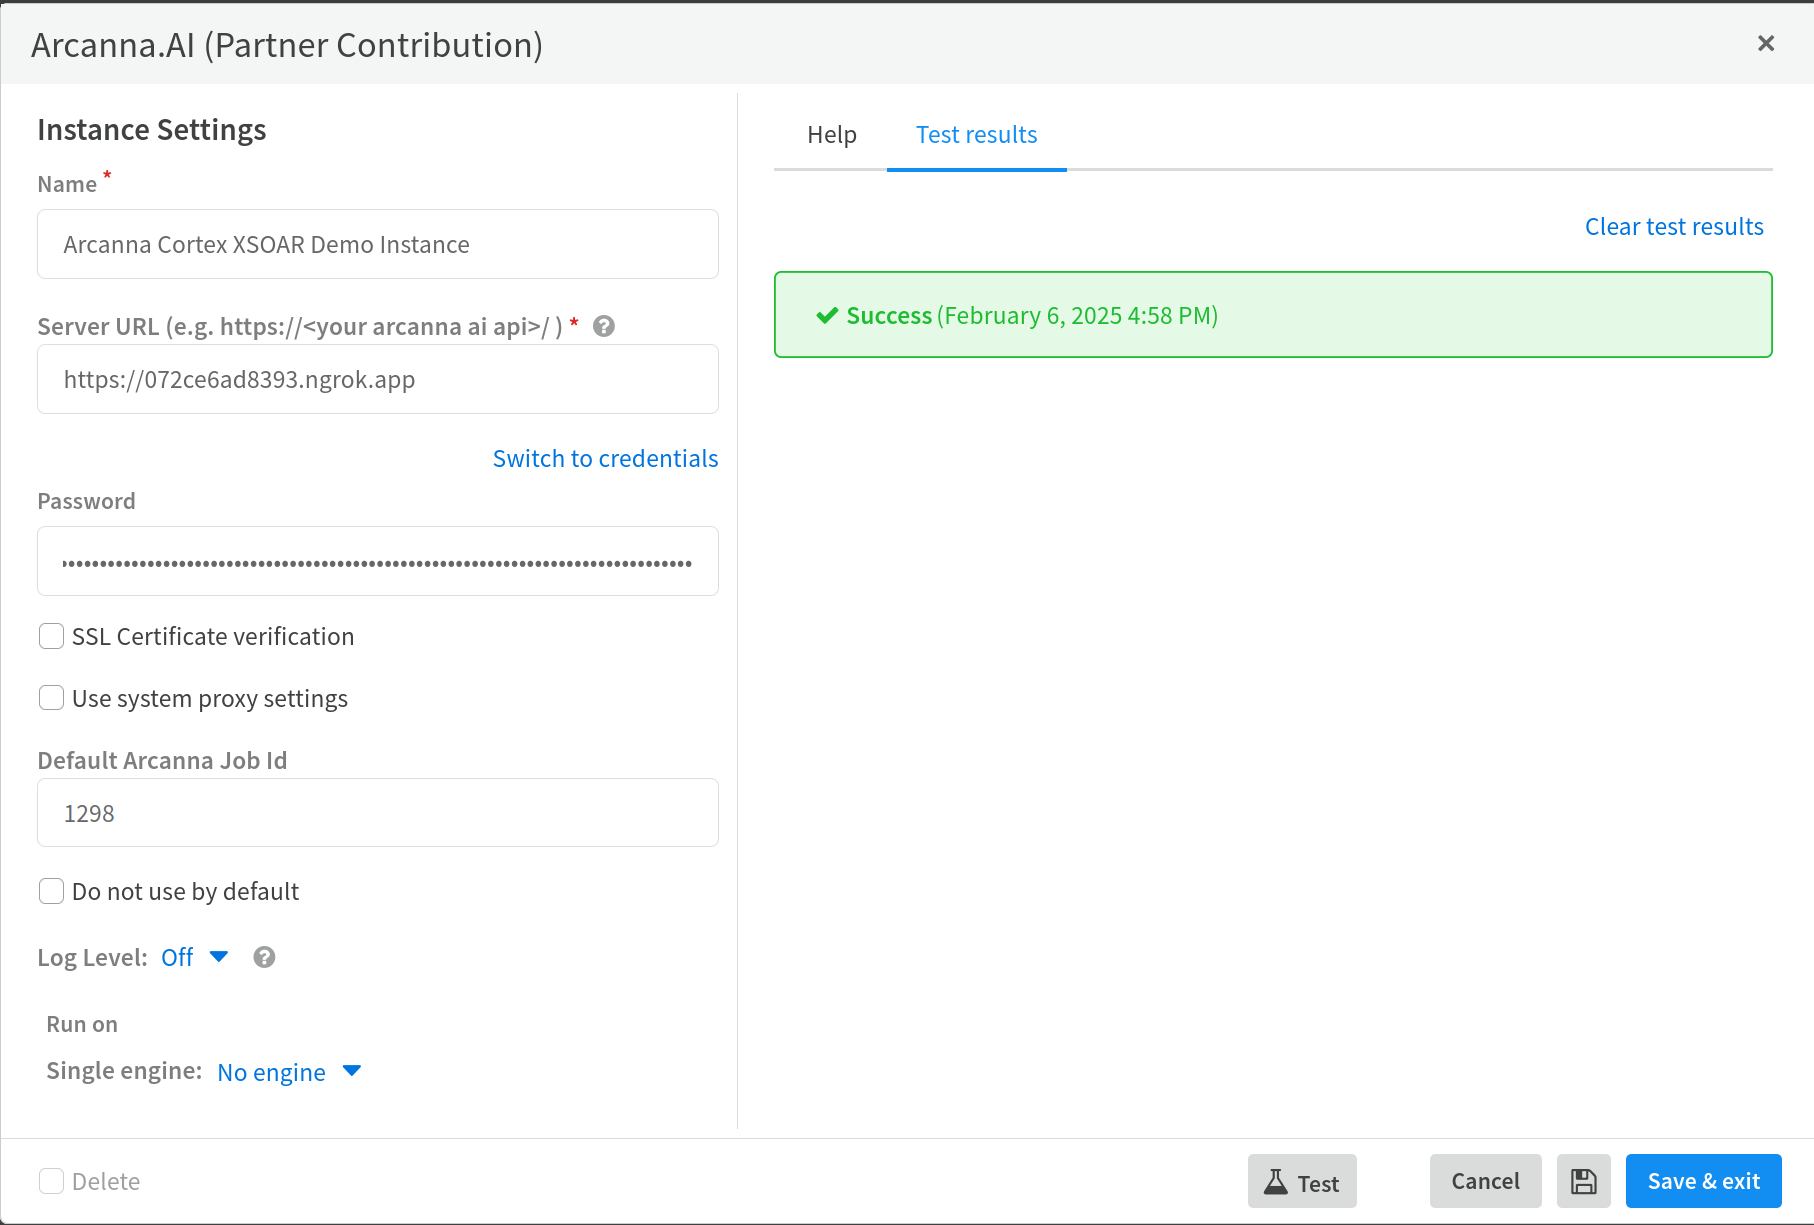
- Name - The name of your instance, it can be anything you want.
- Server URL - The URL of Arcanna instance (IP:PORT or DNS, default port=443).
- Password - The API Key that you previously generated from Arcanna.
- Default Arcanna Job ID - The Pipeline ID created in Arcanna that you would like to be considered as default. This is not mandatory.
When deployed in VM or in AWS, URL includes the same IP used to access the UI. When deployed in the Kubernetes environment, the URL would be the ingress port or port node configured at deployment.
Test the connection and make sure it gets successful. Click Save & Exit and the integration is complete.
At this point, using the pipeline created above, Arcanna is able to receive incidents that have been called through a Cortex XSOAR playbook, be it automatically or manually by an analyst.
Configure Playbook with Arcanna commands
-
Create a Playbook trigger first.
-
When creating a new task, select from the available Arcanna automation commands, and specify the Arcanna instance if multiple instances are defined.
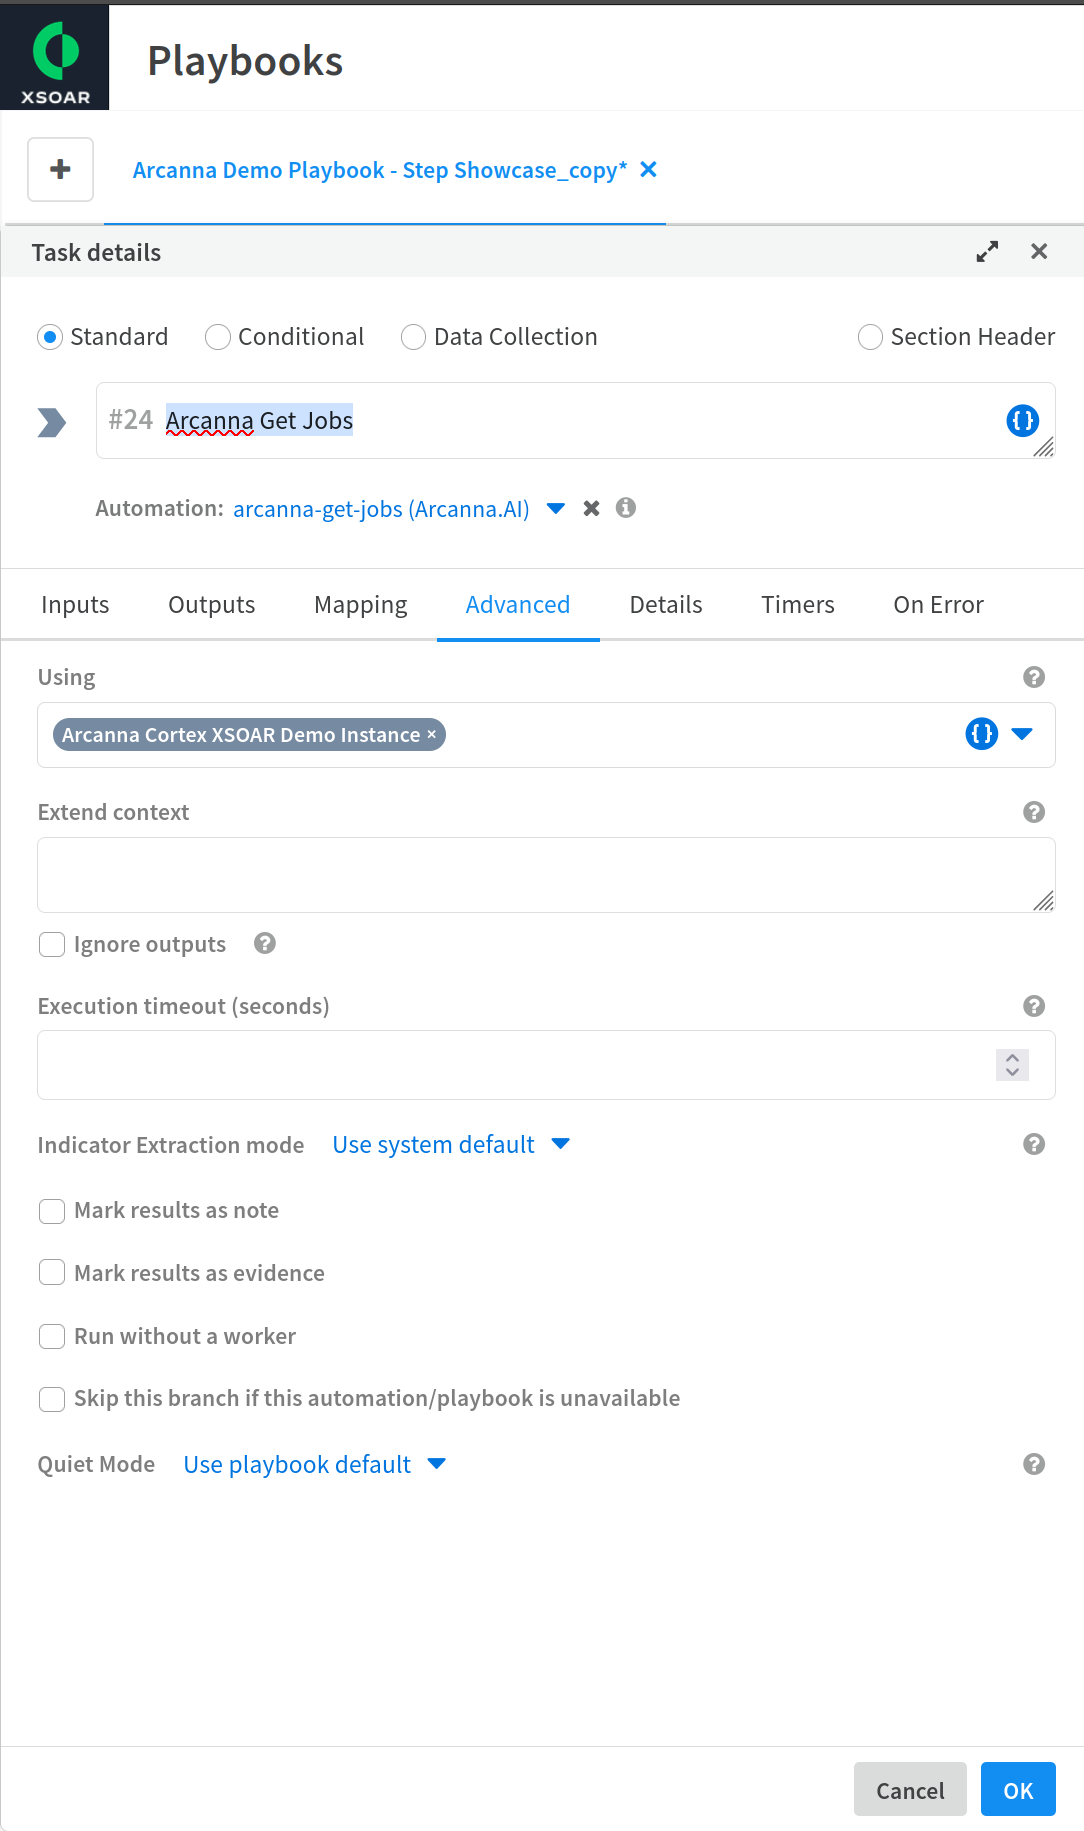
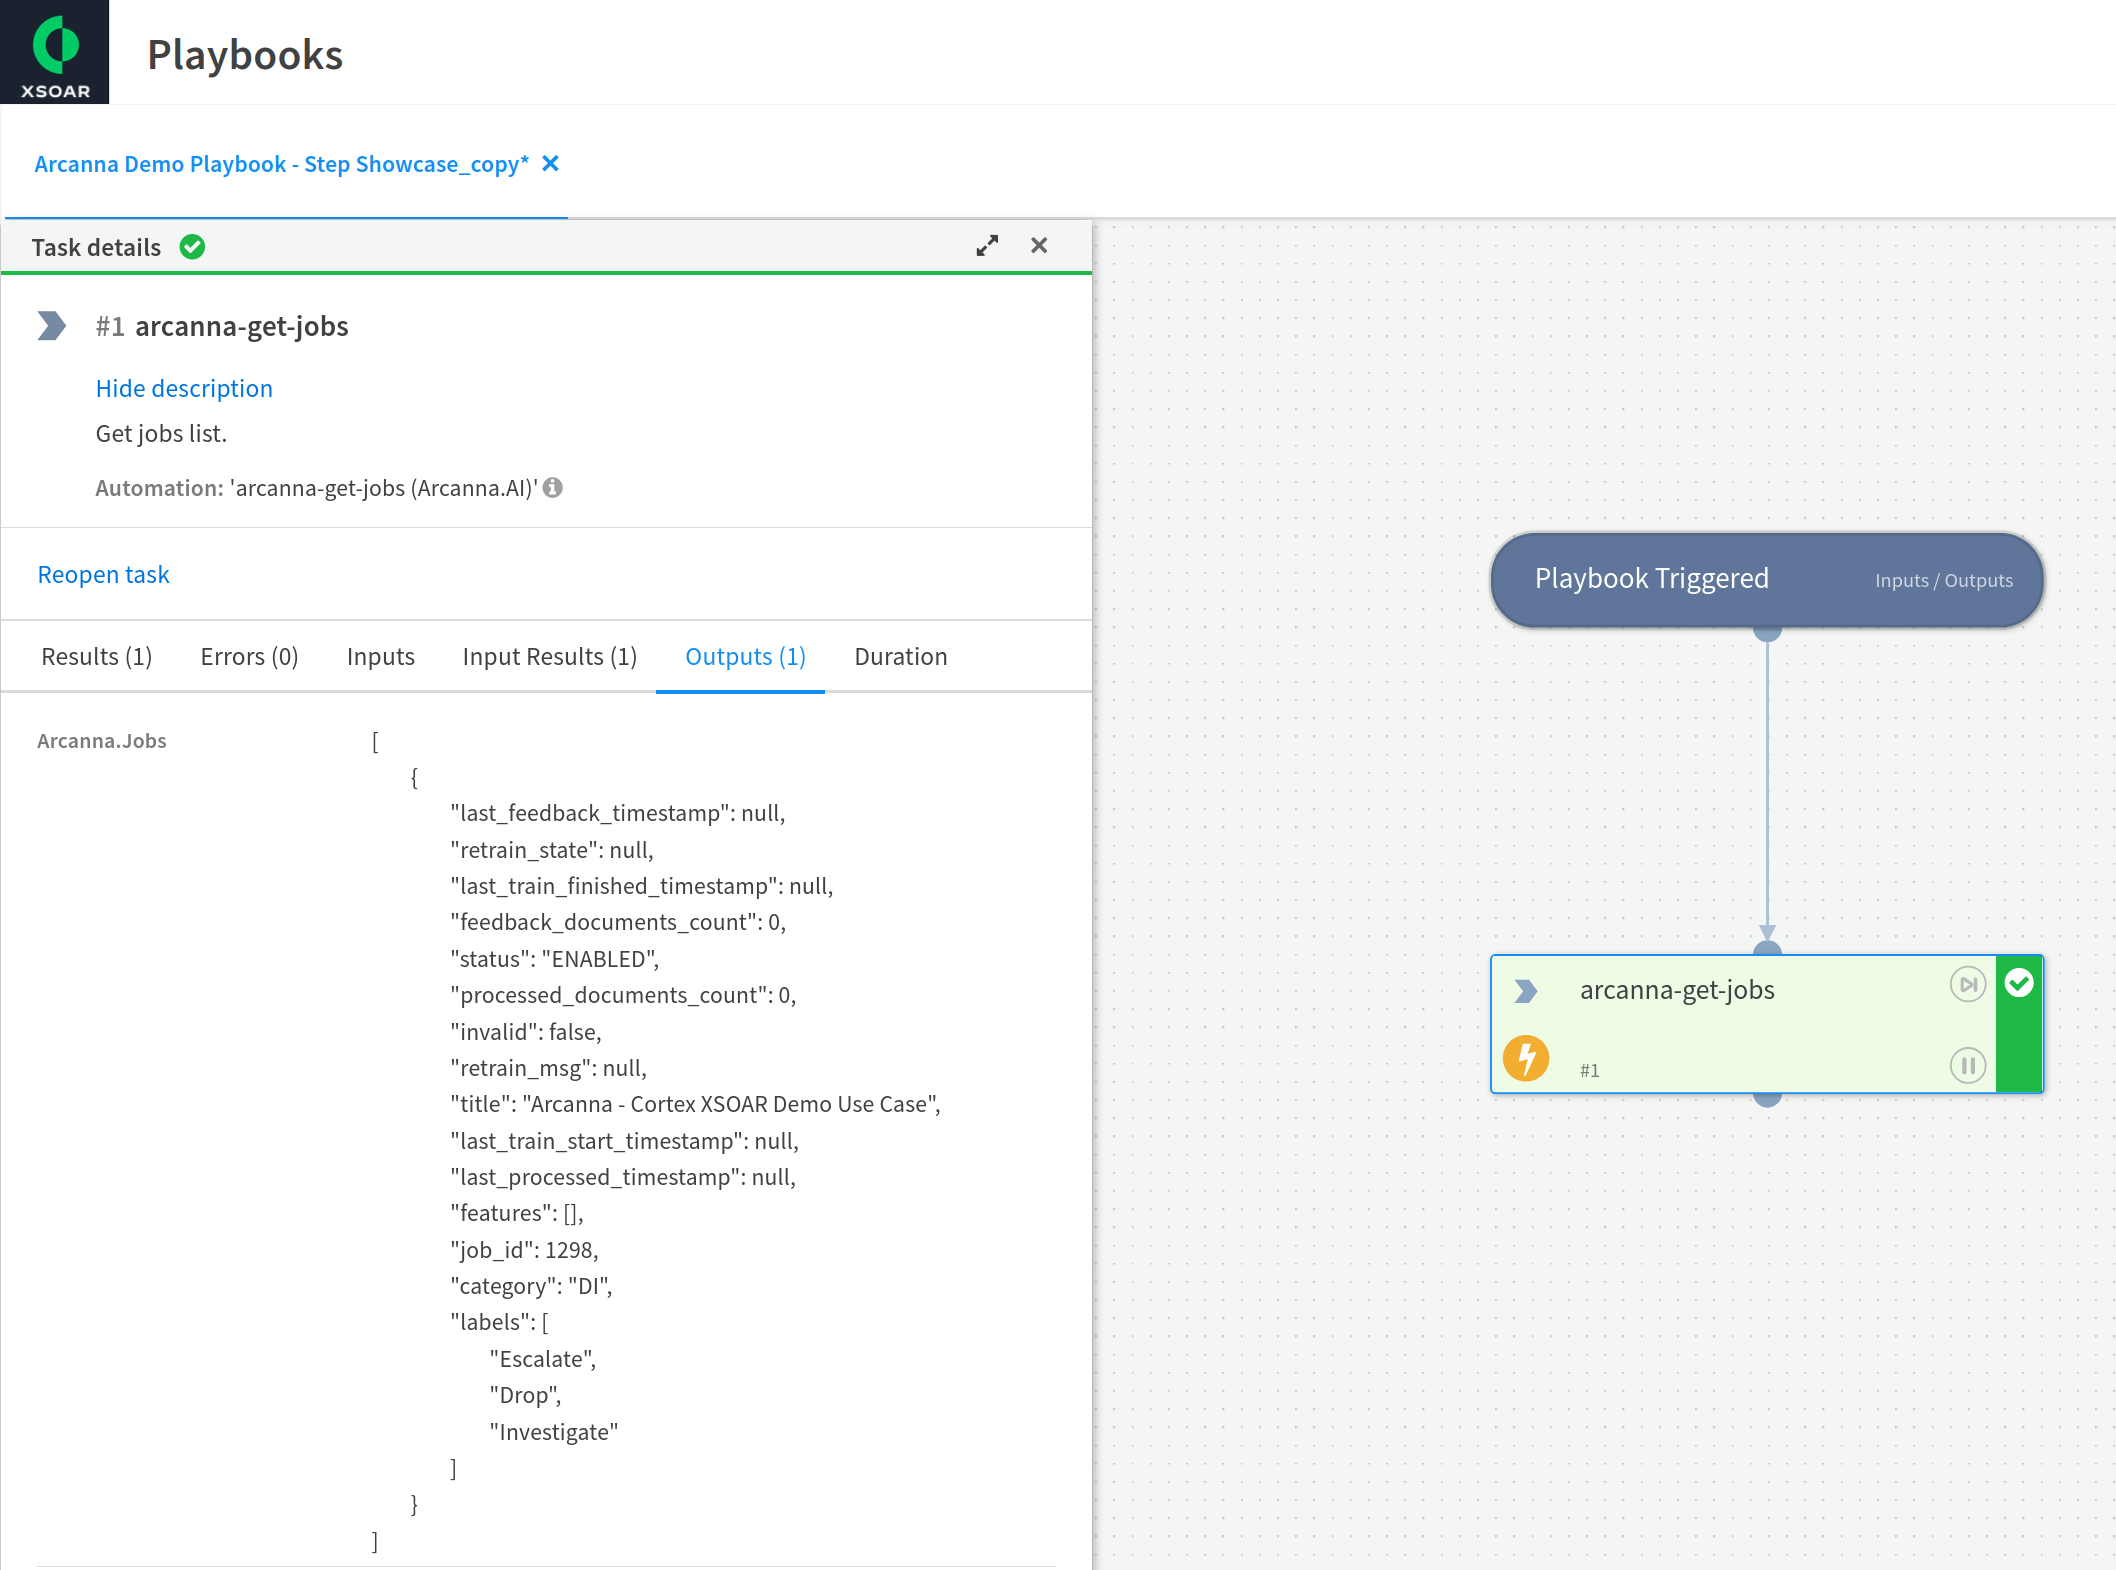
Get jobs - Returns a list of jobs which use the defined API Key
- Add a new task and choose arcanna-get-jobs automation and click Run. The result should look like this:
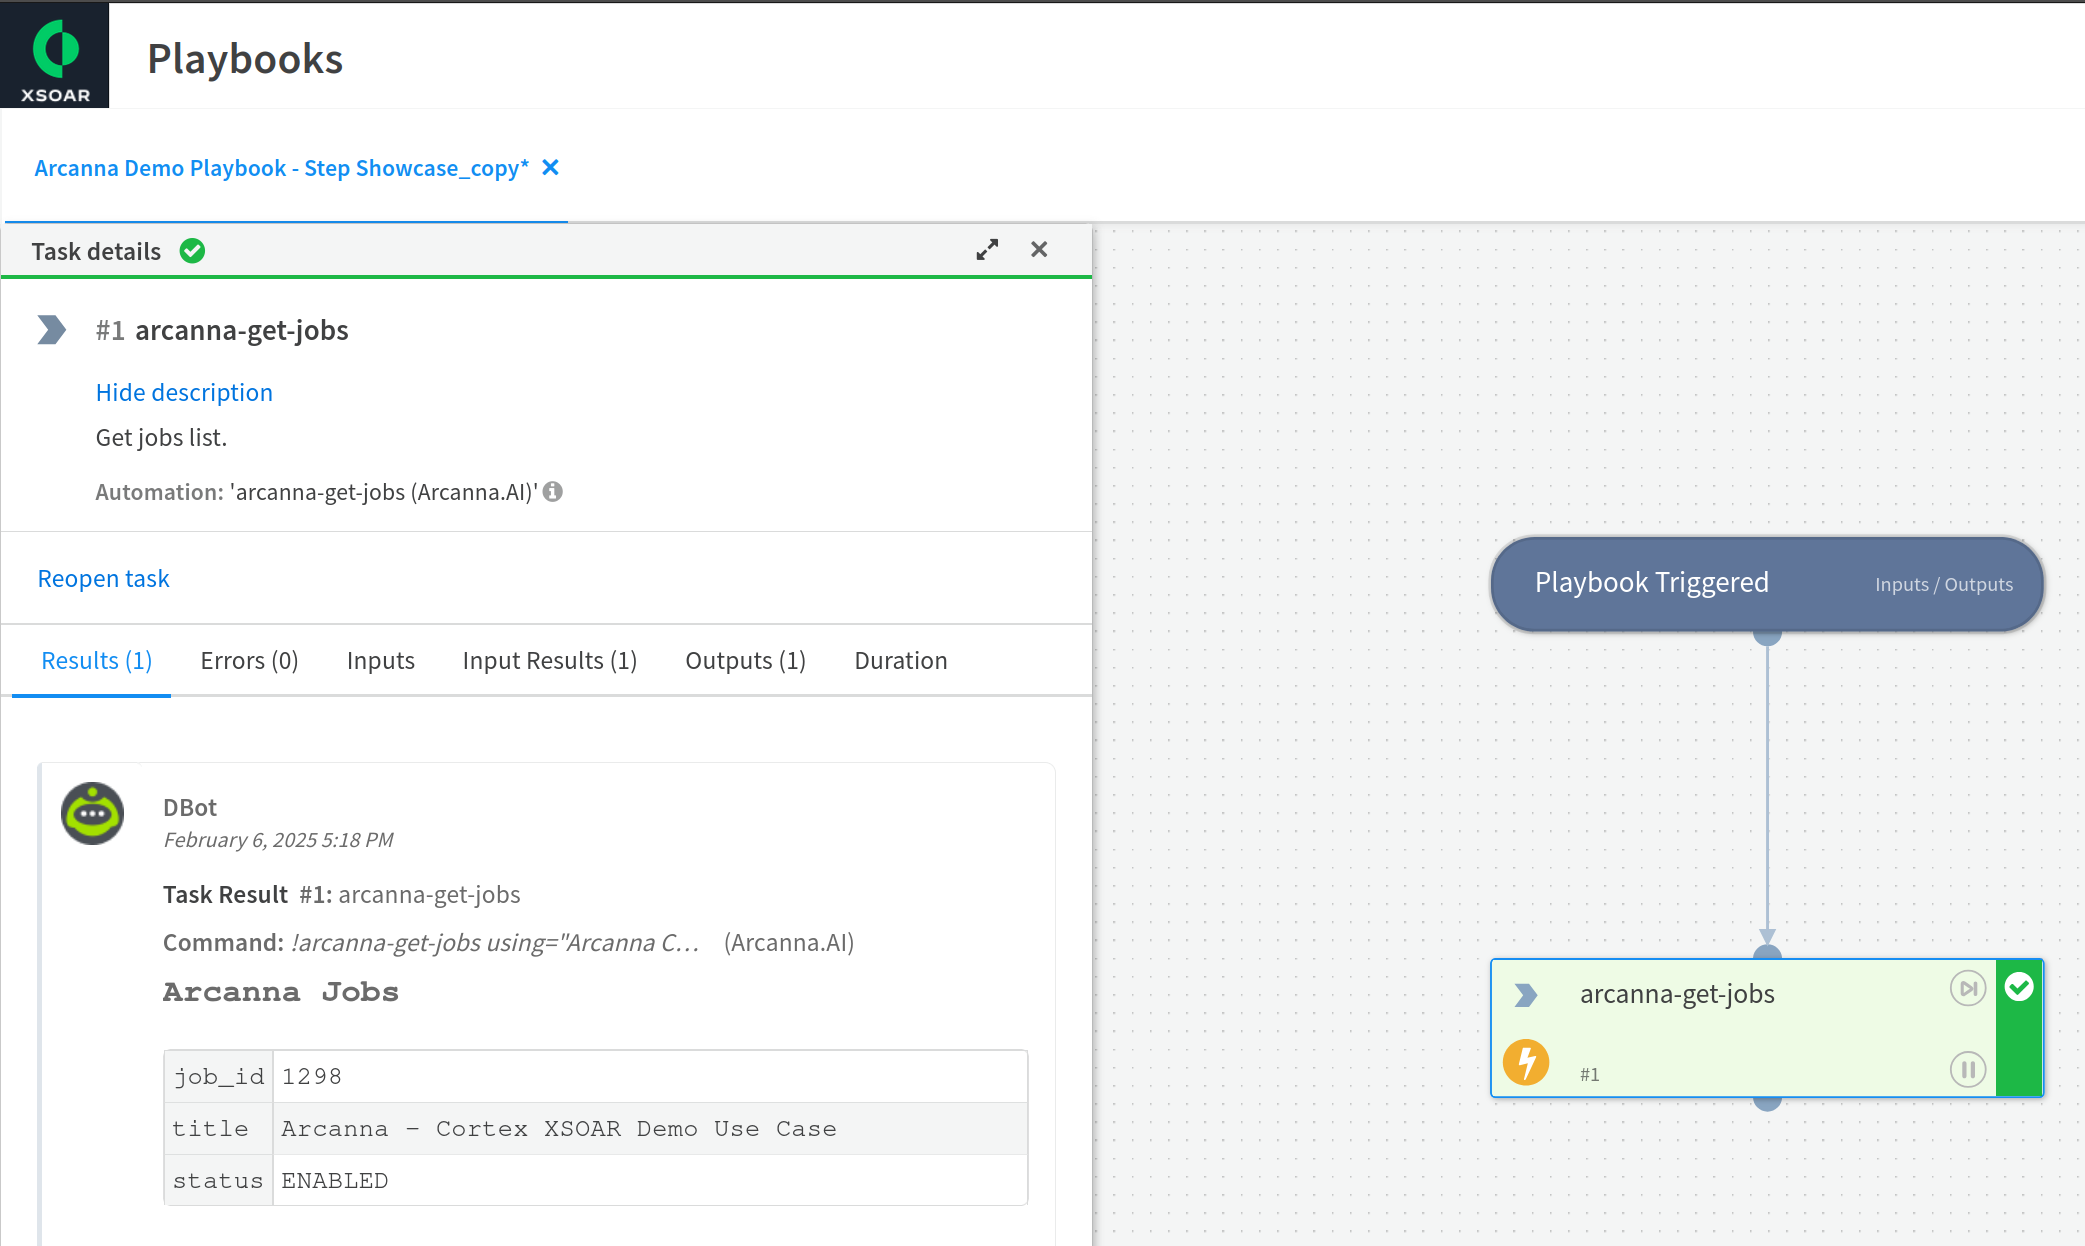
- Go to Outputs tab to see a more detailed response:
Get decision set - Returns a list of possible Arcanna decisions for the specified job
- Add a new task and choose arcanna-get-decision-set automation, configure
job_idor get it from the previous taskjob_id=${Arcanna.Jobs.job_id}and click Run. The result should look like this: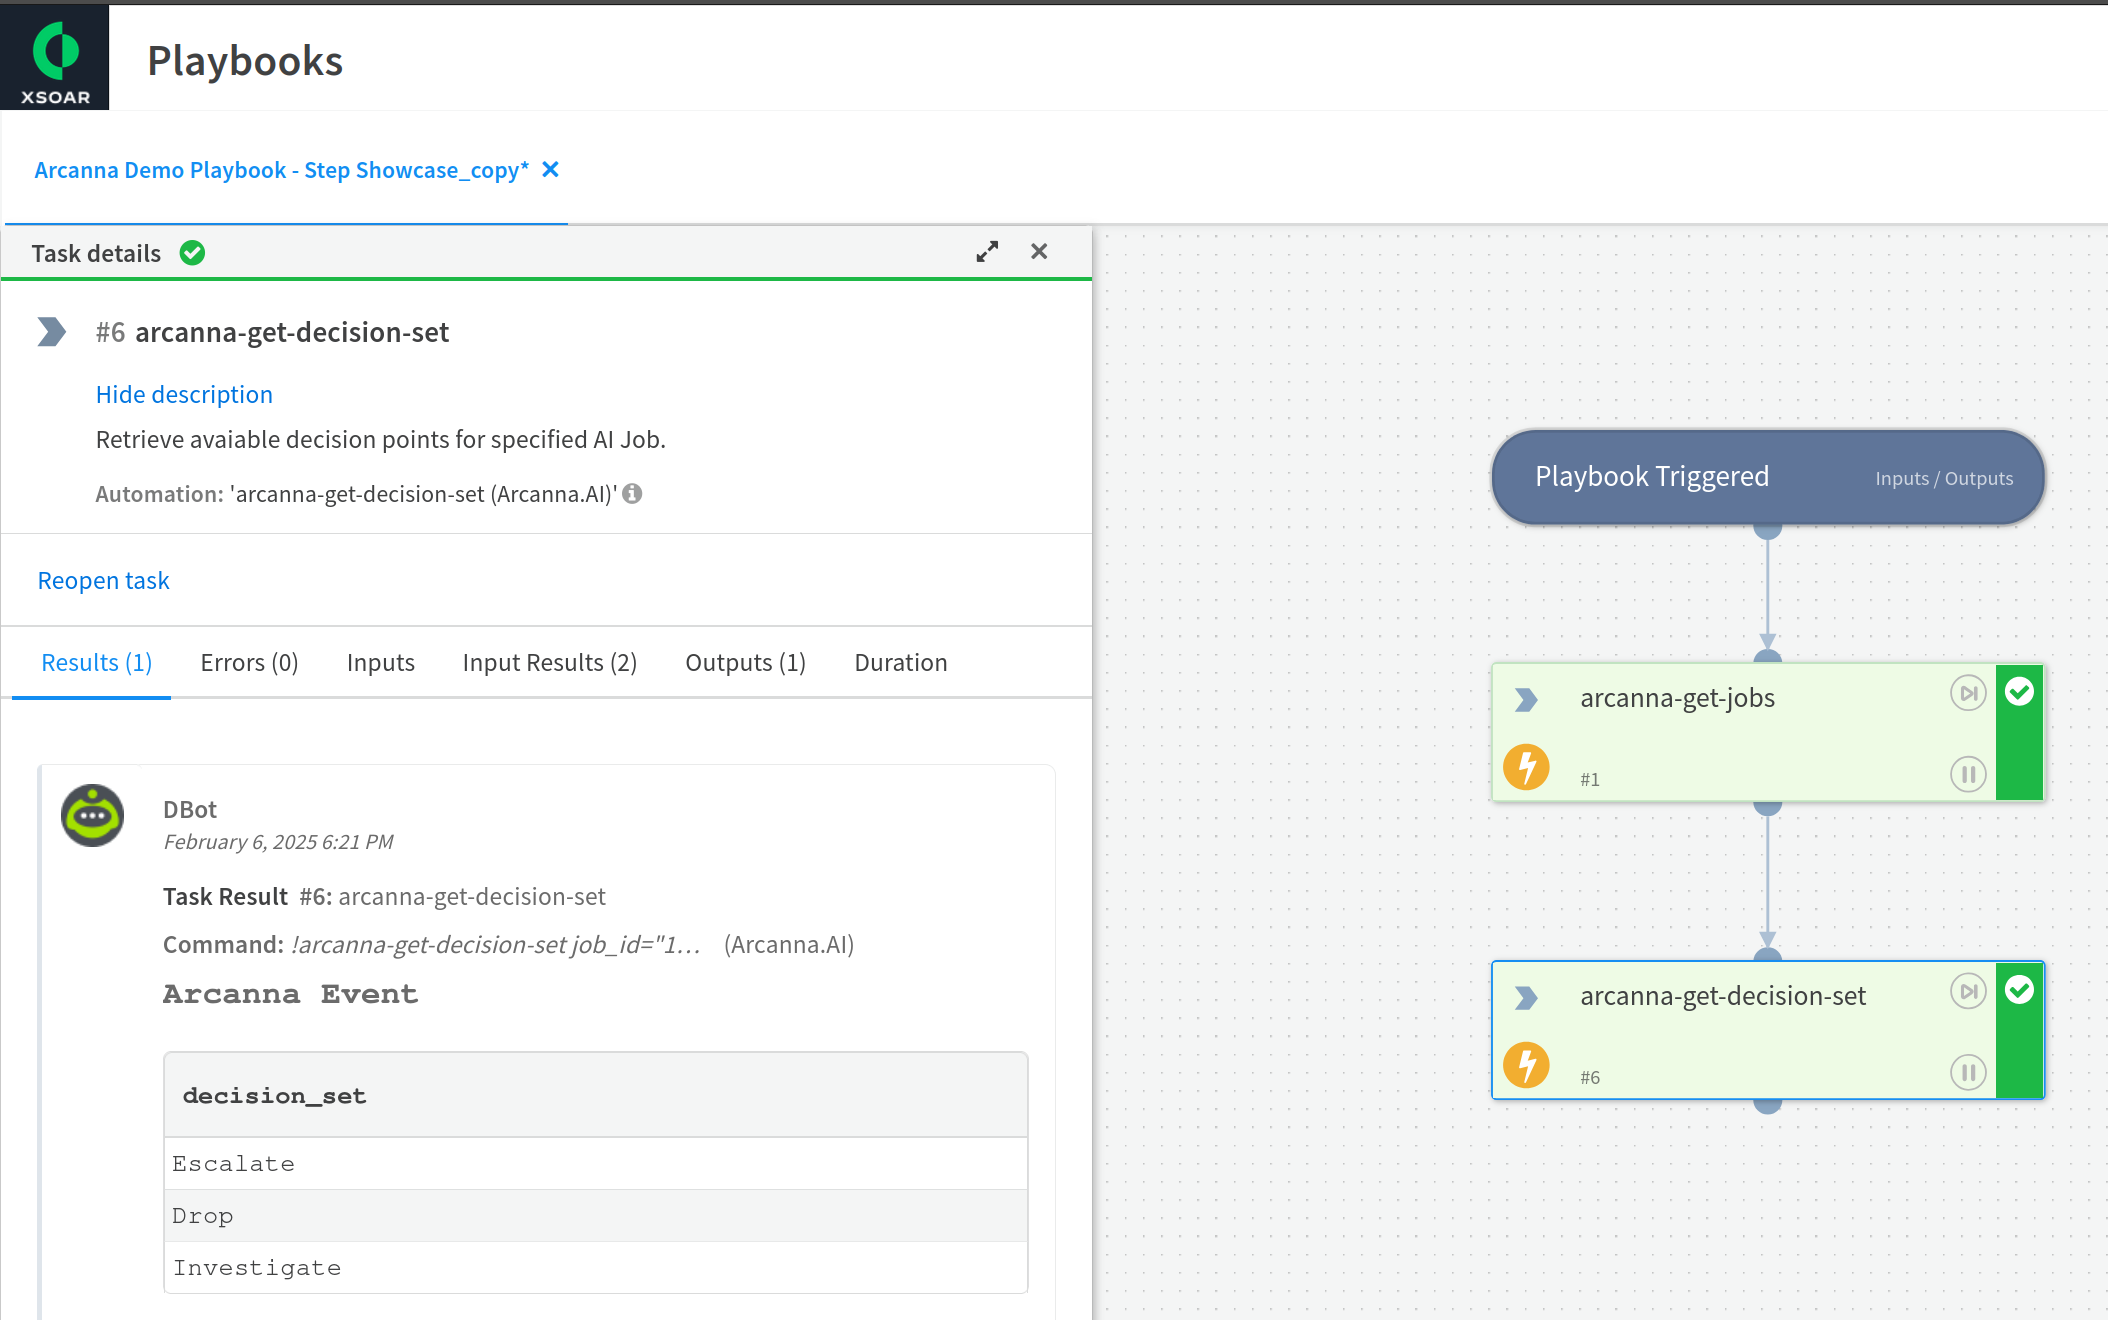
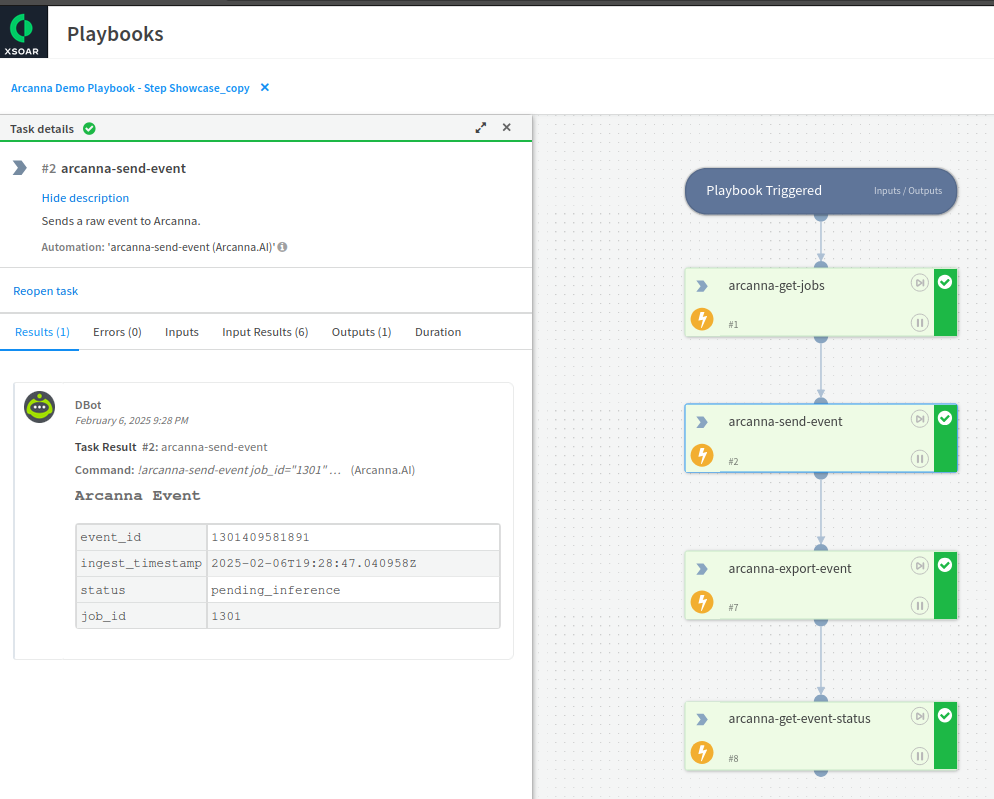
Send Event to Arcanna
- Add a new task and choose arcanna-send-event automation.
- Configure
job_idor get it from the previous taskjob_id=${Arcanna.Jobs.job_id}. - Configure
titleor get it from the incidenttitle=${incident.name}. - Configure
event_jsonwith the incident to be sendevent_json=${incident_json}. - Configure
id_valuewith the incident ID to be used in Arcannaid_value=${incident.alertid}. - Configure
severitywith the incident severity to be sendseverity=${incident.severity}.

- When running the playbook, the response should look like this:
- Repeat this step to send multiple events to Arcanna.
- Now we can navigate to the job's Event Explorer page and review our documents:

Export Event from Arcanna
- Add a new task and choose arcanna-export-event automation.
- Configure
job_idor get it from the previous taskjob_id=${Arcanna.Event.job_id}. - Configure
event_idor get it from the previous taskjob_id=$${Arcanna.Event.event_id}.
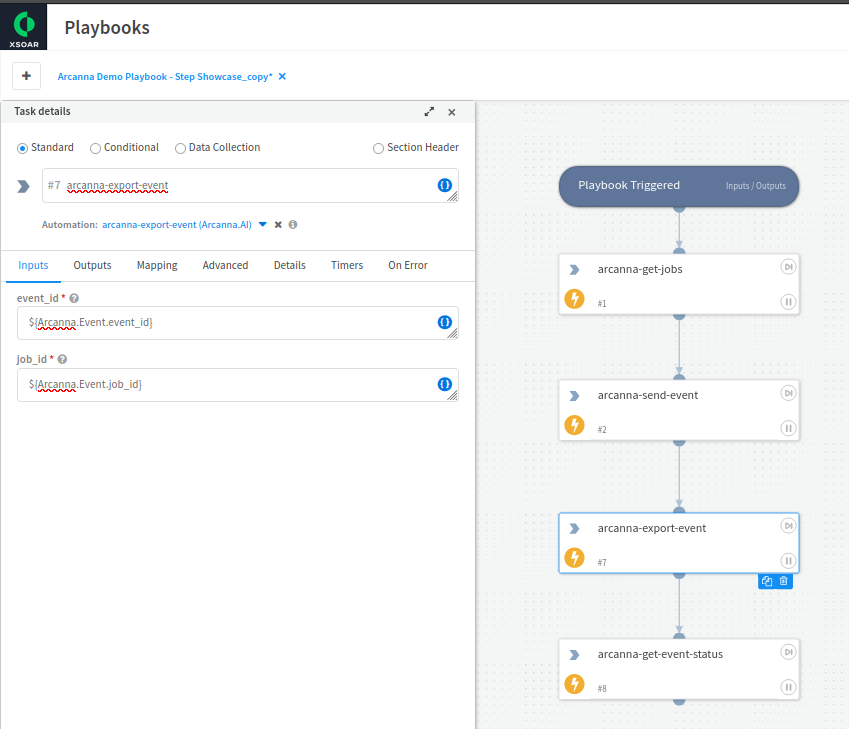
- When running the playbook, the response should look like this:
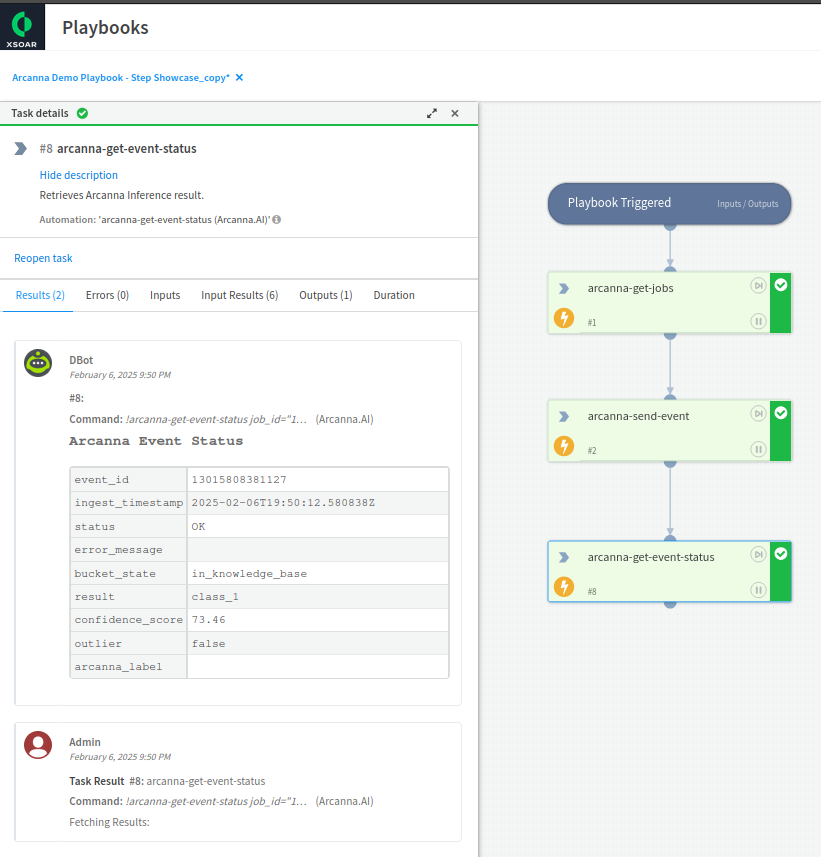
Get Event status - Used to obtain Arcanna's prediction for a given alert
- Add a new task and choose arcanna-export-event automation.
- Configure
job_idor get it from the previous taskjob_id=${Arcanna.Event.job_id}. - Configure
event_idor get it from the previous taskevent_id=$${Arcanna.Event.event_id}.
- When running the playbook, the response should look like this:

- Observe the Arcanna result is
no_decisionsince no AI model is trained yet.
Send Analyst Feedback to Arcanna - Used to incorporate analyst knowledge into Arcanna
- Before this step: Go to Arcanna and select Decision Points
- Add a new task and choose arcanna-export-event automation.
- Configure
job_idor get it from the previous taskjob_id=${Arcanna.Event.job_id}. - Configure the
labelselection as one from the decision set${Arcanna.Event.decision_set}. Here, we manually select it to be 'Drop'. - Configure
event_idor get it from the previous taskevent_id=$${Arcanna.Event.event_id}. Here, we manually select it to our incident ID. - Configure
usernameto be displayed in Arcanna as the user who applied the feedback.
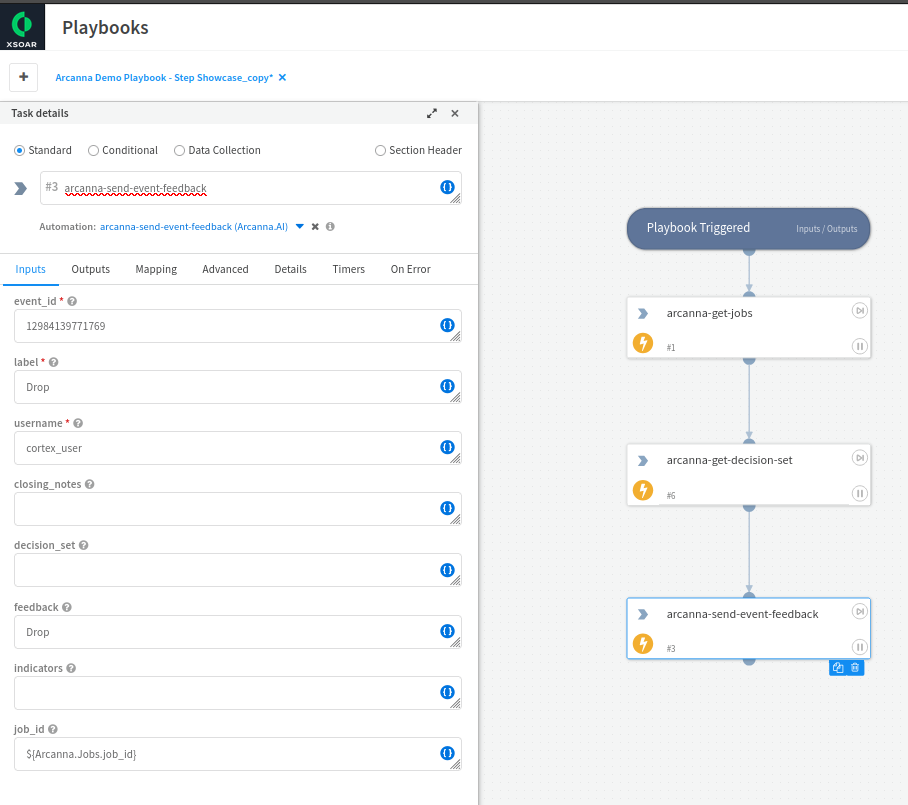
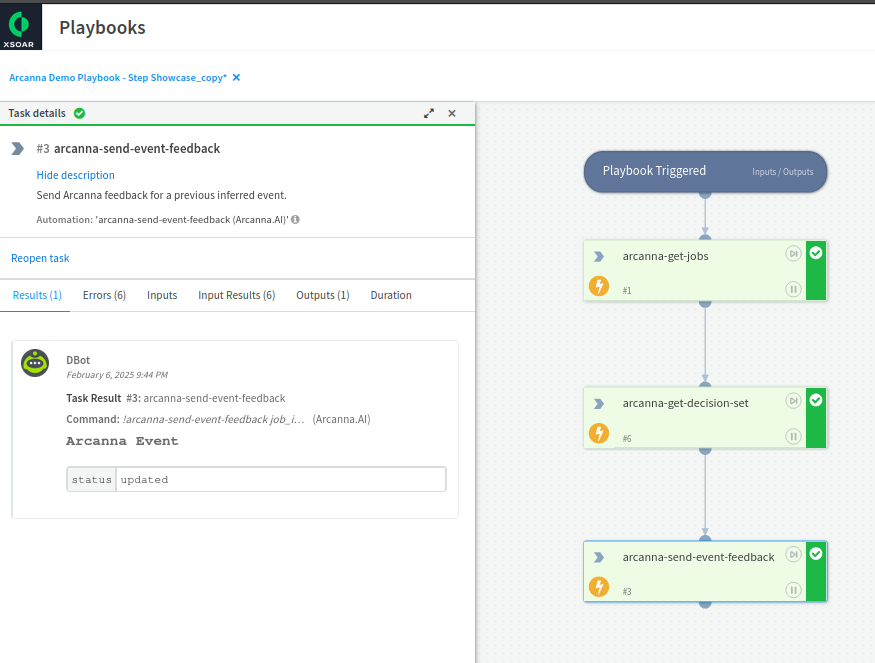
- When running the playbook, the response should look like this:
- Repeat this step to generate enough labeled data to trigger a retrain session.
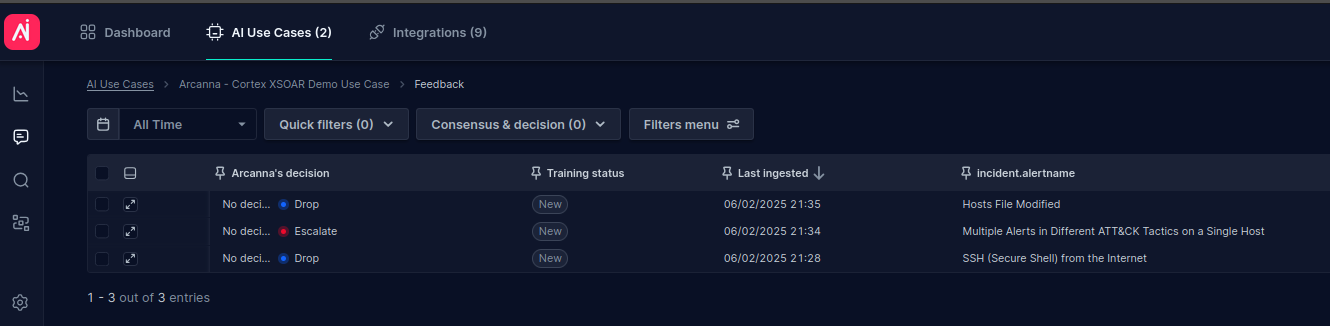
- Now we can navigate to the job's Feedback Page in Arcanna and verify that the feedback has been applied:
Trigger AI Model training
- Add a new task and choose arcanna-trigger-train automation.
- Configure
job_idor get it from the previous taskjob_id=${Arcanna.Jobs.job_id}. - Configure
usernameto be displayed in Arcanna as the user who triggered the training session.
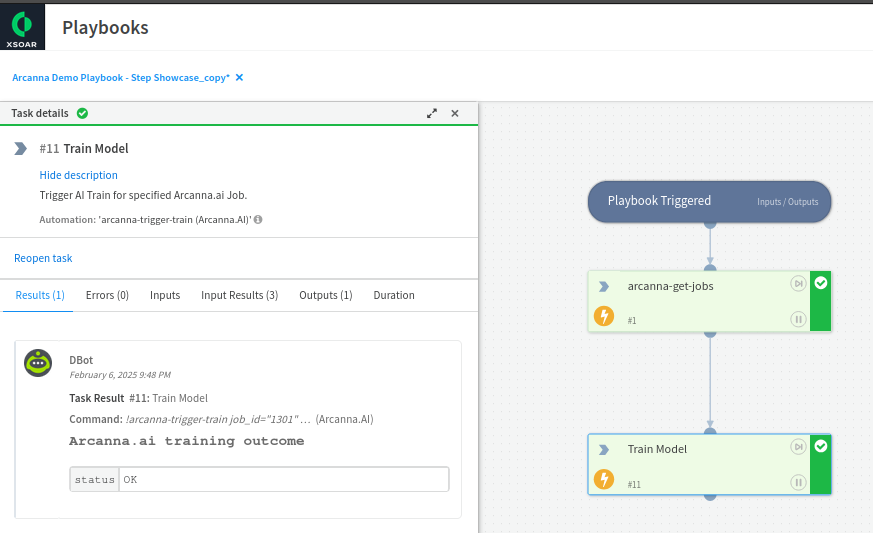
- If everything goes well, the output message should include 'status': 'ok'.
Repeat the step Send Event to Arcanna and Get Event status. Observe the response indicates that the prediction for the above unseen alert is 'Drop' (class_1):