QRadar
IBM QRadar is a security information and event management (SIEM) solution that collects, analyzes, and correlates security data in real time to detect threats and streamline incident response.
Events in QRadar are raw security logs collected from devices, applications, or networks. They contain information about activities like logins, file access, or firewall actions.
Offenses are alerts generated by QRadar when correlated events indicate potential security threats or policy violations, based on predefined rules.
Steps to configure QRadar integration
Prerequisites
-
Arcanna.ai - Arcanna.ai can be deployed in the cloud (AWS), or on-premise. For setup, you can follow this user guide. For flexibility reasons, Arcanna.ai is exporting the AI processed alerts to an internal Elasticsearch/Opensearch data warehouse, that needs be installed at the same time with Arcanna.ai. You can use an Elasticsearch/Opensearch instance you already have, or a new one dedicated just for Arcanna.ai backend.
-
A QRadar instance and sufficient rights for creating authorized service tokens.
How to connect
Follow these steps to create an authorized service token. Arcanna.ai will use this token in order to pull offenses from QRadar.
Create the QRadar integration in Arcanna.ai:
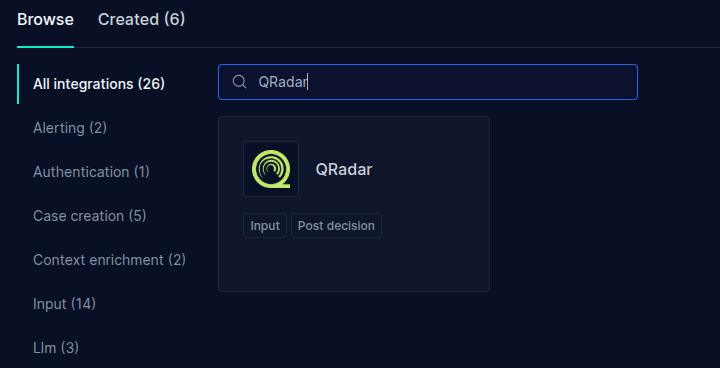
- Go to the Integrations tab
- Search for QRadar integration and click on it
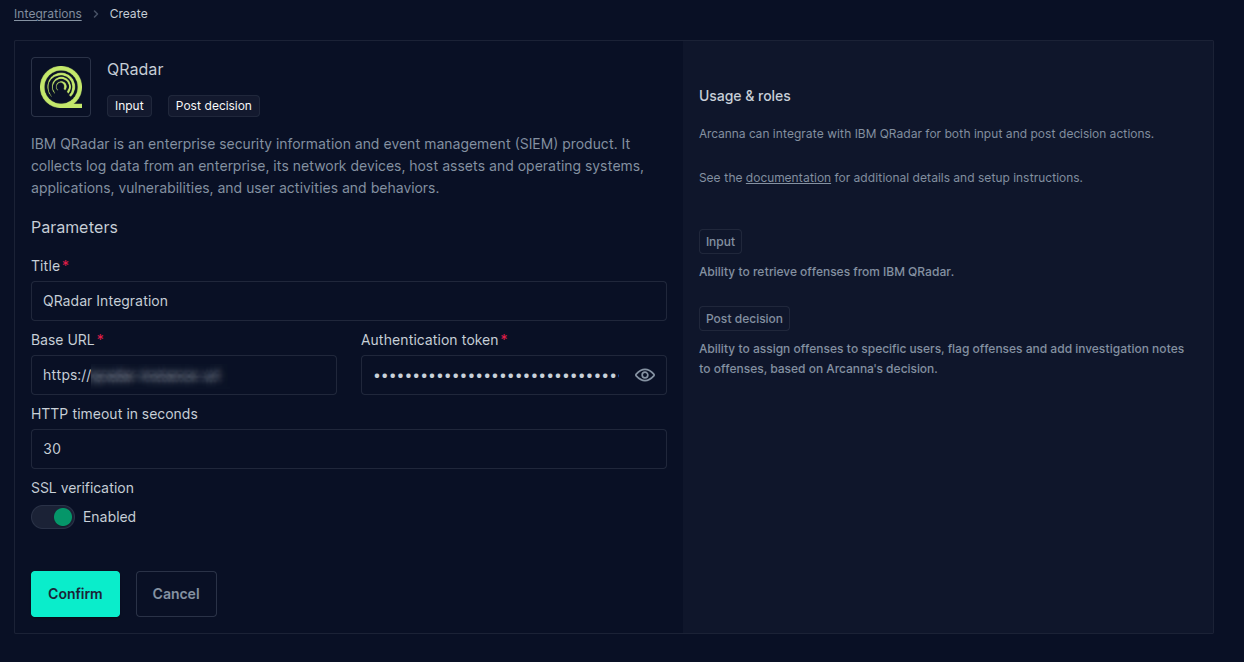
- Fill the integration parameters and provide the generated authentication token
Configure QRadar as an input integration:
- Go to AI Pipelines tab and click Create Pipeline
- Specify the Job title
- For the Input, click on Add+ then search for the QRadar integration created earlier

- Select the integration and configure the search parameters:
- Start date: will only pull offenses generated beyond this date
- Offense query: filter offenses based on the specified query. For more information on the Ariel Query Language, see the official QRadar documentation
- Enrich offenses with events: Specify if event information should be attached to the offenses
- Event fields: which fields should be included in the event data. For a list of default fields, see the documentation. Use '*' to retrieve all the fields. Please note that custom event fields are not included when using the '*' syntax. Custom fields must be explicitly specified.
- Max number of events: Limit the total number of events per offense. Since an offense could potentially have thousands of events, it's good practice to limit the number of retrieved events. Retreieving a large number of events has the potential of slowing down the processing pipeline, since retrieving a large number of events can take a long time
- Events timeframe (sec): Events will be retrieved in a time window defined by the Offense update time (the time when the offense was last updated, like when new events are added to the offense), and the specified timeframe
- Keep raw events: By default, event fields' values are nested as a list and the values are deduplicated. Enable this option to also keep each events as a raw object.
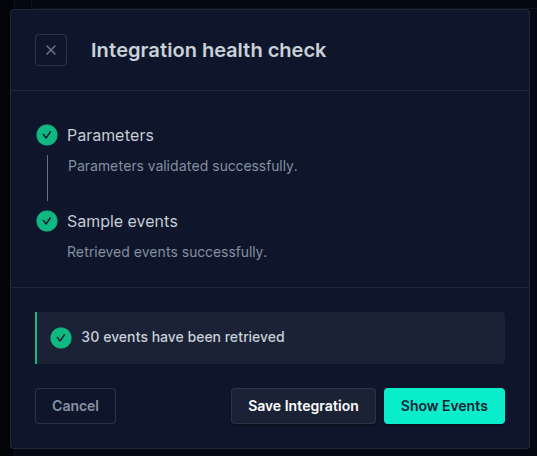
After filling the parameters, click Confirm. The integration will do a healthcheck to ensure that the provided parameters are correct. After the healthcheck passes, you can click on Show Events to view some samples of the input data.\
Click on Save Integration to finish adding the Input integration to the job.
Configure QRadar as a post-decision integration
Arcanna.ai can automatically execute actions in QRadar when it gives a decision to an offense, like flagging the offense, adding notes, or closing the offense.
Since an open offense can get additional context through the events that are attached to it, Arcanna.ai may change the decision based on the additional information. When configuring the post decision integration, you can specify what actions Arcanna.ai should take, and you can also define the behavior when the decision changes.
Suppose you want to automatically flag offenses which Arcanna.ai marked as Escalate. You will configure the New events -> Escalate transition in order to add the flag to the offense. If additional context is added to the Offense, Arcanna.ai may mark the offense as Drop. In this case, you may define the Escalate -> Drop transition, which will be configured to take the appropriate action (for example, remove the flag from the offense and add a note).
To configure the QRadar Post Decision integration, click on Advanced Settings and select the Post decision category. Click on Add+ and select the QRadar integration that was created earlier.
For each transition, configure one or more actions that Arcanna.ai should take in QRadar whenever an offense gets a decision:
- Assign offense to user: The offense will be assigned to the QRadar user specified here
- Flag action: Add or remove the flag from the offense
- Add notes to offenses: Create a note template that will be added to the offense. Offense field values can be added to the note by using the
{{<qradar_offense_field>}}syntax. See Jinja template examples for more information. - Close offense: Enable this flag to automatically close the offense
- Closing reason ID: Specify which closing reason should be use when closing the offense. To create custom closing reasons, see here. To view a list of existing closing reasons and their ID's, see here.
- Add note to offense before closng it: Enable this to add a custom note when the offense is closed
- Custom closing note template: Create the note template that will be added to the offense. Supports Jinja templates.

You can define any number of transitions. If a transition occurs that isn't defined, Arcanna.ai will not take any actions.
After defining the transitions, click on Confirm. The integration will be added to the Job. Click Save to apply the changes.